Which is the best 4K Dash Cam for you? Viofo A139 Pro vs Thinkware U1000 vs Viofo A129 Pro. We’re gonna compare these 3 units as well as have comparison video of driving through a tunnel, driving at night, and driving through the day. Also how well all of these units do at picking up license plates.
Dash Cam Resolution
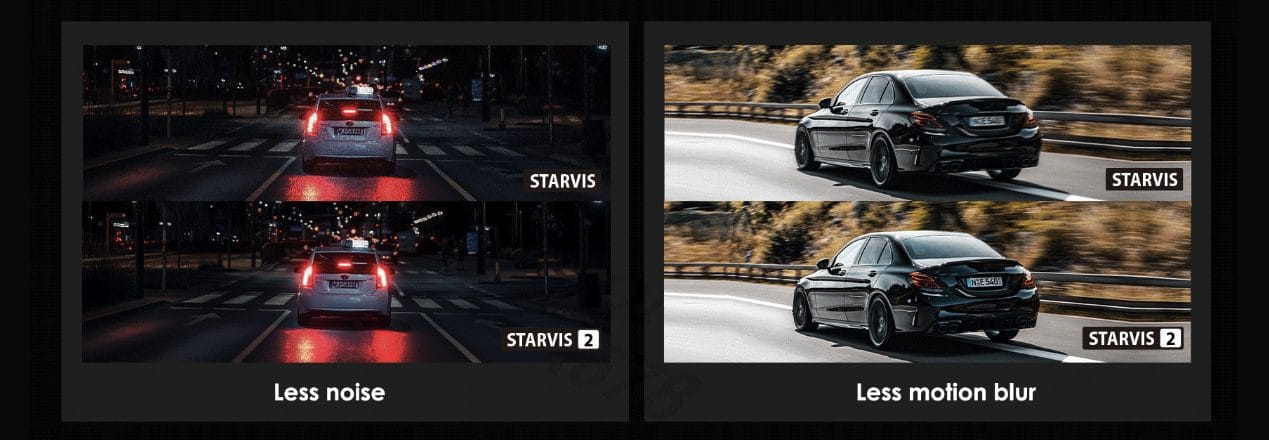
Viofo A139 Pro has a front Sony STARVIS 2 4K image sensor and a rear Sony STARVIS 1080p image sensor
Thinkware U1000 uses a front 4K Sony STARVIS image sensor and a rear 1440P Sony STARVIS image sensor
Viofo A129 Pro uses a front 4K Sony EXMOR image sensor and a rear 1080p Sony STARVIS image sensor
Therefore, you can also change all 3 of these units front camera from 4K resolution 30 frames per second to 2K 1440p resolution at 60 frames per second. As a result, means it will take up to 60 pictures per second.
Viewing Angle
Viofo A139 Pro has a front 140 degree wide viewing angle and a rear 170 degree viewing angle
Thinkware U1000 has 150 degree wide viewing angle and rear 156 degree wide viewing angle
Viofo A129 Pro has a 130 degree front viewing angle and rear 140 degree viewing angle making it have the least coverage
High Dynamic Range
The VIofo A129 and Thinkware U1000 do not have high dynamic range. However, they do have WDR(Wide Dynamic Range). Wide Dynamic Range processes images to ensure clear recordings in bright and dark light. This allows the dash camera to combine multiple images at different levels of brightness to create one superior image.
The Viofo A139 Pro has High Dynamic Range (HDR). Furthermore, this is the second 4K camera that I have seen on the market that actually has high dynamic range in a 4K resolution. The HDR enables the camera to deliver video with near perfect exposure in varying lighting situations. It can enhance video quality especially when it comes to the issue of front license plate being overexposed at night. Making this units one of the best 4K dash cam available.
Wi-Fi capability
So, all three of these cameras support 2GHz and 5GHz Wi-Fi. If you change these dash cameras to 5GHz Wi-Fi it will actually download videos 3-4 times faster than 2GHz. All of these units also support android and IOS apps. So that you can pair your phone and download videos directly to your phone.
SD Card Capacity
The Viofo A129 Pro and Viofo A139 Pro support up to a 256GB micro SD card
The Thinkware U1000 supports up to a 128GB micro SD card
If you are looking to upgrade your micro SD card I do recommend checking out our YouTube video or reading our Blog.
GPS Antenna
So, for all three units the GPS antenna is built directly into the unit. For VIOFO it will actually supply you speed and location data of where the video was recorded. Thinkware you will get the capability of red light and speed camera notifications as well as speed and GPS location. You can also choose to turn off the GPS speed, for Thinkware and VIOFO in case you have a heavy foot.
Parking Mode
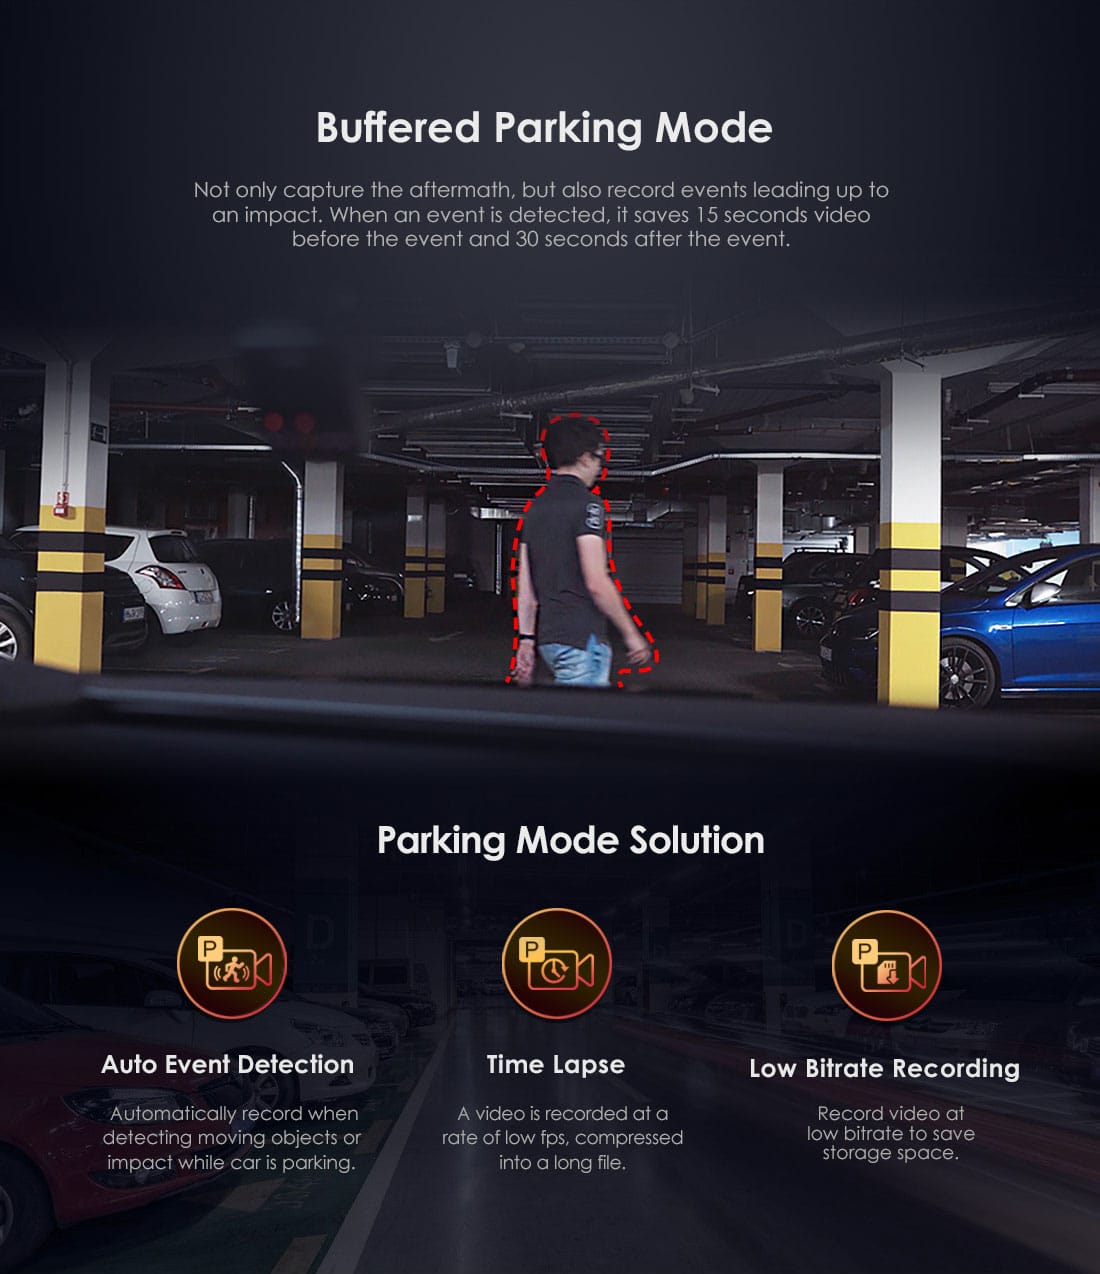
Both the Viofo A139 Pro and the Viofo A129 Pro have three parking mode option. Above all, we see no difference in parking mode options between the 2 units.
They both offer Auto Event Detection, which automatically records when detecting motion or impact. Time Lapse mode means the video is recording at a low frame per second. Particularly, it will record in 1,2,3,5, or 10 frames per second. Lastly, it offers low bitrate recording which will lower the resolution to save space on SD card.
The Thinkware U1000 has four available parking modes. They have
Motion Detection, which means anytime somebody walks by, or drives by it will actually wake up and record.
Time Lapse, which means it will record at 2 frames per second
Energy Saving Mode, this draws really low current and will last for a very long time in parking mode. So how this works is if you get hit while parked 1 second after impact, it will wake up and start recording and save it into a separate video file.
Energy Saving Mode with Radar Module, the radar module is an extra part. What it does is it detects movement coming towards the vehicle, and as it detects the movement coming towards the vehicle, it will wake up and start recording. If there is no impact to the vehicle it will actually delete the recording and go right back to sleep.
Parking Mode Cable and Low Battery Protection
The VIOFO parking mode cable is 2 different part numbers. Furthermore, the HK3 is needed for the Viofo A129 Pro and the HK3-C is needed for the Viofo A139 Pro. Nevertheless, there is not much difference in terms of connections as you still need to hook up power, ground and ignition. Secondly, there is also a selector switch for low battery protection which is 11.8 volts, 12 volts, 12.2 volts, or 12.4 volts. This protects your battery from dying as a result of dash cam.
Thinkware you need to also hook up constant power, ground, and ignition. However, you can select low battery protection digitally through the Wi-Fi app.
Loop Recording
Viofo has flexible options of 1,2,3,5, or 10 minute video recordings. While the Thinkware has options of 1 minute video recordings. With Thinkware if there is any impacts while driving or parked it will do a separate 20 second video.
LCD Screen
Out of all three of these units the only one who has an LCD screen is the Viofo A129 Pro. The LCD screen allows you to easily go through the menus of dash camera and change settings. So if your not tech savvy and don’t like smart phones then this is a good choice for you.
Cable Sizes
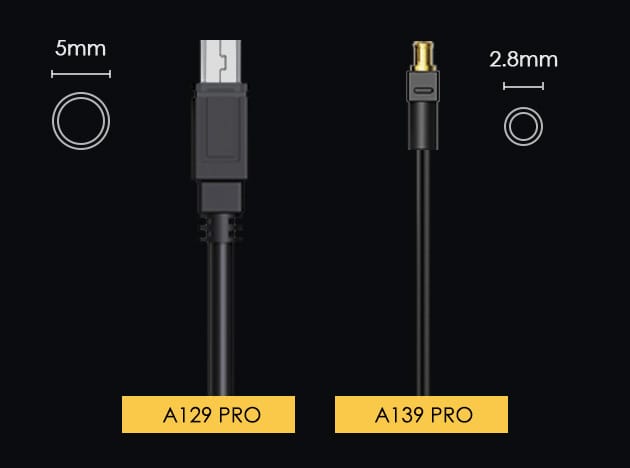
The A139 Pro has the smallest cable to go from the front to the back of the vehicle. So, if you are looking to run a wire from the front of your vehicle to the back the A139 Pro is half the size of other cables at just 2.8mm.
Pro’s and Con’s
Viofo A139 Pro
Pro’s
High Dynamic Range
Supports up to a 256 GB micro SD card
Night Vision
New Sony STARVIS 2 image sensor
Best Dash Cam I have tested for picking up license plates
Small rear camera cable
Con’s
1080p rear camera
File Organization could be better
Some phones you may need to turn off cellular data to pair via Wi-Fi app
Thinkware U1000
Pro’s
2K rear camera
Energy Saving Mode
Red light and speed camera notifications
Con’s
No High Dynamic Range
Max 128GB micro SD card
Talks too much
Viofo A129 Pro
Pro’s
LCD screen
Supports up to 256 GB micro SD card
Smallest size of all 3 dash cams
Con’s
No High Dynamic Range
1080p rear camera
Front camera not Sony STARVIS
File organization could be better
Some phones you may need to turn off cellular data to pair via Wi-Fi app
Best 4K Dash Cam
In short, all 3 of these dash cams round off some of the best 4k dash cam available on the market. However, if I was picking a unit strictly on video quality the Viofo A139 Pro is by far the best I have tested.
In this blog we are going to compare the Viofo A129 Pro 4K versus the Viofo A229 Duo Dash cam. Which one is better and why would you buy one over the other? We are going to compare these 2 units.
Dash Cam Resolution
The Viofo A129 Pro 4K comes with an 8 megapixel Sony EXMOR front 4K dash cam, and a rear 1080p Sony STARVIS image sensor. Viofo A229 comes with a front 2560 x 1440p 5 megapixel Sony STARVIS image sensor front and back.
So what is the main difference between 4K and 2K resolution. Take a look below.
Viewing Angle
The Viofo A129 comes out with a front viewing angle of 130 degrees and a rear viewing angle of 140 degrees. Now when you look at the Viofo A229 you’re getting a lot more coverage with 140 degree front viewing angle and 160 degree rear viewing angle. That is an additional 30 degrees of viewing angle total between front and rear.
viofo a129 viewing angle
viofo a229 viewing angle
Wi-Fi Settings
For both Viofo units they offer 2.4 GHZ Wi-Fi and 5 GHZ Wi-Fi. Now why would you want this option? Therefore, I do recommend changing to 5GHZ so when you are downloading videos it will download videos 3-4 times faster than 2.4 GHZ.
Micro SD Card Capacity
Both Viofo units will support up to a 256 GB micro SD Card. I do recommend that when getting an SD card that you look at something with a very high write speed or a high endurance SD card. This blog may help.
GPS Antenna
Equally, both dash camera units have a GPS antenna built in to their mount. Overall, it will give you speed, time, and location data embedded into the video. Ideally, you can also turn that off in case you have a heavy foot.
Parking Mode
As we continue to compare the Viofo A129 vs Viofo A229 Dash Cam. We are going to look at the various parking mode options. Above all, we see no difference in parking mode options between the 2 units.
They both offer Auto Event Detection, which automatically records when detecting motion or impact. Time Lapse mode means the video is recording at a low frame per second. Particularly, it will record in 1,2,3,5, or 10 frames per second. Lastly, it offers low bitrate recording which will lower the resolution to save space on SD card.
Parking Mode Cable
The VIOFO parking mode cable is 2 different part numbers. Furthermore, the HK3 is needed for the Viofo A129 Pro and the HK4 is needed for the Viofo A229. Nevertheless, there is not much difference in terms of connections as you still need to hook up power, ground and ignition. Secondly, there is also a selector switch for low battery protection which is 11.8 volts, 12 volts, 12.2 volts, or 12.4 volts. This protects your battery from dying as a result of dash cam.
Rear Camera Cabling
So, all of these cameras when getting a front and rear combo includes a cable that connects the rear camera to the front camera. There is quite the difference between the Viofo A129 Pro and the Viofo A229. Please refer to image down below. For instance, on some vehicles it will be a lot easier to hide the cable and tuck it away by using the A229 Dash Cam.
Video Length Recording
Viofo has flexible options of 1,2,3,5, or 10 minute loop recording. So, depending on what you want to record maybe you want to record a journey across Canada, or maybe your a video vlogger. A lot of other dash cameras on the market will limit you to a 1 minute video recording.
File List Organization
Viofo uses all files, locked files and parking files. Firstly, all files will have every single video recorded, Secondly, locked files is going to have your emergency recordings or any impacts while driving. Lastly, parking files will have your files it records while parked.
LCD Screen
The Viofo A129 has a 2′ LCD screen while the Viofo A229 utilizes a new 2.4″ LCD screen.
Viofo A129 vs Viofo A229 Dash Cam
In short, either one of these units is a great investment. However, I personally love the Viofo A229 due to its bigger screen, smaller cord to run from front to rear, wider viewing angle and Sony STARVIS lens on front and rear camera. Make a decision and let us know your thoughts.
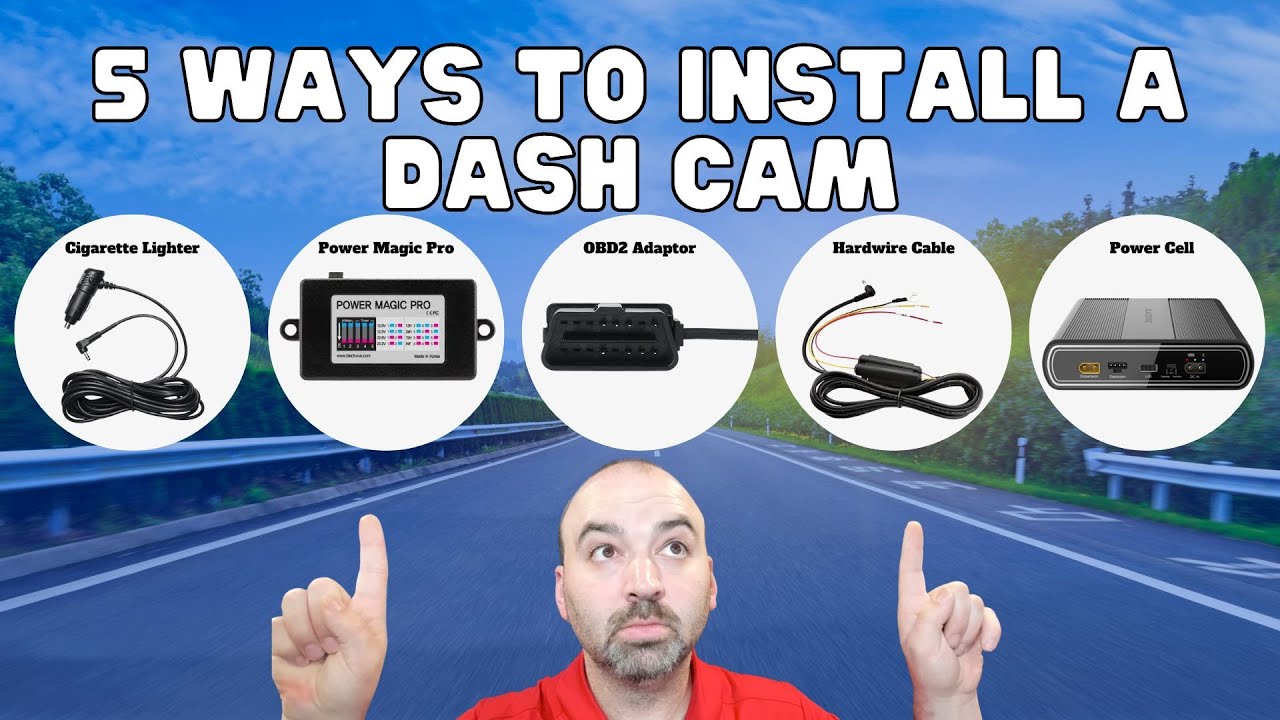
We are going to talk about the 5 different ways to install a dash cam. Breaking down the differences between using a cigarette lighter plugin, parking mode cable, OBD2 adaptor and a battery pack.
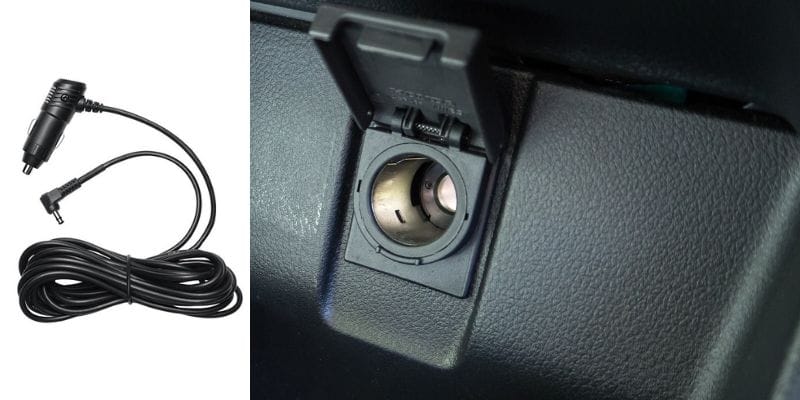
Cigarette Lighter Cable
If you get a dash camera that comes with a cigarette lighter cable. Above all, keep in mind that this has no low battery protection. All you simply do is plug it into the cigarette lighter plugin and power up the dash cam. Make sure to verify if your cigarette lighter cable is working off ignition or constant power. If it is a constant power plugin there is a very good chance your vehicles car battery will die overnight.
Universal Parking Mode Cable
Now for customers who get a cigarette lighter cable dash camera but they don’t have any parking mode capability. Or maybe they do not have the parking mode cable. We do have a universal parking mode cable which is actually from Blackvue called the power magic pro. What happens with this system is the cigarette lighter will plug into it. Then there is dip switches that allows us to set time and low battery protection voltage. Above all, this is just a universal way to make every dash camera have parking mode.
Some of the downfalls of using this cable is it will not work like a true parking mode. Therefore, It will not allow you to use parking mode specific features like time lapse, motion detection, or impact only. However, when you are using this mode it will just record like normal.
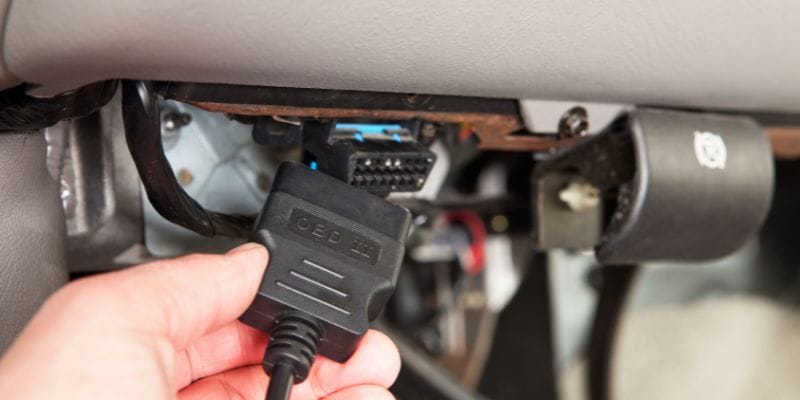
So, what the OBD2 cable is, is basically a plug that plugs directly into your vehicle underneath your dash. Pretty much every vehicle has this plugin except a few Tesla vehicles. Furthermore, this is the same plug-in a mechanic would plug into, to do a diagnostic, or clear your check engine lights. Now this will plug right into that connector. What it does for you is gives you parking mode and low battery protection. Because, the dash cameras that it does work for have low battery protection already built in.
Some concerns our customers have is how will the mechanic plug-in if the dash cam is plugged in? Well all they do is simply unplug it and the mechanic can plug their diagnostic tool right in. This is one of the 5 ways to install a dash cam.
Hardwire Cable
This is the most common way to get a dash cam installed where it will record while parked. So, typically what happens with the systems we carry is your going to be using systems that have a red, yellow, and black wire. These require hooking them up to constant power, ignition power and ground. Main reason why you would do this, is so you can utilize the low battery protection built into the dash camera. Above all, so you can have the parking mode capabilities working.
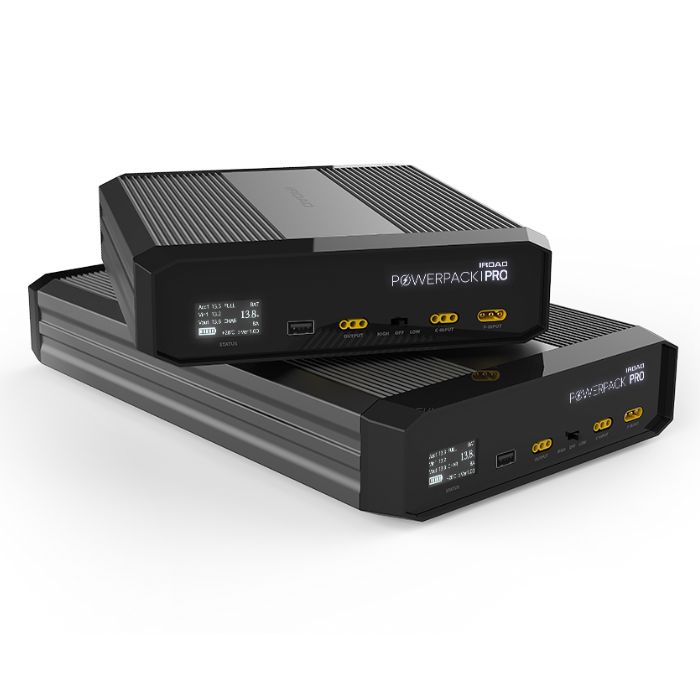
So, a battery pack is basically a backup battery that actually gets installed. Typically under the seat, or somewhere else in the vehicle. It is hooked up to power, ground and ignition while some battery packs only get hooked up to ignition and ground. Therefore, what happens is as you are driving around your vehicle it charges up the battery pack. Most battery packs last from 16-24 hours of parking mode. When you turn your ignition off, what happens is the powercell switches into parking mode. The parking mode will last until the battery packl runs out of battery power. Lastly, this will keep it completely isolated from your car battery in your vehicle. Which in turn means you will never have your battery die as a result of the dash cam.
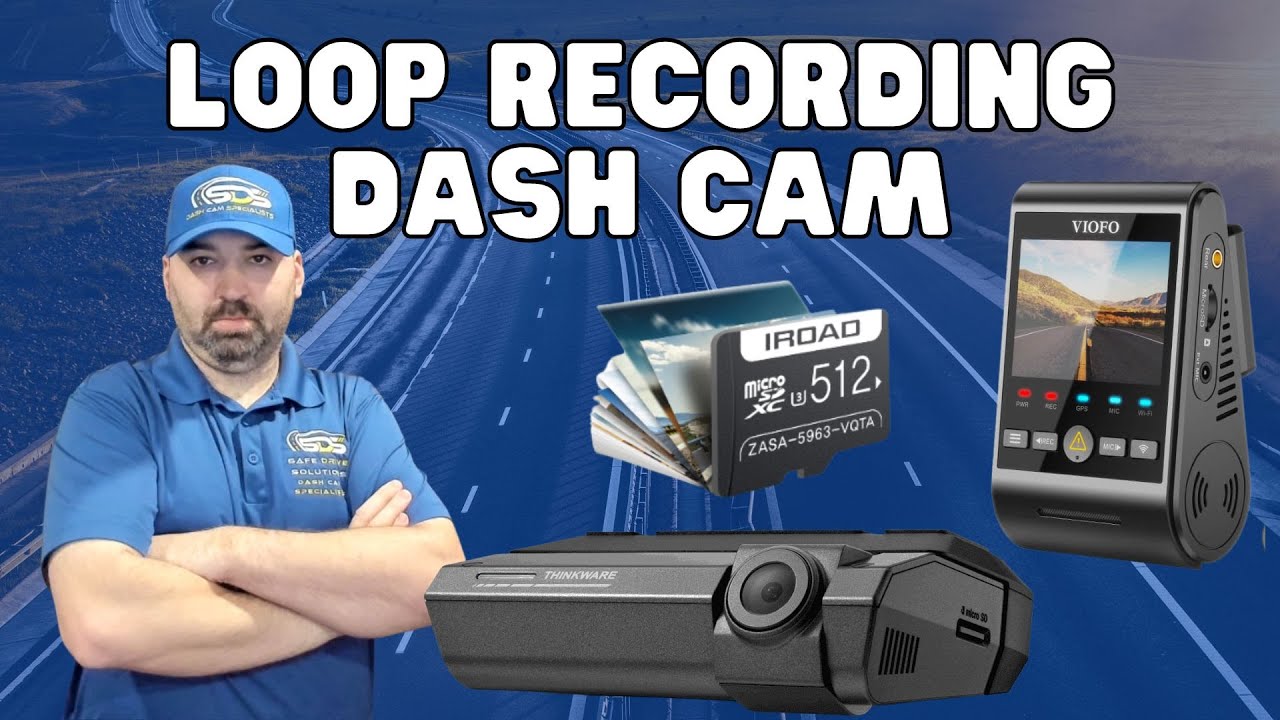
A continuous loop recording dash cam records video by overwriting older video with new footage. This allows the camera to keep recording even if the installed SD memory card is full. Helping to ensure that the device never misses a minute of your drive.
So, what are your options when it comes to a loop recording dashcam? For the longest time I thought the only option was 1 minute recording. It will record multiple 1 minute recording files until the SD card is filled. Lets explore what these dash cams offer.
In terms of loop recording feature, there are lots of dash cameras on the market. You can buy systems for cheap on the internet. We have seen that a lot of the units do not have this feature. We have installed some expensive units bought online where you need to manually format the unit every time the SD card fills up.
Now keep in mind that if you are somebody who does not want to overwrite the videos on your dash cam. Maybe you want the loop recording to be turned off. You can do that on the majority of these dash cameras. Typically, most systems you simply go into the settings menu and turn off the overwrite feature of the dash cam.
Conclusion
All the systems we support here at Safe Drive Solutions all support the loop recording feature. We strongly recommend getting a dashcam with this feature to all our clients.
Car accidents happen all the time. Some people will say they will never get into an accident. So let’s think of how we can prepare for the unexpected.
Do not move your vehicle unless it is blocking traffic
Put on your hazard lights to warn other drivers. Safety should be your #1 priority.
Assist anyone who is injured
Call an Ambulance/Police as soon as possible. Avoid moving an injured person as you might aggravate their injuries. Seek medical attention for your own injuries. Some injuries, such as whiplash, may not appear for hours or even days after the accident.
Exchange names, addresses and insurance particulars
With all drivers involved make sure to get the names and addresses of as many witnesses as possible. Obtain the names and addresses of any passengers. Record the license plate numbers of all vehicles involved.
Retrieve Dash Cam Footage
Log into your dash cam and download your footage to you phone or remove the SD card to view on your computer when you get home or work. (Do not give the police your dash cam footage) I would recommend sending them a copy of the footage so you have the original at a later date. If they lose the SD card or your footage you cannot prove your innocence. Some dash cam footage also cannot be viewed by just plugging the SD card into a computer. You may need special desktop software to view it which I would recommend talking to your dash cam provider or manufacturer. For our clients Safe Drive Solutions we have a support page with all downloads for easy accessibility.
Do not admit or deny any fault for the accident
You should not discuss the accident with anyone except the police, and your lawyer. Therefore, many times I thought i was at fault and was not.
Make detailed notes about the accident
Draw a sketch showing the position of each vehicle at the time of the accident. Write down any statements made by other drivers or passengers.
Report the accident to your insurance company
It is important to communicate with your insurance company sooner rather than later. One of the key steps after a car accident.
Take photographs of the damage to your vehicle
The more pictures you can take, the better. Using your phone to take pictures is usually sufficient enough. If you can clean the vehicle before taking pictures it will show more detailed damage.
Upload videos and pictures to your insurance company
Make sure to submit dash cam video footage and pictures to show your side of the story. You will be surprised how some information yet so little can prove innocence.
If you have been injured, call a Lawyer for a free consultation
You may be entitled to compensation. I know for myself I was involved in 2 car accidents that were not my fault and I was seeing a physio, chiropractor, massage therapist for a year or so after a car accident. Some of my injuries are minor but I still have small side effects 14 years later. At least once a year I still go to the chiropractor for an adjustment.
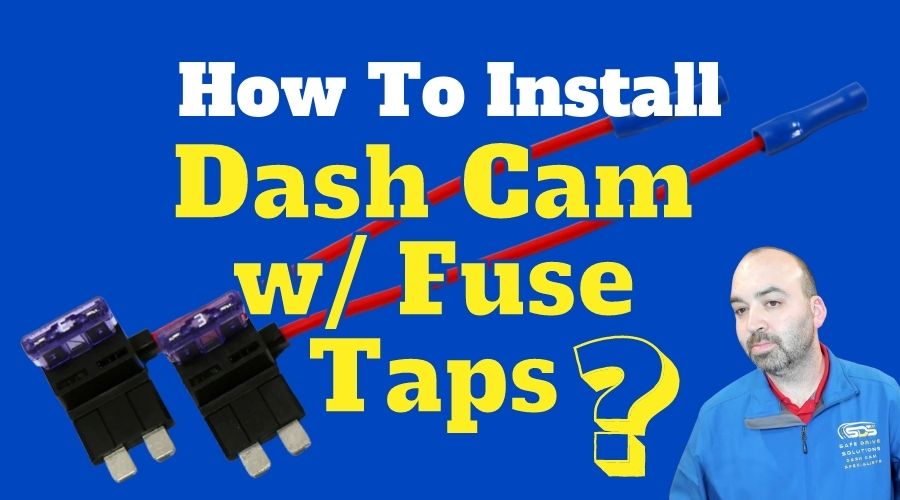
Often I get asked how do you hardwire a dash cam using fuse taps? So, first things first is you need a hardwire cable. For all of our Thinkware, IROAD, and GNET dash cameras they use a 3 wire cable.
Red wire = Ignition power
Yellow wire = Constant power
Black wire = Ground
Tools Needed
A couple of tools we recommend using so you can properly test fuses on a vehicle.
Ground test light
Multimeter
Ground Test Light + Multimeter
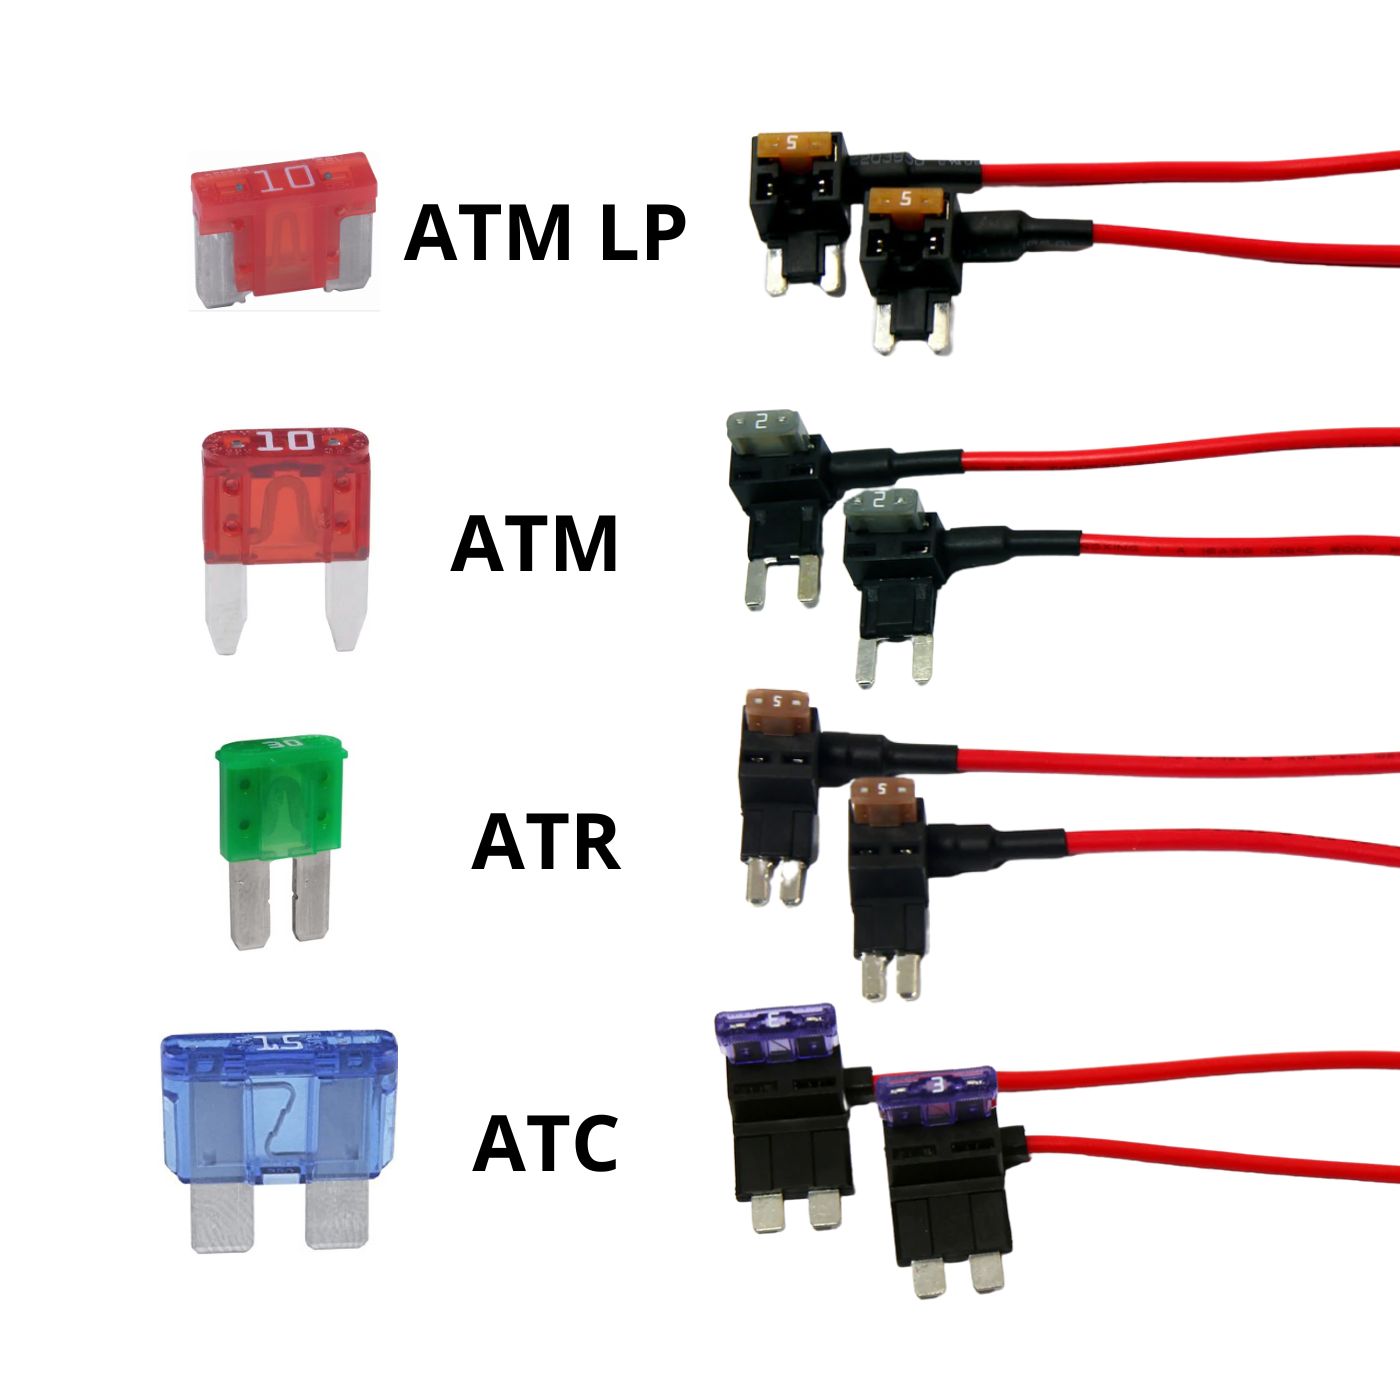
Fuse Taps
You will also need fuse taps. I recommend reading your vehicles owners manual, or looking at your fuse box to verify which style fuse you have.
We specifically use these style of fuse taps as you can put the original fuse in and a new fuse for the dash camera. All part of the process of how to hardwire a dash cam.
Locate Fusebox
Make sure to locate your fusebox on your vehicle. If you are having challenges finding it please refer to your owners manual of your vehicle.
Testing Fuses
When using a ground test light and you test the end of the fuse it will tell you whether the fuse has power or not. Ignition source will have power when ignition is switched on and lose power when ignition switched off. Constant power will have power all the time whether vehicle is on or off. However, be very careful not to be using fuse taps in safety slots. For instance, airbags, SRS, Antilock brakes, ESC Electronic stability control. Please refer to our YouTube video for more in depth detail.
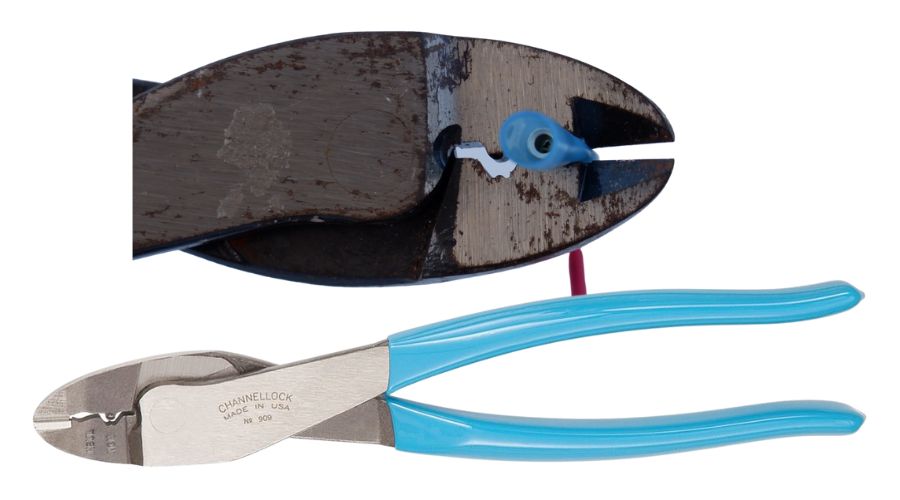
Connecting Fuse Taps to Hardwire Cable
So you can either butt connect or solder it depending on the tools you have available to you. I prefer to solder as it is a tougher connection and I will follow it up with electrical tape. But being that most people will not have a soldering iron you can butt connect just make sure when you crimp it down that it is solid. I personally in the past when I used butt connectors I would use channel locks.
Connect Fuses to Fuse Panel
So now that we have made our connections we want to make sure to place the fuse taps in the correct places. You should have an end outcome similar to picture shown for your power connections.
For your ground connections you can either use an existing bolt (please don’t use a bolt that goes through plastic) or a self tap screw.
Final Testing
Now we want to hook power up to the dash camera and test to see if it powers off and on with ignition. Make sure to start your car up and make sure you do not have any Check Engine Lights popping up. It can be very easy to plug a fuse into the wrong place or make a mistake so please be careful.
Conclusion
Well that is the coles notes of how to hardwire a dash cam using fuse taps. Hopefully it helps you out. Keep in mind we always recommend getting a professional installer.