2026 BMW iX Viofo Dash Camera and Battery Pack
I'm Ben at Safe Drive Solutions, and in this install I fitted a Viofo A329S three-channel dash camera and a dedicated battery pack into a brand-new 2026 BMW iX. Below I’ll walk you through the wiring choices, where we tapped power, how we routed and hid the cables, and key tips specific to the BMW iX platform so you can repeat the job cleanly and reliably.
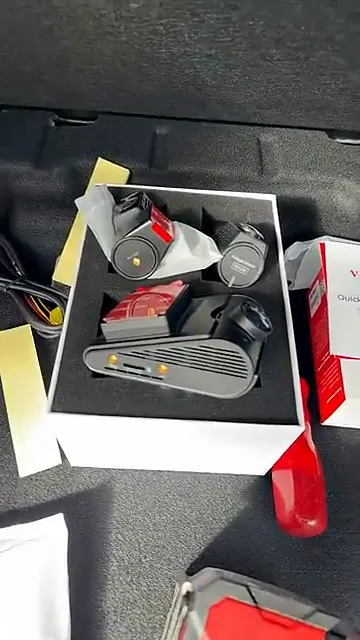
What we installed
The package for this vehicle was a Viofo A329S three-channel dash camera paired with a battery pack for parking mode and reliable parked surveillance. The A329S gives us front, rear, and interior coverage while the battery pack provides isolated power so the vehicle’s main battery isn’t drained.
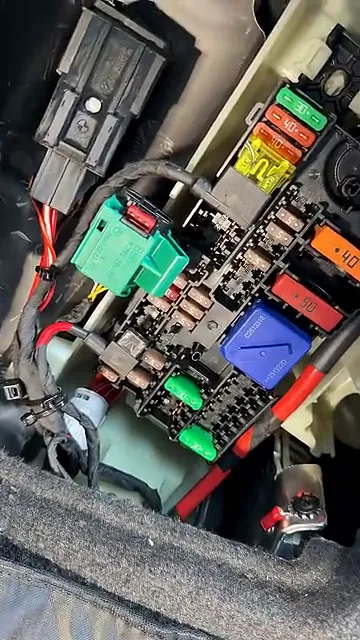
Accessing power: fuse panel choices
On the BMW iX the main fuse panel we used is in the rear portion of the vehicle. The top rows are constant-power fuses and the lower rows are ignition-switched fuses. There are multiple unused fuse slots, which makes it easy to add a dedicated circuit for the battery pack.
For this install we used an extra constant-power slot at the top and an extra ignition slot down below to interface properly with the battery pack’s wiring. That gives the battery pack the information and power it needs to manage charging and parking mode.
Important note on the iX timeout
The BMW iX will take roughly 5–10 minutes to “time out” (fully turn off accessory circuits). If you need the system to go inactive instantly after you finish wiring, pressing the lock button on the door will force the timeout quicker.
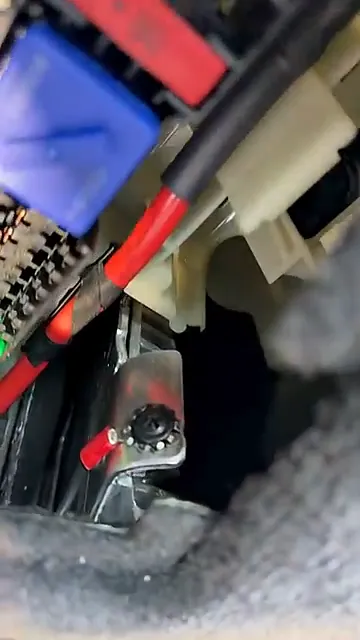
Grounding and mounting details
Behind the fuse panel there’s a metal bracket that also supports audio components like an amplifier. We used that metal bracket as a ground point. Using a self-tapping screw allowed us to create a solid, reliable ground without affecting the amplifier or other electronics.
All wiring was routed neatly and hidden: the harness comes out concealed near the panel, then runs forward along the roofline and down to the dash cam area. Wherever wires pass airbags or other safety items we tucked and secured them carefully, using tie-straps to prevent any loose runs.
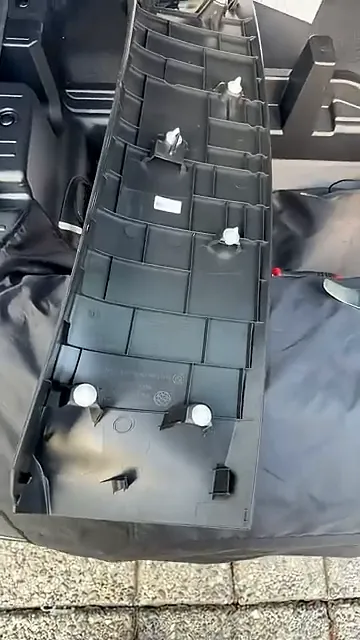
Running cables to the hatch and hiding excess
To get the wiring into the hatch area of the BMW iX you need a T20 Torx to remove two bolts. Once those bolts are removed the hatch panel clips off fairly easily, allowing you to run cables through the panel opening.
We hid extra cable length inside the back hatch area so nothing dangles or pinches on the liftgate. You’ll notice two separate cables routed to the hatch — that’s intentional: one for the rear-facing camera and one for the interior-facing camera.
"Who would have thought?"
Camera placement: front, rear, and interior
The front camera is mounted off to the passenger side of the rearview mirror and tucked high on the windshield so it stays out of the driver’s sightlines. The rear and interior cameras are mounted and routed toward the front, with the rear lens looking out the back window and the interior lens angled to illuminate the cabin when the hatch is closed.
Quick install checklist and tips
- Use unused constant and ignition fuse slots to feed the battery pack properly.
- Expect a 5–10 minute accessory timeout on the BMW iX; press the lock button to force instant timeout if needed.
- Ground to a solid OEM metal bracket — a self-tapping screw is acceptable when carefully done.
- Route wires high along the headliner and behind airbags; secure with tie-straps to prevent sagging or interference.
- Remove hatch panel bolts with a T20 Torx and use the clip-off panels to hide excess cable in the liftgate area.
- Run separate cables for rear and interior cameras so each can be positioned optimally.
Conclusion
This BMW iX install demonstrates how a three-channel Viofo A329S plus battery pack can be integrated cleanly into modern vehicles without interfering with factory systems. Careful fuse selection, a reliable ground, and thoughtful cable routing are key to a professional result. If you’re tackling a similar build, follow the checklist above and take your time removing panels and securing wires — it makes all the difference in long-term reliability.
For more installs and step-by-step guidance, check out the full walkthrough by Safe Drive Solutions - Dash Cam Specialists.

