Rear Dash Cam Wiring: A Step-by-Step Guide for hatch vehicles
Installing a dash cam can significantly enhance your driving safety and provide essential evidence in case of accidents. One of the most challenging aspects of the installation process is running the wiring, especially if you’re looking to conceal it neatly. In this guide, I’ll walk you through the steps I take to run wiring into the back hatch of a vehicle, ensuring a clean and professional look.
Understanding the Basics of Dash Cam Installation
Before diving into the specifics, it's crucial to understand why proper wiring is essential. Most drivers don’t have specialized tools for running wires through factory grommets. This can lead to messy installations that not only look unprofessional but can also affect the functionality of the camera. A clean installation can prevent future issues and ensure the dash cam operates effectively.
Tools You Will Need
Here’s a quick list of tools that will help you during the installation:
- Specialty wire fish tool
- Trim removal tool
- Screwdriver set
- Zip ties or cable ties
- Electrical tape
Step-by-Step Installation Process
Let’s break down the installation process into manageable steps. Each step is crucial for ensuring that the wiring is hidden and the dash cam is securely mounted.
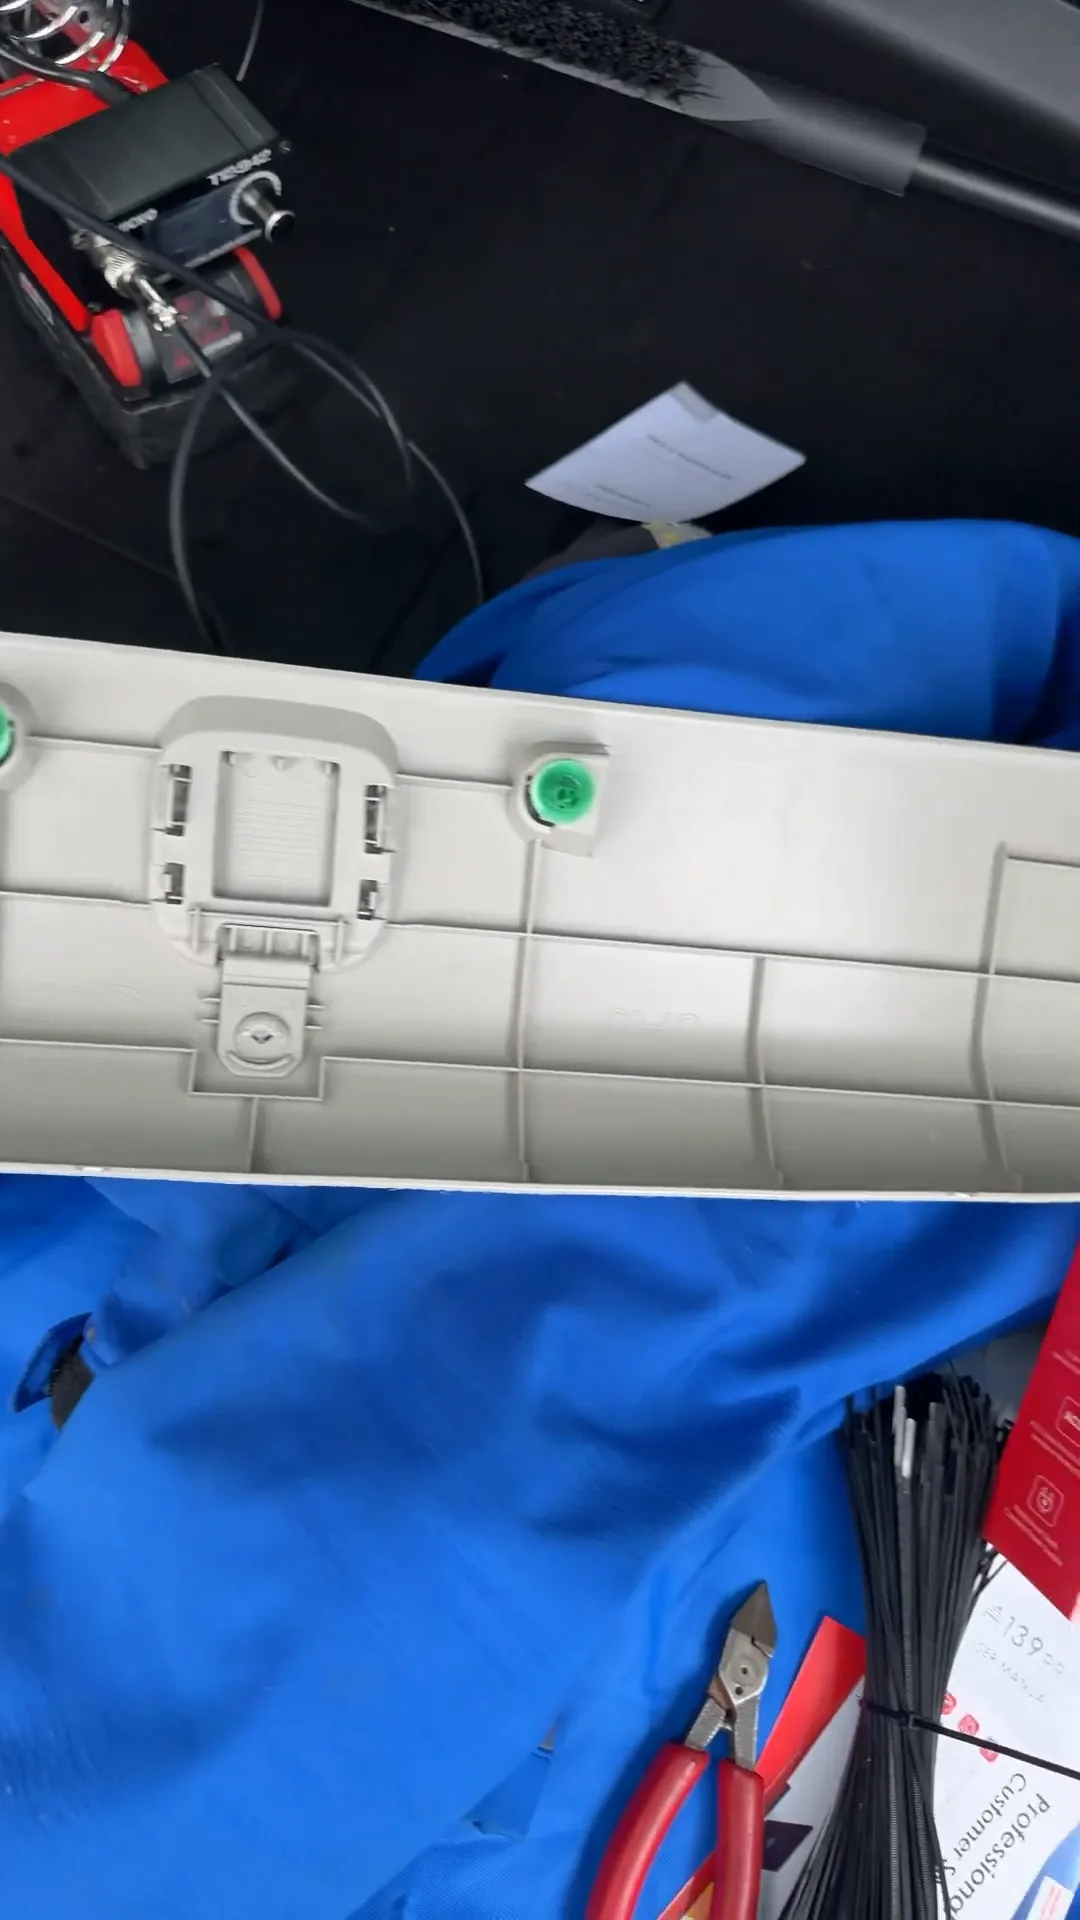
1. Remove the Necessary Panels
The first thing you need to do is remove the panels that cover the wiring in the back hatch. This usually involves:
- Taking off the top hatch panel to expose the wiring access.
- Using a trim removal tool to carefully detach the panels without breaking any clips.
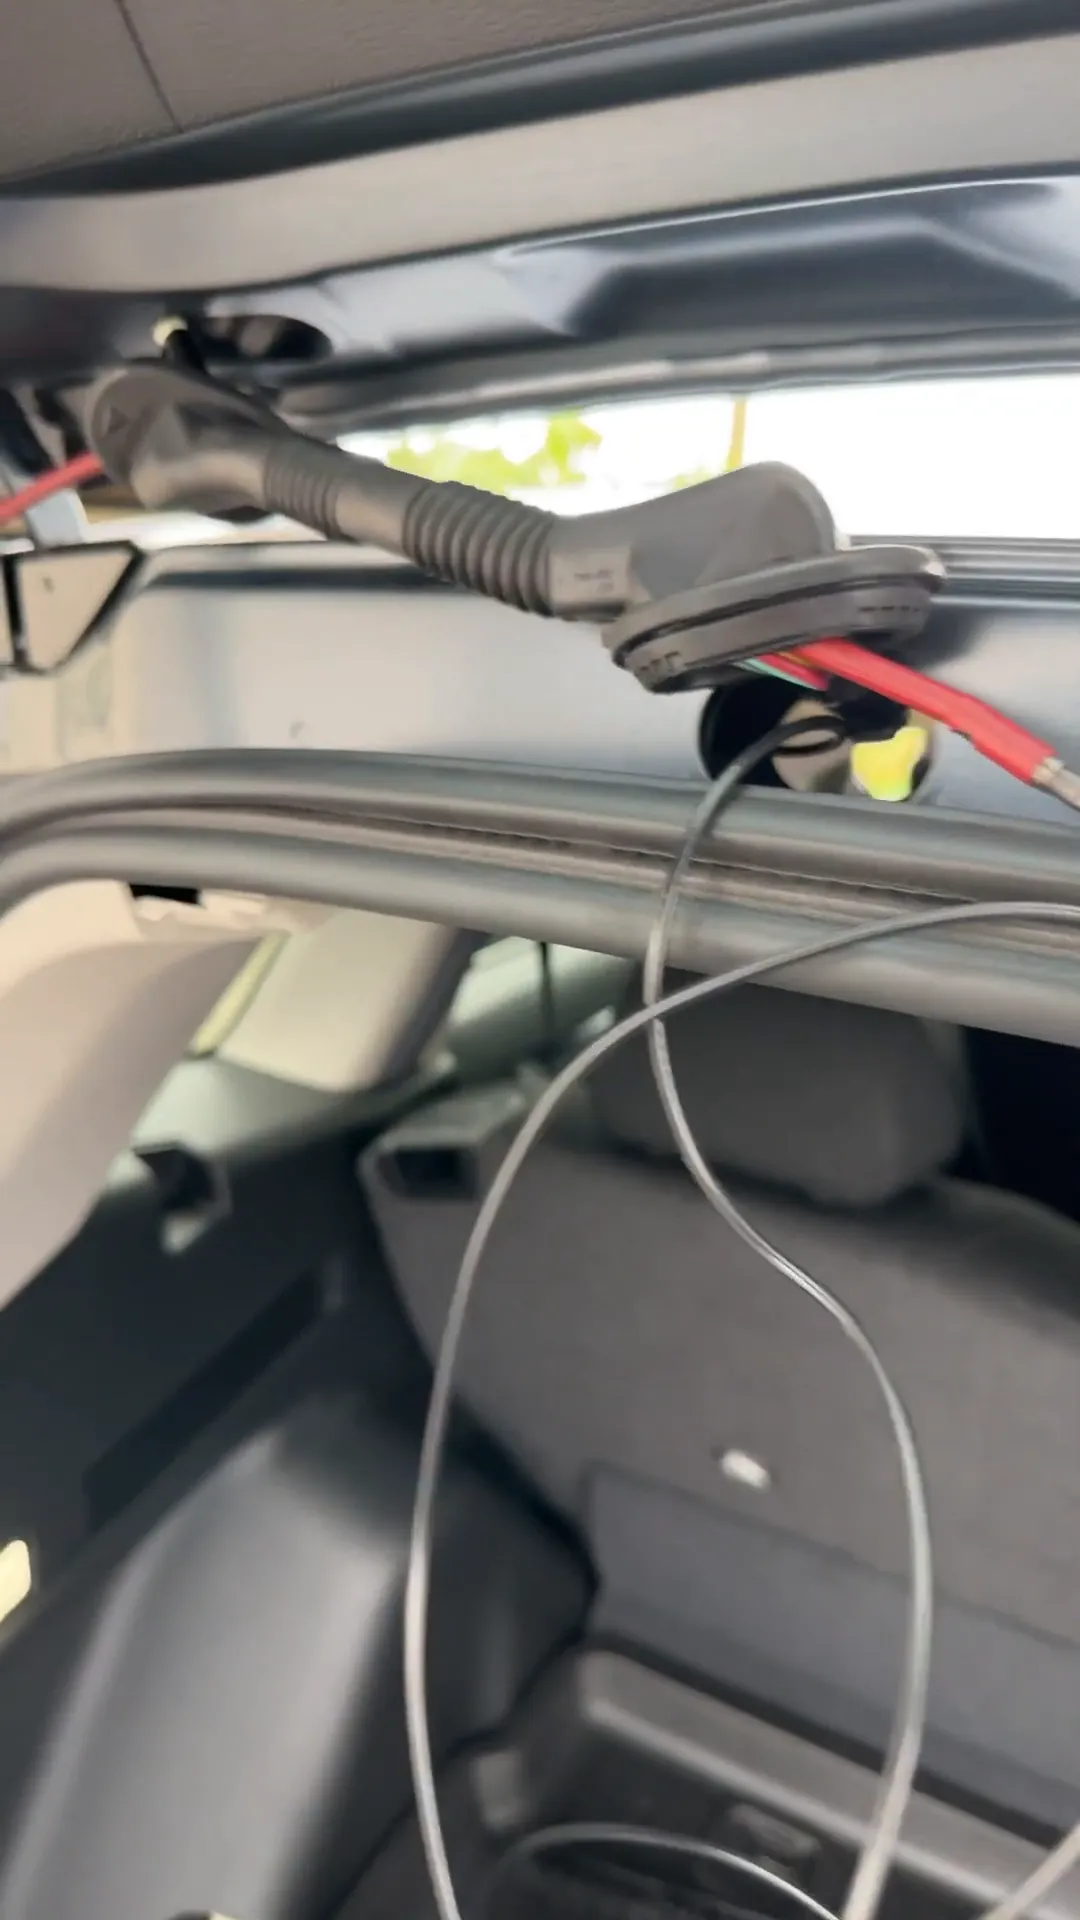
2. Running the Wiring
With the panels removed, it’s time to run the wiring. Here’s how I do it:
- Using the specialty wire fish tool, guide the wire through the factory grommets. This is a tool you won’t find at your typical hardware store, but it’s essential for this job.
- Make sure that the wire is securely fastened and not pinched when the panels are reattached.
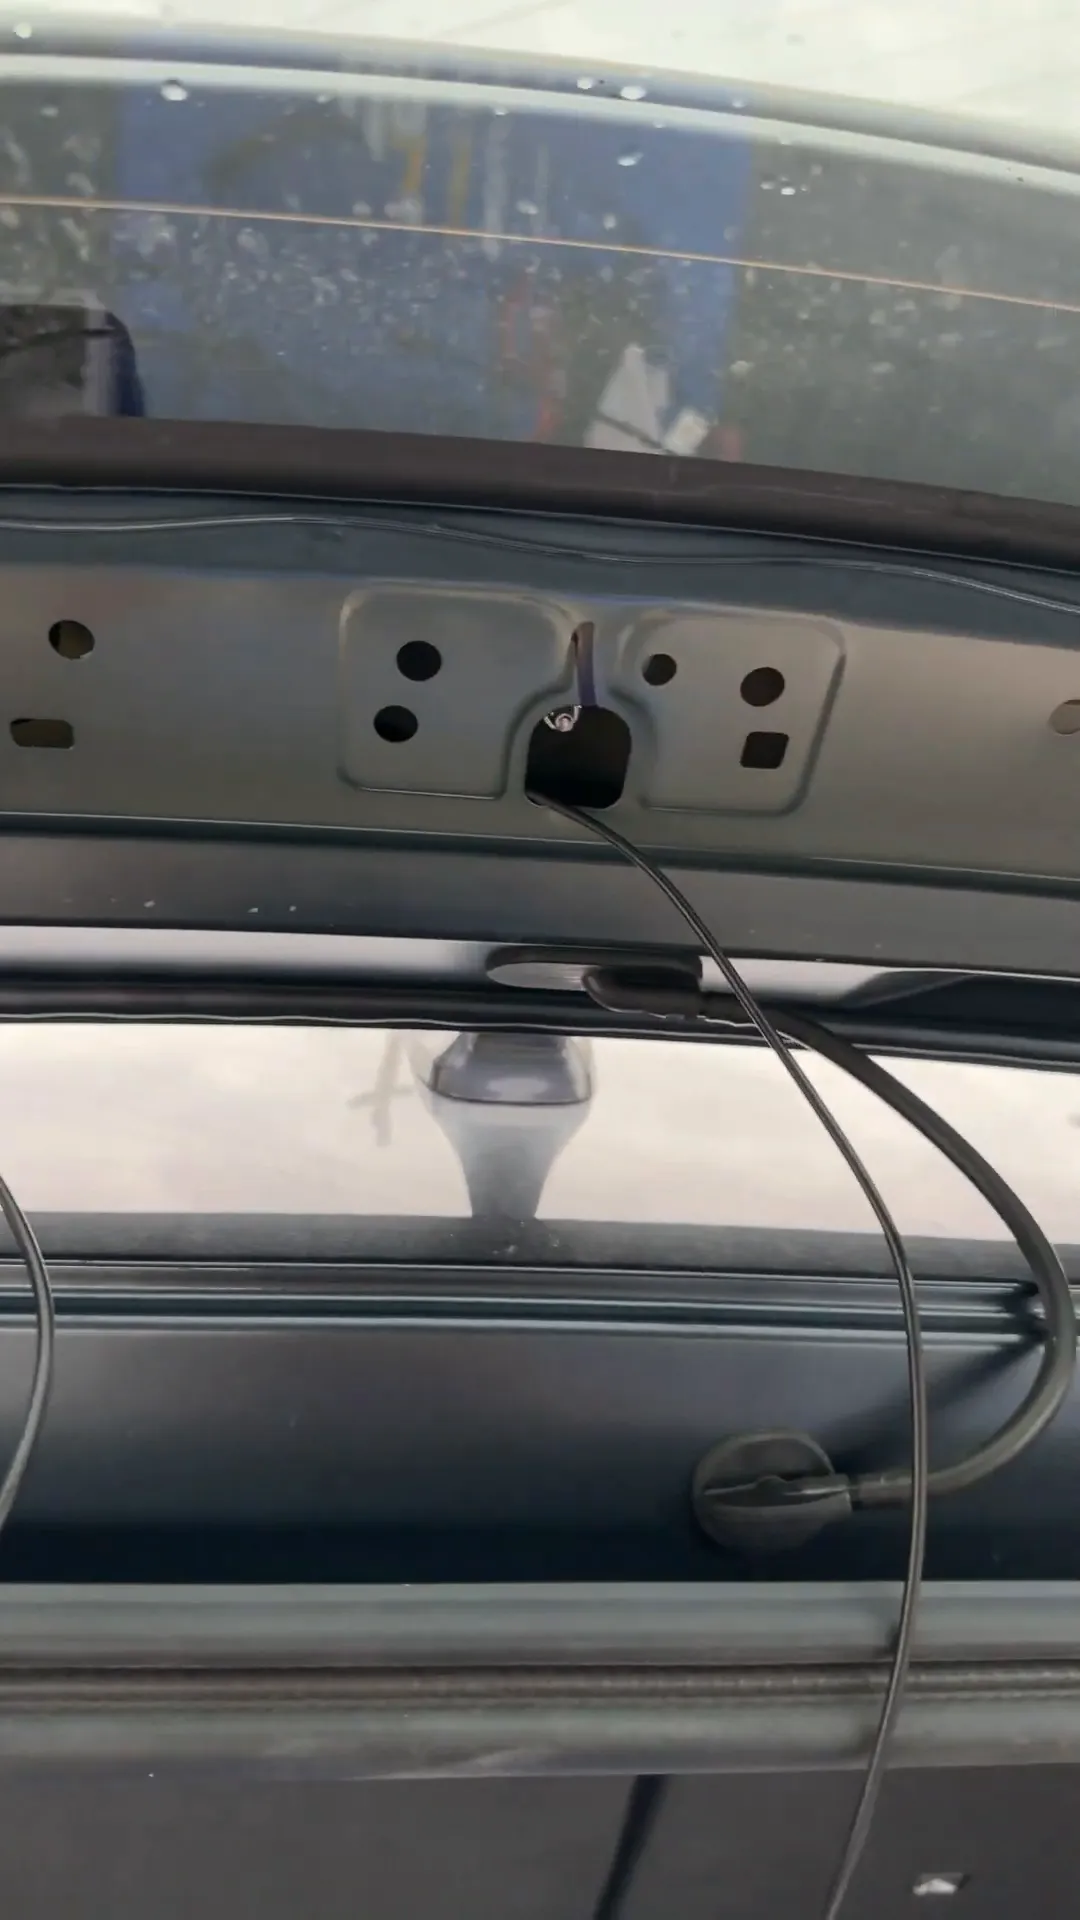
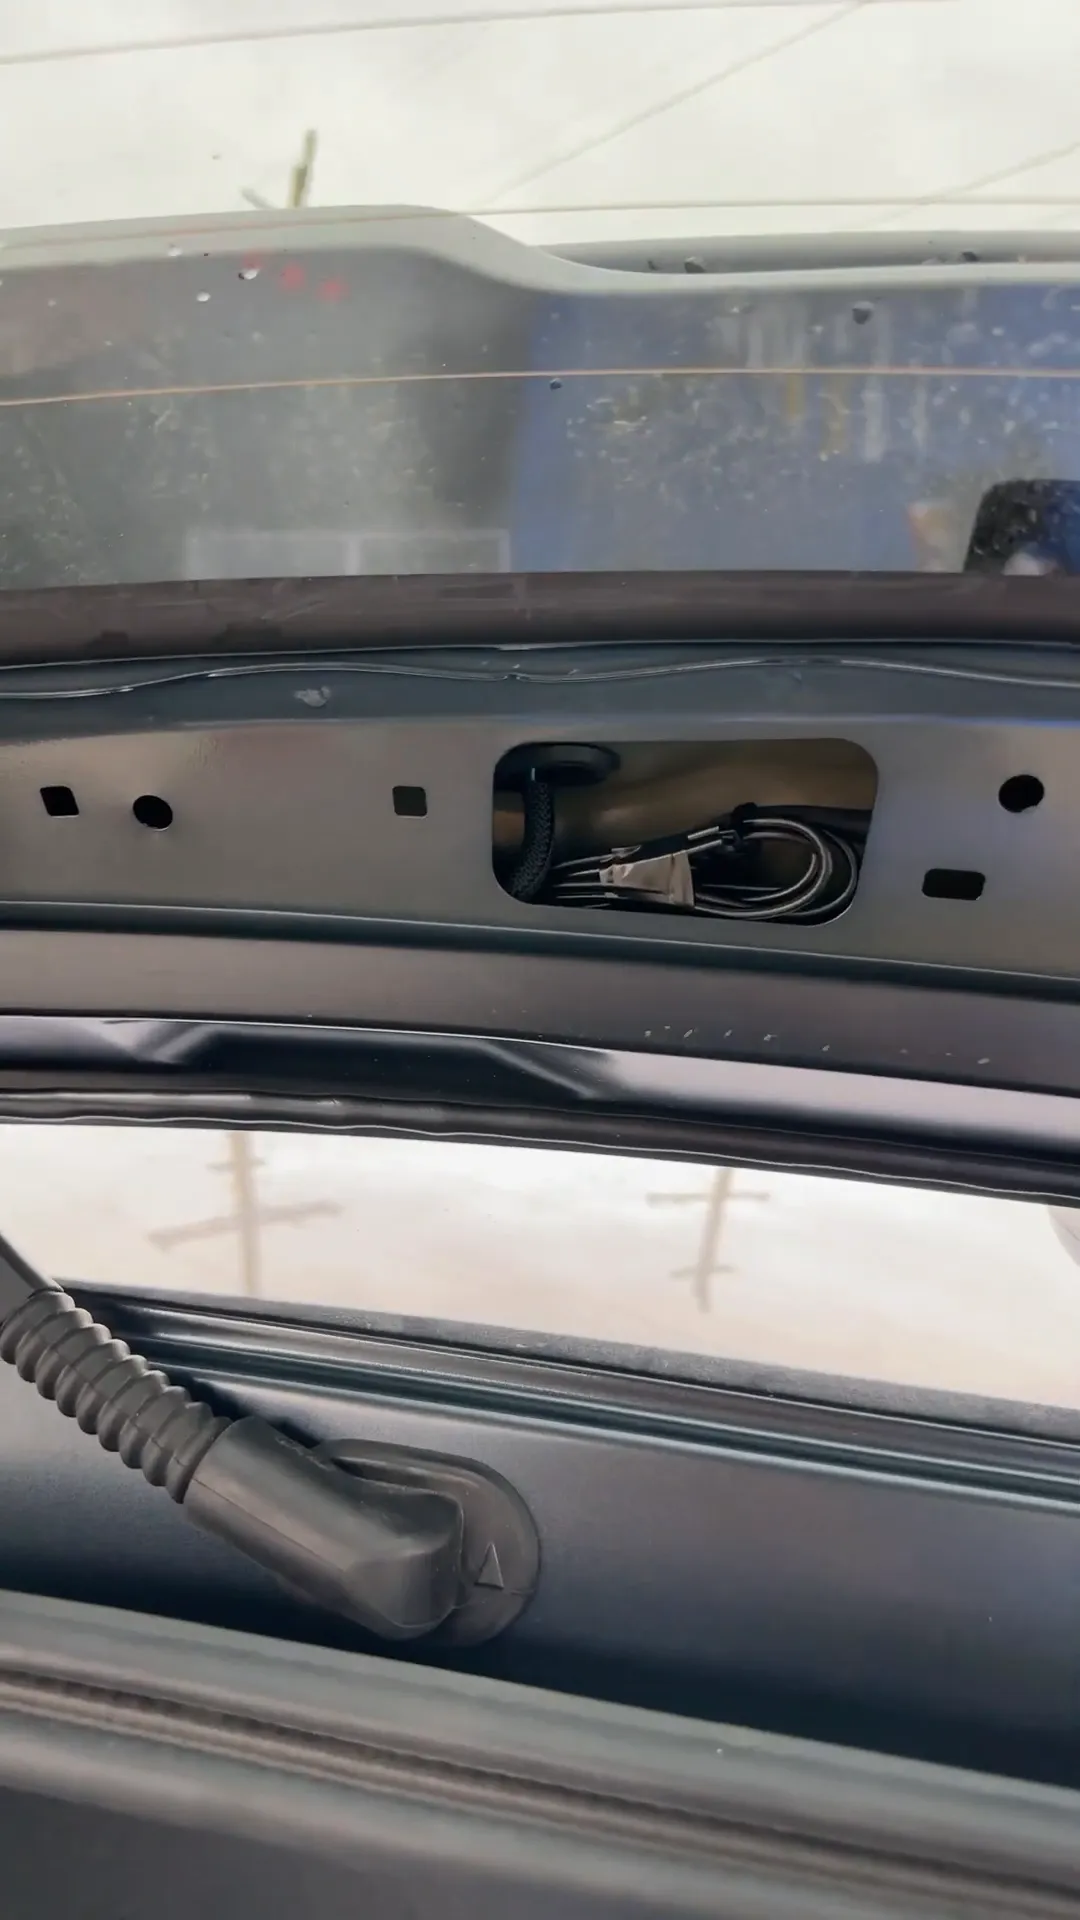
3. Connect to the Rear Window
After the wire is run through, you’ll need to connect it to the rear window. This involves:
- Removing the panel that connects directly to the rear window.
- Securing the wire so it’s not visible and does not interfere with any window mechanisms.
4. Mount the Camera
With the wiring in place, it’s time to mount the camera. Ensure that:
- The camera is positioned correctly for optimal recording.
- All excess wiring is tied up using zip ties for a neat finish.
5. Final Checks
Before putting everything back together, double-check that:
- The camera is functioning properly.
- All panels are securely reattached.
Why Professional Dash Cam Installation Matters
While DIY installations can be rewarding, there are compelling reasons to consider professional help. Here are a few:
- Expertise: Professionals have the experience and tools to ensure a flawless installation.
- Warranty: Many professional installations come with a warranty, providing peace of mind.
- Time-Saving: Hiring a professional can save you time and hassle.
If you prefer a professional installation, check out our services at Safe Drive Solutions.
Conclusion
Installing a dash cam in your vehicle is a smart move for safety and security. By following these steps, you can ensure that your installation is clean and effective. If you’re ever in doubt, don’t hesitate to reach out for professional assistance. Remember, a well-installed dash cam can provide crucial evidence in case of an incident, giving you peace of mind on the road.
For more insights on dash cams, consider reading our blog on why you need a dash cam or the benefits of professional installation.

