Alfa Romeo Giulia Quadrifoglio Dash Cam Installation

Installing a dash cam in an Alfa Romeo Giulia Quadrifoglio requires a little patience and a careful approach to power selection, grounding, and routing around safety systems. This guide walks through the practical steps I used to install a VIOFO A329S without modifying the vehicle—no drilling, no permanent changes—while keeping airbag areas clear and everything neatly hidden.
Where the fuse box hides
The fuse panel in the Giulia is tucked behind the interior side panel near the floor mat area. Remove the trim and the panel comes off to reveal the fuses. This location is unusual compared with many cars, so start by lifting the floor mat and loosening the small fasteners holding the side panel.
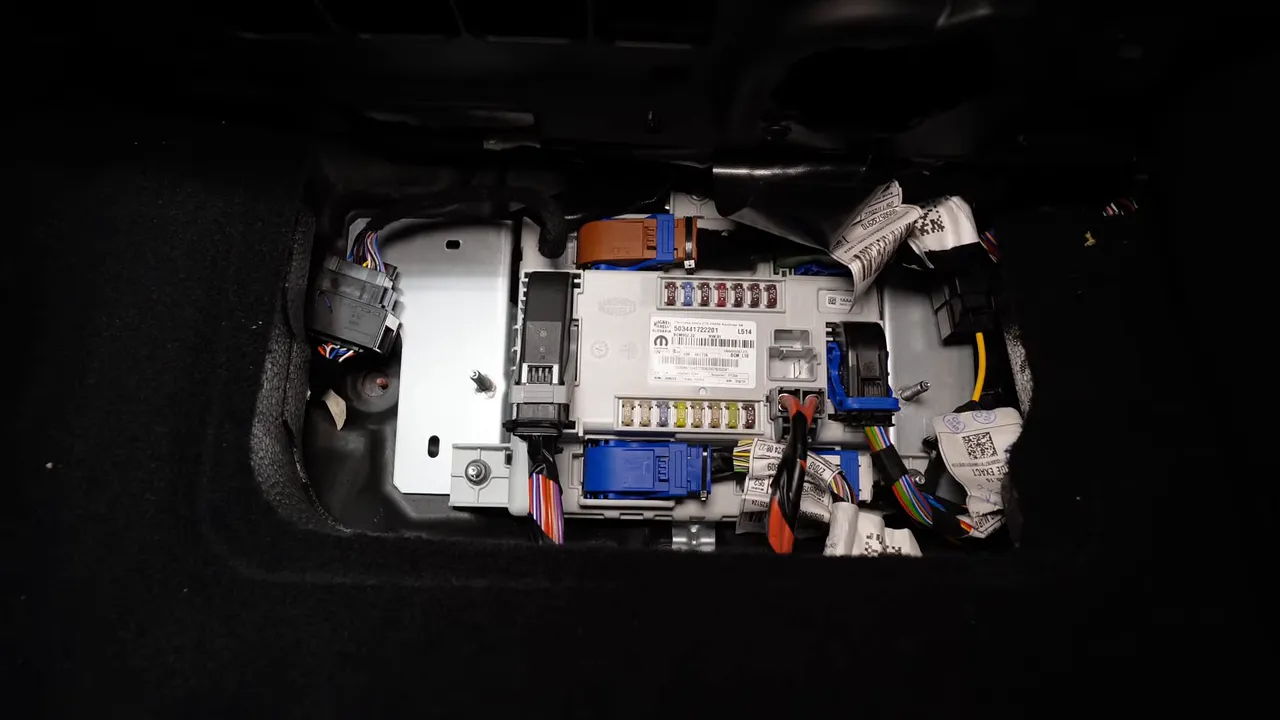
Choosing the right fuses: constant vs. switched
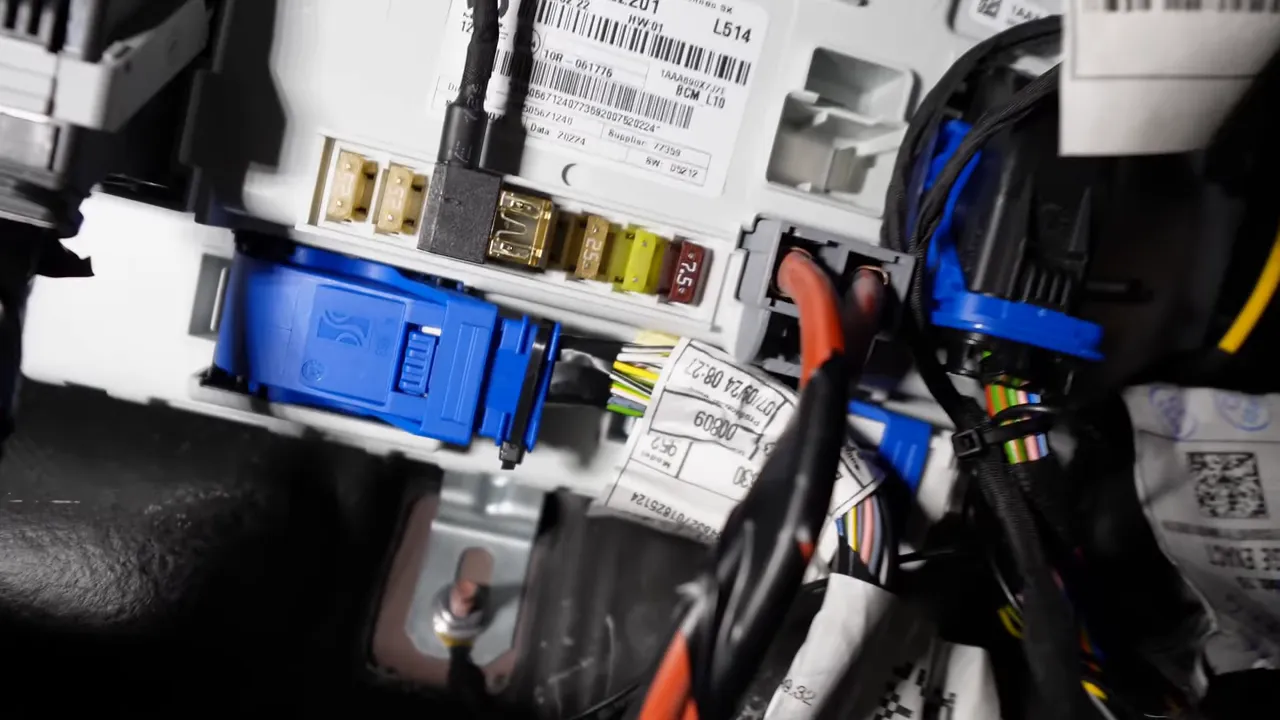
Not all fuses behave the same. In this car the bottom row of fuses are constant power and the top row are ignition-switched. That means:
- Bottom fuses provide constant 12V even with the key off.
- Top fuses are switched with the ignition and only live when the key is on.
After identifying the constant power circuit you want to tap, verify with a test probe before committing. The install here uses a 15 amp constant power fuse for continuous power and a separate 15 amp "power outlet" fuse as a switched source for accessory features.

Important fuse-tap tip
So, the big thing is is to make sure to put the factory 15 amp fuse back in place because a lot of times people forget to put this fuse in and they end up having problems.
When installing a fuse tap or relocating a fuse, always ensure the original factory fuse remains correctly seated. If you use an add-a-fuse, orient it so the factory fuse stays on the original side that carries power.
Grounding without drilling
Finding a solid ground point is simple if you can locate a tested chassis bolt. On the Giulia there is a 10 mm bolt near the fuse area that tested as a reliable ground. Attaching to that bolt avoids drilling or using adhesive grounds and keeps the install reversible.
Secure the ground lug under the bolt and use tie straps to keep the connection neat.
Routing the cable and the tricky A-pillar
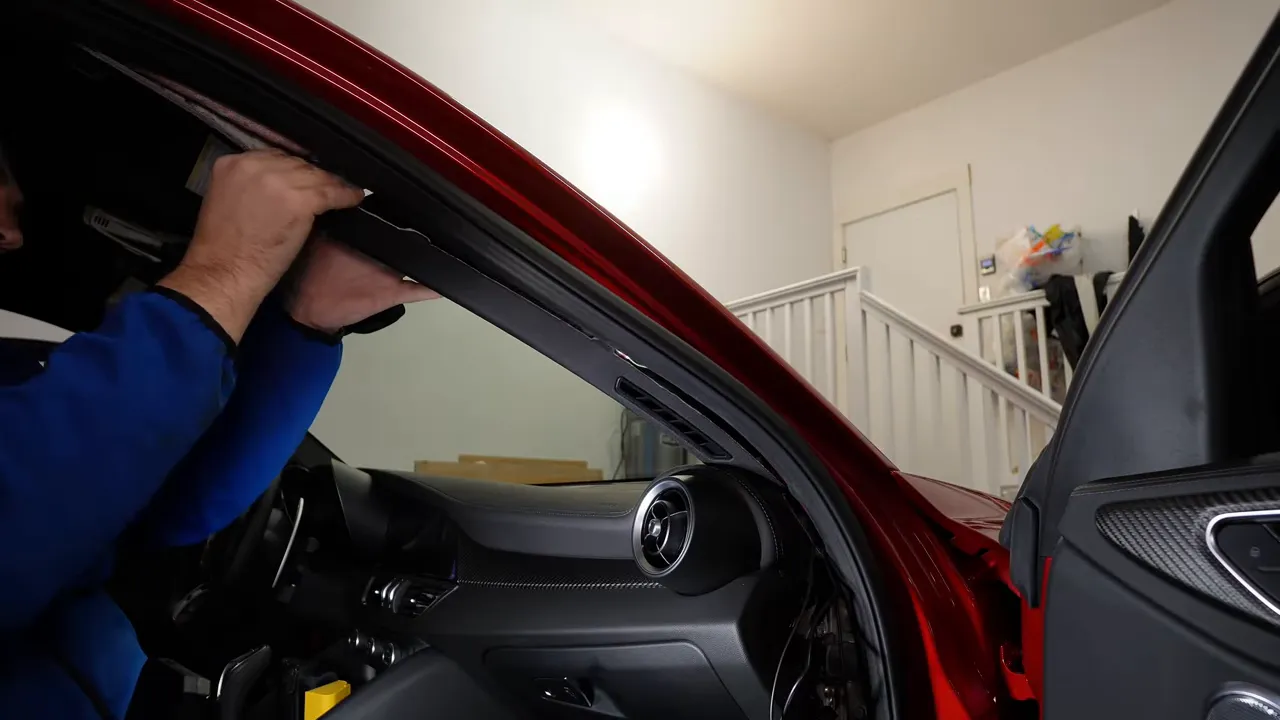
Routing the dash cam cable up to the windshield requires removing the A-pillar trim. Be prepared: the Giulia’s A-pillar is latched at both the bottom and the top, and there is a hidden hook that connects to the headliner.
Trust me when I say the A-pillar is tricky.
Work slowly to disengage the latches and tuck the cable behind the factory wiring harnesses. The goal is to keep the cable behind the trim and not interfere with any safety systems.
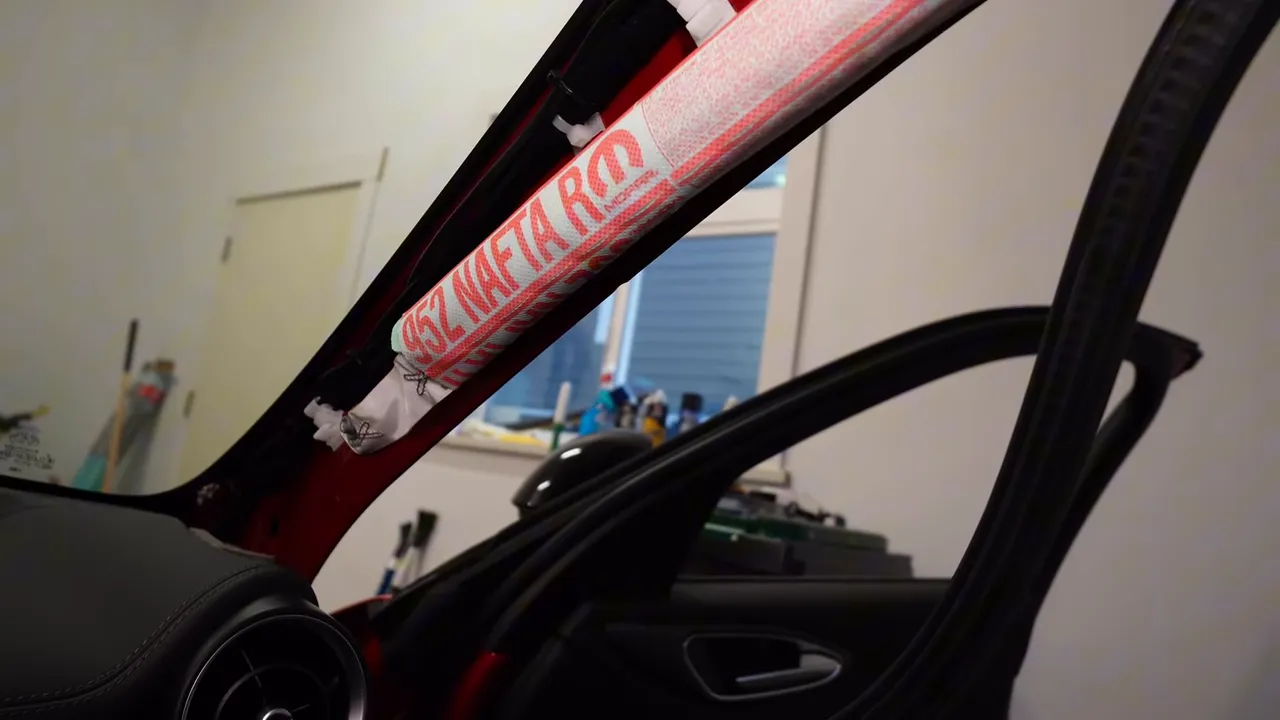
Airbag strap and safety routing
There is a strap that secures the A-pillar trim to the side panel so the trim only opens a controlled distance if the side airbag deploys. Route the cable behind the airbag area so it does not obstruct the deployment path. Hiding the wiring directly behind the airbag channel minimizes interference while keeping the harness out of sight.
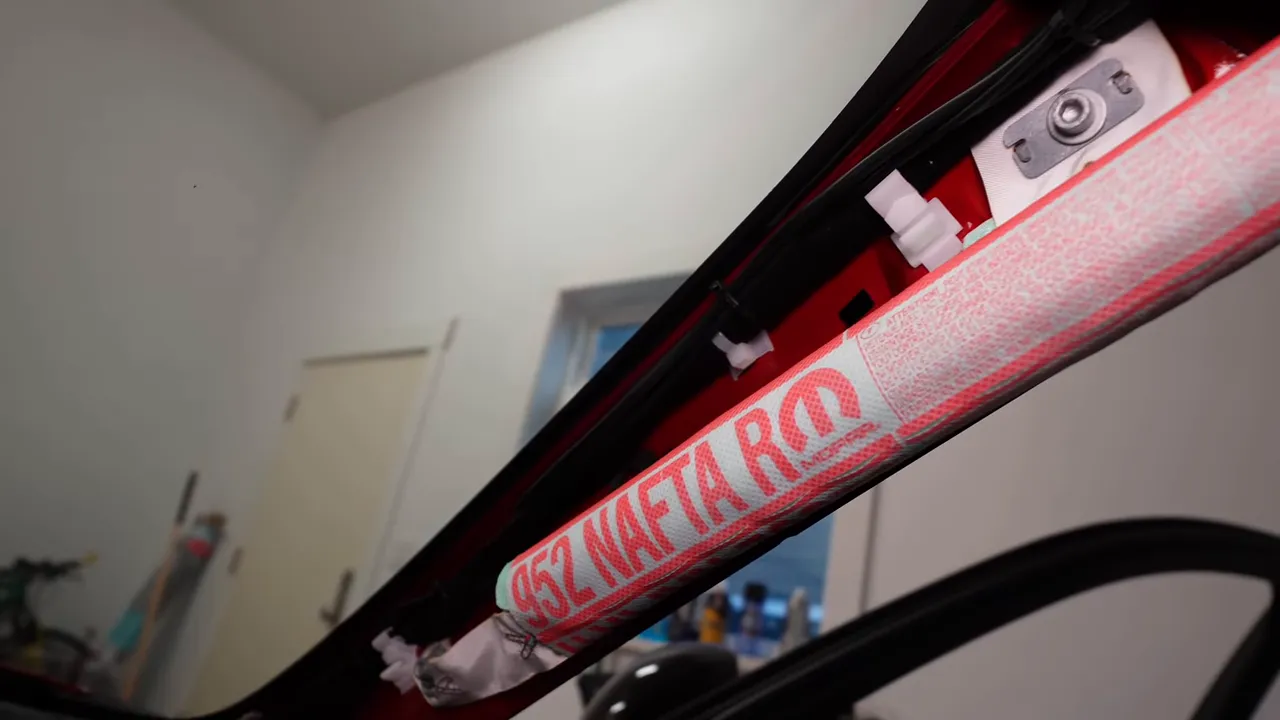
Tuck any excess cable into the side panel cavity and secure everything with tie straps. Use factory harness runs where possible so the installation looks and behaves like OEM wiring.
Reinstalling the A-pillar
Putting the A-pillar back requires patience. Align the top hook with the headliner and the bottom latch with the lower panel, then press into place. It can take a bit of force and adjustment—don’t rush it, and double-check that the strap and latches are seated correctly so the airbag system remains unaffected.
Final setup and neatness
Once power, ground, and routing are complete, secure the dash cam and tidy all cables with tie straps. The VIOFO A329S in this install was mounted cleanly, with all wiring hidden behind trim and anchored at multiple points to prevent rattle or pull on connections.
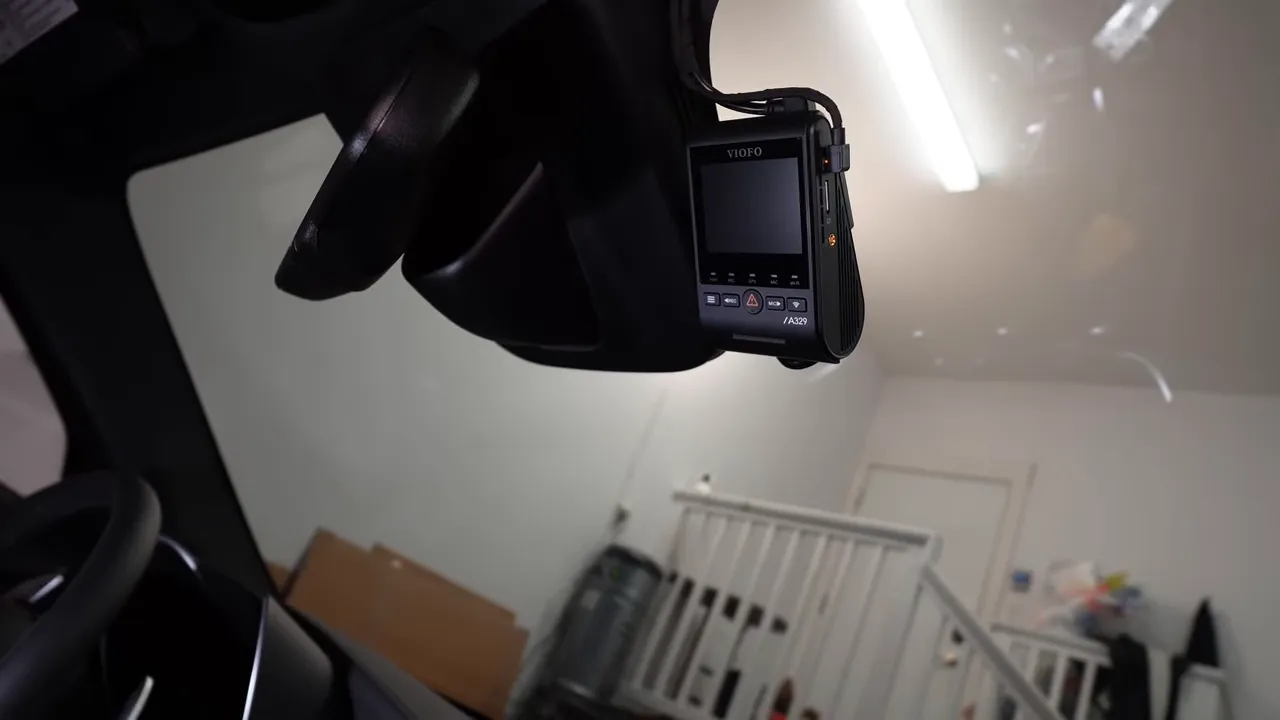
Because the install used factory grounding and fuse locations, the vehicle remains unmodified and reversible if you ever want to remove the dash cam.
Quick checklist before you finish
- Confirm fuse orientation: Factory fuse must remain in the circuit when using an add-a-fuse.
- Verify power types: Know which fuses are constant and which are ignition-switched.
- Secure ground: Use a tested chassis bolt rather than creating a new hole.
- Respect airbags: Route wiring behind airbag channels and do not interfere with deployment straps.
- Test everything: Power up and cycle the key to make sure both constant and switched feeds behave as expected.
Safety and final thoughts
Handling trim around airbags requires care. If you are unsure about any step—especially anything that interacts with safety systems—consider hiring a professional from Safe Drive Solutions to complete the installation. A clean, properly routed install protects both the dash cam and the vehicle’s safety features.
The result: a discreet, professionally routed dash cam installation that preserves vehicle integrity and keeps airbag systems clear while providing continuous and switched power where needed.

