
Nissan GTR Dash Cam Install: Clean Hardwire Setup and Hidden Wiring Guide
A clean Nissan GTR dash cam installation is all about three things: keeping the camera discreet, routing every cable safely around the airbags, and making solid power connections that will hold up over time. The goal is a factory-look front and rear dash camera setup with no loose wires hanging around the windshield or dashboard.
This installation uses the headliner, A-pillar, weather stripping, under-dash space, and the OBD2 wiring area to conceal the front camera power cable and rear camera cable. Take your time, use the right trim tools, and verify every circuit before connecting anything.
What You'll Learn
- Route GTR dash cam wiring behind trim without interfering with curtain airbags.
- Release the A-pillar safely by rotating, not cutting, the blue airbag retainer clip.
- Verify OBD2 constant power, ground, and ignition circuits before making hardwire connections.
- Secure excess wire under the dash for a quiet, factory-look installation.
Table of Contents
- Tools and Installation Approach
- Start at the Rearview Mirror and Headliner
- Remove the A-Pillar Safely Without Damaging the Airbag Retainer
- Route the Rear Camera Cable Beside the Curtain Airbag
- Bring the Front Wiring Down Behind the Dash
- Hardwire Power at the OBD2 Harness
- Reassemble the GTR Interior
- Mount the Front and Rear Dash Cameras
- What Makes This a Professional-Looking Dash Cam Installation
Tools and Installation Approach
For this job, a plastic panel popper tool is the main tool for safely releasing trim panels and tucking wire. Needle-nose pliers are important for the Nissan GTR A-pillar retainer clip, a wire fish tool makes the under-dash routing much easier, and a test light is essential before connecting power.
You will also want tie straps, electrical tape, wire strippers, soldering equipment or your preferred secure connection method, a 10 mm socket or Phillips screwdriver, paper towel, and glass cleaner.
The basic path is simple:
- Mount and wire the front camera around the rearview mirror.
- Tuck the wiring into the headliner.
- Route the rear camera cable safely behind the side curtain airbag.
- Run the cable toward the rear through the weather stripping and trim.
- Fish the front camera power cable down behind the A-pillar.
- Hardwire constant power, ground, and ignition at the OBD2 harness.
- Secure excess wiring, reassemble the dash, and mount the cameras.
Start at the Rearview Mirror and Headliner
Begin by moving the rearview mirror down and removing the small trim stem behind it. This piece simply clips off and opens up room to hide the dash cam wiring cleanly behind the mirror.
Run the front camera power wire and rear camera cable behind the mirror, then tuck them into the headliner. The GTR headliner is fairly forgiving here. Pull down gently with your fingers and push the cable upward a little at a time. Do not force the wire or use anything sharp that could damage the headliner.
Keeping the wiring high and close to the windshield makes the finished install much cleaner. It also keeps the cable out of sight from the driver’s seating position.
Remove the A-Pillar Safely Without Damaging the Airbag Retainer
The A-pillar is the most important part of this installation to handle carefully. Use a panel popper tool to release the trim, but do not pull aggressively once the panel begins to move.
The Nissan GTR A-pillar has a blue airbag retainer clip. This clip must be rotated sideways with needle-nose pliers before the panel can fully release. Do not cut, break, or remove this clip. It is part of the airbag retention system and needs to be properly aligned again during reassembly.
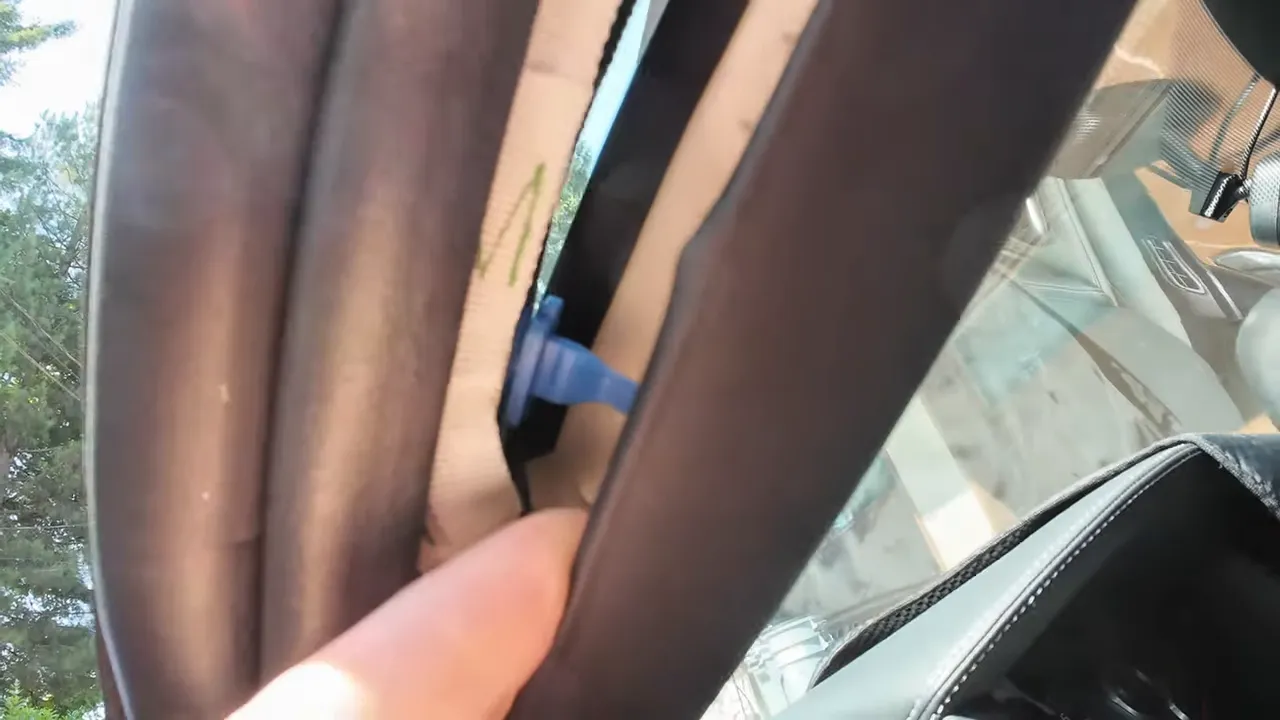
Once the A-pillar is removed, you can continue tucking the dash cam wiring along the headliner. The mounting points on the trim line up with the blue retainer clip when the panel is reinstalled, so make a mental note of its position before moving on.
Route the Rear Camera Cable Beside the Curtain Airbag
Run the rear camera cable behind the airbag, not across the airbag deployment path. In the GTR, the side curtain airbag runs from the front toward the back along the roofline.
The safe route is beside the airbag, tucked behind the trim and close to the weather stripping. There is room between the weather stripping and the airbag, which allows the cable to remain out of the way if the airbag deploys.
Before pulling the cable too far, attach a tie strap to the factory wiring harness as a reference point. This gives you a baseline for the cable path and prevents the cable from being pulled too far forward or backward while routing it.
Remove the weather stripping from the front of the driver’s door opening toward the rear. It pulls away cleanly and gives access to tuck the rear camera cable behind the surrounding trim. Use the panel tool to guide the cable into place in short sections.
The key principle is simple: keep the cable behind the panel, while allowing the airbag to deploy in front of the panel without interference.
Once the cable is routed toward the rear, tuck any excess cable high in the headliner area and reinstall the weather stripping. Make sure the headliner and weather stripping sit flush when finished.
Bring the Front Wiring Down Behind the Dash
At the front A-pillar, secure the extra cable with tie straps and prepare to route the dash cam power wiring under the dashboard. The small driver-side side panel can be removed easily with a panel popper, although removing it does not create much extra working room.
For real access, remove the lower dash panel. Start by removing the two 10 mm bolts located near the hood release. A Phillips screwdriver may also work depending on the hardware. These fasteners must come out before the lower dash can release.
Move the hood release out of the way, gently pry the lower dash panel outward, and disconnect its connections. There are plugs on the top area of the panel, plus a plug and hose on the opposite side. Keep track of where each connection belongs so reassembly stays straightforward.
Release the OBD2 port from the lower dash panel by pressing it out from one side with a panel tool. With the lower dash removed, there is plenty of room to work beneath the steering area.
Use a Wire Fish Tool Instead of Fighting the Side of the Dash
The space along the side of the dash is tight, so running the wire directly down that route is frustrating and unnecessary. Feed a wire fish tool upward from under the dash toward the top of the A-pillar, near the windshield.
When the fish tool reaches the A-pillar area, attach the dash camera wiring and pull it down under the dash. Be patient and pull steadily. Once the main wire is down, the rear camera cable can be pulled down the same way if needed.
There is plenty of room beneath the dash to coil, tape, and tie strap extra rear camera cable. Keeping that slack secured is what prevents rattles and gives the installation a professional finish.
Hardwire Power at the OBD2 Harness
This Nissan GTR installation uses the wiring at the back of the OBD2 connector for constant power, ground, and ignition power. This approach is also common on many Nissan, Infiniti, and Subaru vehicles, but the exact wiring must always be tested on the specific vehicle.
OBD2 pin assignments provide useful reference points:
- Pin 16 is constant power.
- Pin 4 is ground.
- Pin 8 is ignition power on this Nissan GTR.
Do not rely only on pin position, wire color, or an assumption from another vehicle. Use a test light to verify the circuits before stripping any factory wire. It is easy to miscount pins, especially when looking at the connector from the wrong direction.
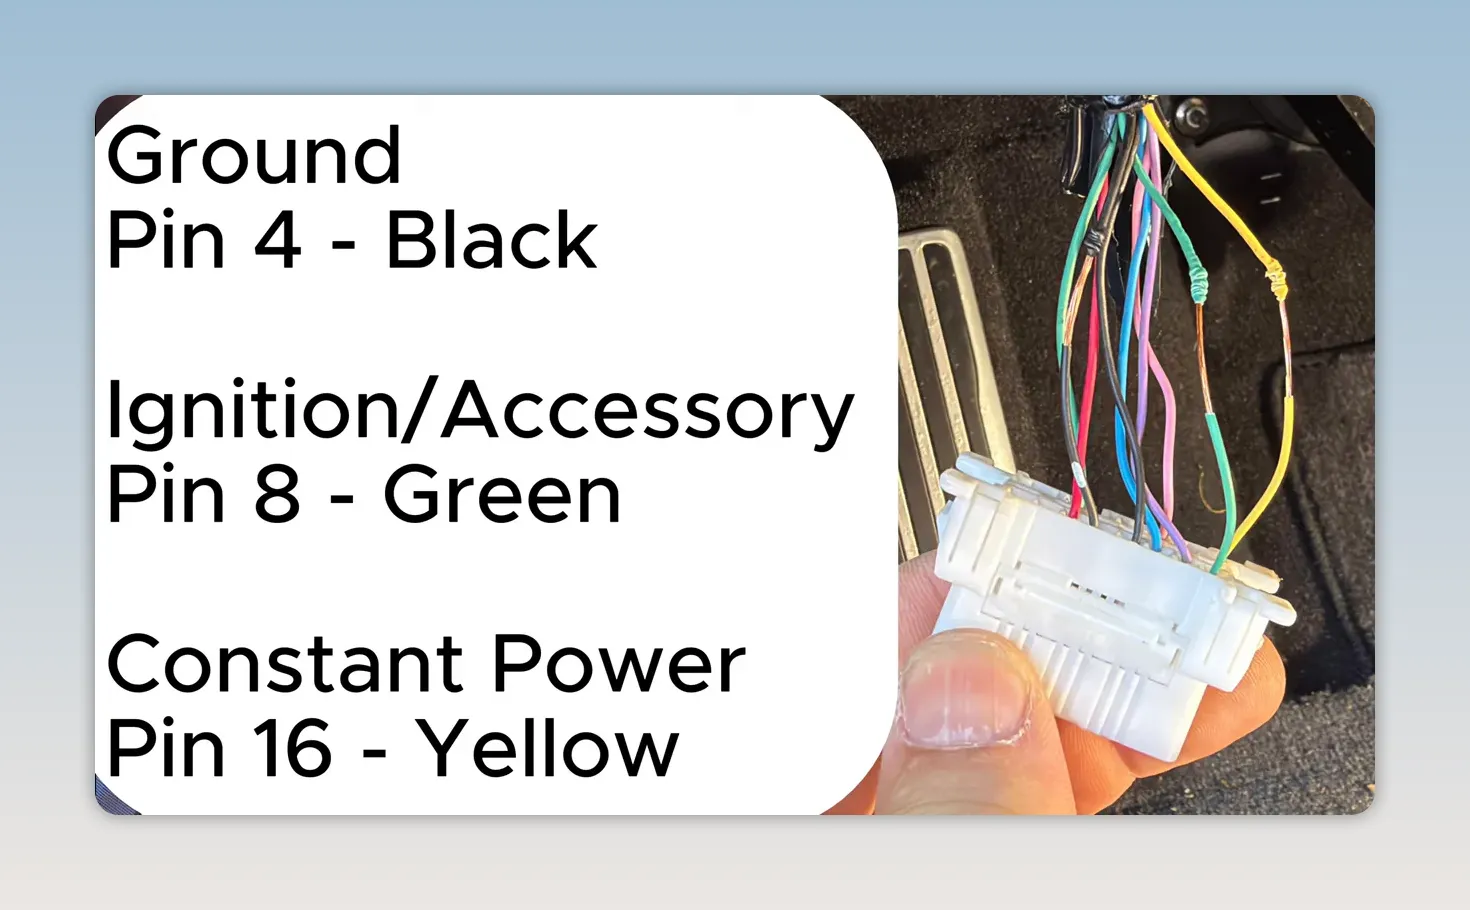
On this vehicle, the identified wire colors are:
- Ground: Pin 4, black wire
- Ignition or accessory: Pin 8, green wire
- Constant power: Pin 16, yellow wire
After testing, strip back the required wiring and connect the dash cam hardwire leads for constant power, ground, and ignition. Solder the connections, tape them securely, and tie the wiring up beneath the dash. A solid connection and proper strain relief are far better than leaving loose splices under the steering column.
If you are not comfortable testing automotive wiring or soldering into factory circuits, use a qualified installer. The cleanest installation is never worth compromising the vehicle’s electrical system or safety equipment.
Reassemble the GTR Interior
With the wiring secured, reinstall the OBD2 port, reconnect the lower dash panel plugs and hose, and reinstall the lower dash panel. Put the hood release back in place and reinstall the two 10 mm bolts.
Reinstall the A-pillar carefully. Make sure the blue airbag retainer clip is correctly aligned before snapping the trim back into place. Finish by reinstalling the small trim piece behind the rearview mirror.
At this point, the front camera wiring should be nearly invisible, with no loose cable around the mirror, windshield, A-pillar, or driver’s footwell.
Mount the Front and Rear Dash Cameras
Plug the dash camera in and confirm that it powers on before removing the adhesive backing. This gives you a chance to confirm the cable connection and choose the best viewing angle without committing to the mount location.
Clean the windshield thoroughly with glass cleaner, then dry it with a clean paper towel. Adhesive mounts need a clean, dry surface for a reliable hold. Position the front camera high on the windshield near the rearview mirror for a discreet view of the road.
Before peeling the 3M tape, hold the camera in its intended position and check the viewing angle. Make sure it has a clear forward view and is not obstructed by the rearview mirror, windshield tint band, or interior trim.
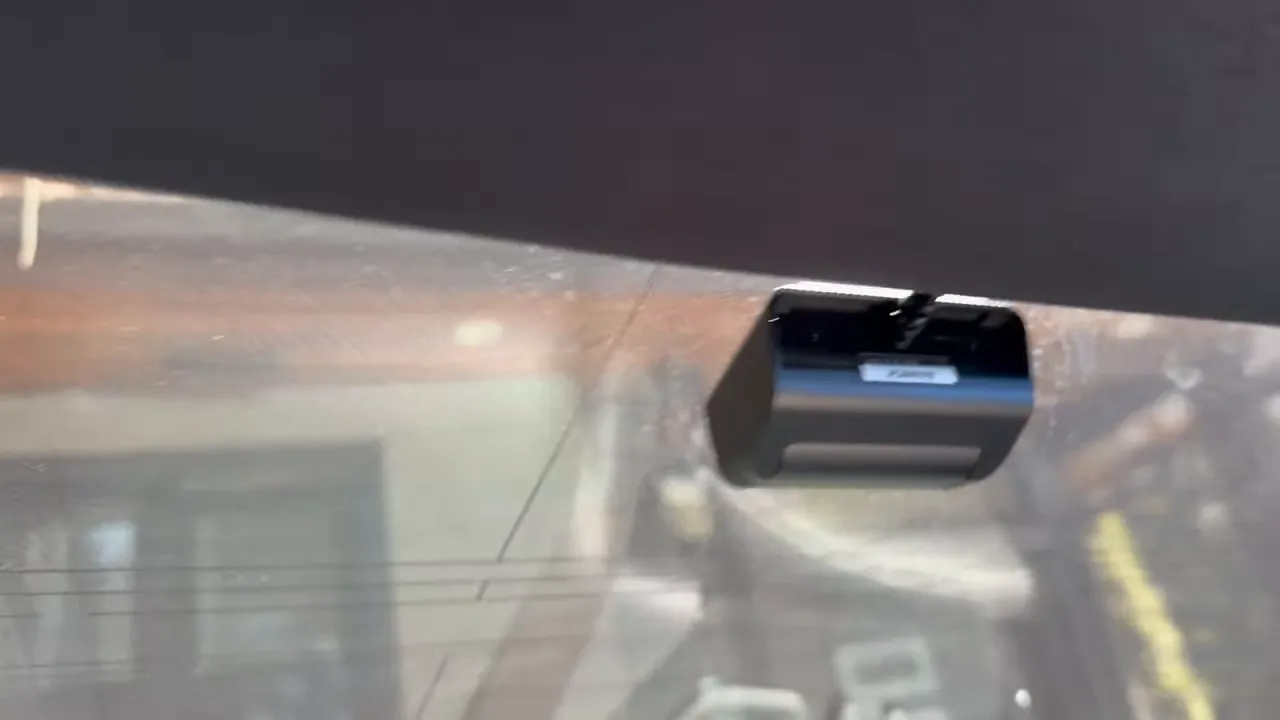
Mount the rear camera at the back of the vehicle after the cable has been routed and secured. Confirm that both cameras power on and that the front and rear views are properly aimed before considering the installation complete.
What Makes This a Professional-Looking Dash Cam Installation
A clean dash cam install is not just about hiding wire. It is about routing the wire in a way that respects the vehicle’s airbag system, keeps the dashboard serviceable, and avoids unsecured cable that can rattle or snag.
- Keep wiring tucked into the headliner and trim rather than exposed.
- Route cables beside, not across, curtain airbags.
- Do not cut or damage airbag retainer clips.
- Use a wire fish tool to avoid forcing cable through tight gaps.
- Test every power source before making a connection.
- Solder, insulate, tape, and secure hardwire connections.
- Coil and tie up excess cable under the dash.
- Test camera operation and viewing angles before final mounting.
The finished Nissan GTR setup delivers front and rear video coverage with a clean, hidden wiring path and dependable hardwired power.
|
Nissan GTR Dash Cam Installation FAQ
Can I route a dash cam cable along the GTR A-pillar?
Yes, but route the cable beside and behind the curtain airbag path. Do not place wiring across the airbag deployment area or damage the blue A-pillar airbag retainer clip.
Which OBD2 pins power the dash cam in this Nissan GTR?
For this installation, pin 16 is constant power, pin 4 is ground, and pin 8 is ignition power. Test every circuit on the vehicle before connecting the dash cam.
Do I need to remove the lower dash panel?
Removing the lower dash panel provides the access needed to fish wiring down from the A-pillar, connect to the OBD2 harness, and secure excess cable properly.
When should I stick the dash cam to the windshield?
Only after confirming the camera powers on and the proposed mounting position provides a clear viewing angle. Clean and dry the windshield before applying the 3M adhesive.