
Upgrade Your Ford Maverick With a Professional Front and Rear Dash Cam Install
A dash cam installation should be clean, secure, and built to keep recording when you need it most. This Ford Maverick came in with a failed budget dash camera that had been powered through the cigarette lighter socket. It left the owner without parking mode and, more importantly, without reliable evidence when an accident happened.
We replaced it with a front and rear Viofo A229 Plus setup, hardwired it for a tidy finish, routed every cable safely around the airbags, and mounted both cameras discreetly. Here is the process behind a professional Ford Maverick dash cam installation.
What You'll Learn
- Mount the front camera discreetly behind the rearview mirror without pinching its cable.
- Route the rear camera cable behind the side curtain airbag for a safer installation.
- Connect hardwire kit leads to constant power, ignition power, and a secure ground point.
- Use front and rear dash cam footage to preserve evidence after a collision.
Table of Contents
- Start by Removing the Old Dash Cam and Wiring
- Prepare the Rearview Mirror Housing for a Clean Cable Exit
- Hardwire the Power Cable for Parking Mode
- Route the Rear Camera Cable to the Back Window
- Connect Constant Power, Ignition Power, and Ground
- Clean the Glass and Mount Both Cameras
- Why a Rear Dash Camera Is Worth It
- Final Checklist for a Professional Ford Maverick Dash Cam Installation
Start by Removing the Old Dash Cam and Wiring
Before installing anything new, remove the previous camera, power cable, and adhesive mount completely. In this truck, the old dash cam wiring had been tucked through the trim, which made some panels tighter than they should have been.
Begin at the rearview mirror housing. A panel popper tool works well here. Pry downward at the top of the housing, pull outward, and lower the rearview mirror for better access. The housing is secured with four clips, so take your time and avoid forcing it.
Next, remove the A-pillar trim. On this Ford Maverick, that means removing the 10 mm fastener and carefully releasing the trim clips. Keep track of every clip as you work. If one falls behind a panel, retrieve and reinstall it before reassembly so the panel sits properly afterward.
Continue removing the prior wiring from the front of the truck toward the kick panel. Since the old setup used a cigarette-lighter plug, it did not provide parking mode coverage. That is one reason hardwiring is a worthwhile upgrade when the camera supports it.
Prepare the Rearview Mirror Housing for a Clean Cable Exit
The front camera is mounted high on the windshield, behind the rearview mirror. That placement gives the camera a great road view while keeping it out of the driver’s line of sight.
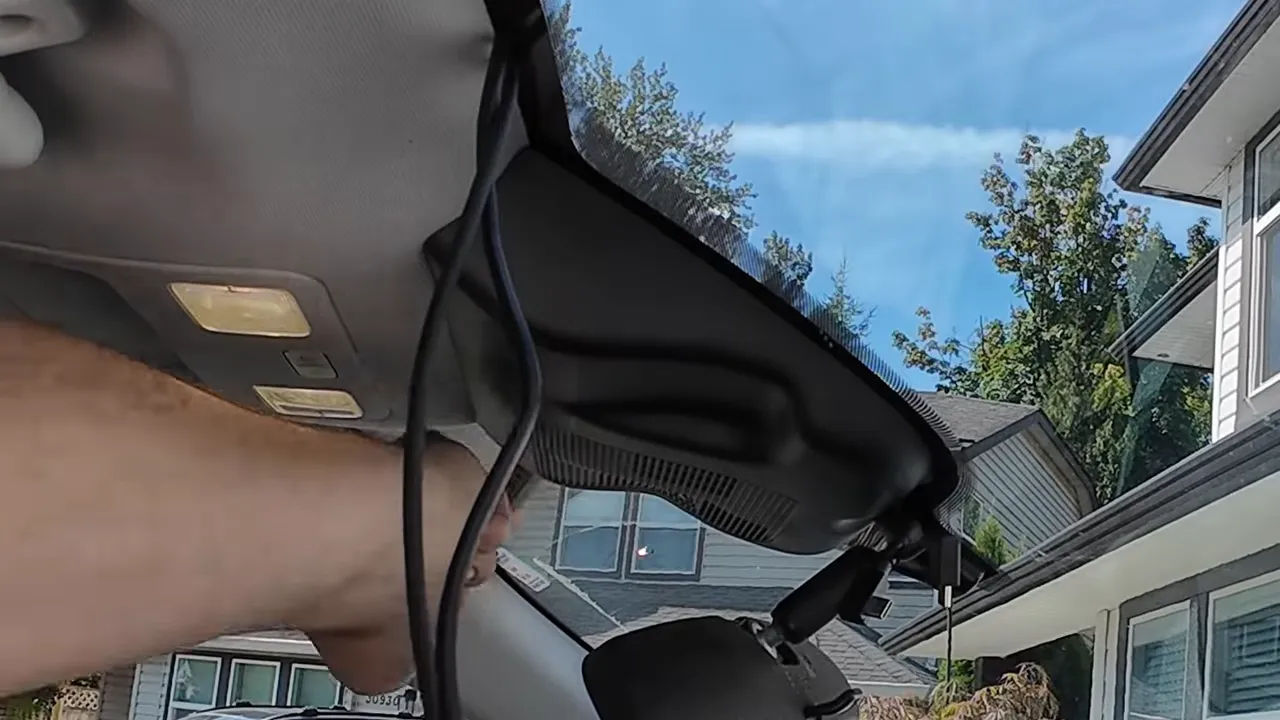
There is one important detail when routing wiring through the rearview mirror housing: do not simply pinch the wire behind the cover. If you do, the cover may not fully engage its clips and the cable can get crushed.
Instead, make a small notch in the housing where the cable needs to exit. A simple file is enough. File only as much material as needed for the wire to pass through without being pinched. Once the cable fits freely:
- Set the wire length needed for the camera connection.
- Secure the excess behind the mirror with a tie strap.
- Trim the tie strap cleanly with side cutters.
- Align the cable with the notch.
- Press the four housing clips back into place.
From there, tuck the cable into the headliner and run it toward the driver-side A-pillar.
Hardwire the Power Cable for Parking Mode
The hardwire cable serves two purposes. It powers the dash camera while driving and, when configured for it, supplies the power needed for parking mode. If parking mode is not wanted, the camera can still be hardwired and parking mode can simply be turned off in the camera settings.
Run the hardwire cable down the A-pillar area and secure it to the factory wiring. Keep the wiring tidy and controlled with tie straps rather than leaving loose cable behind the trim.
At the lower dash area, remove the sill plate and the side panel to reach the fuse box area. The sill plate pulls upward, and the lower side panel can be removed with a panel tool.
Routing Around the Side Curtain Airbag
This is the part that matters most. The rear camera cable must be routed behind the airbag, never in front of it. A cable placed in front of an airbag can interfere with deployment or become a hazard if the airbag deploys.
On the Maverick, pull back the weather stripping enough to access the routing channel. The rear cable is thin, and there is room to place it well behind the airbag. Keep the cable close to the outer lip and away from the airbag deployment path.
Once the cable is behind the airbag, tuck it under the headliner and continue toward the rear of the truck. Reinstall the weather stripping as you go. It should press back into place cleanly.
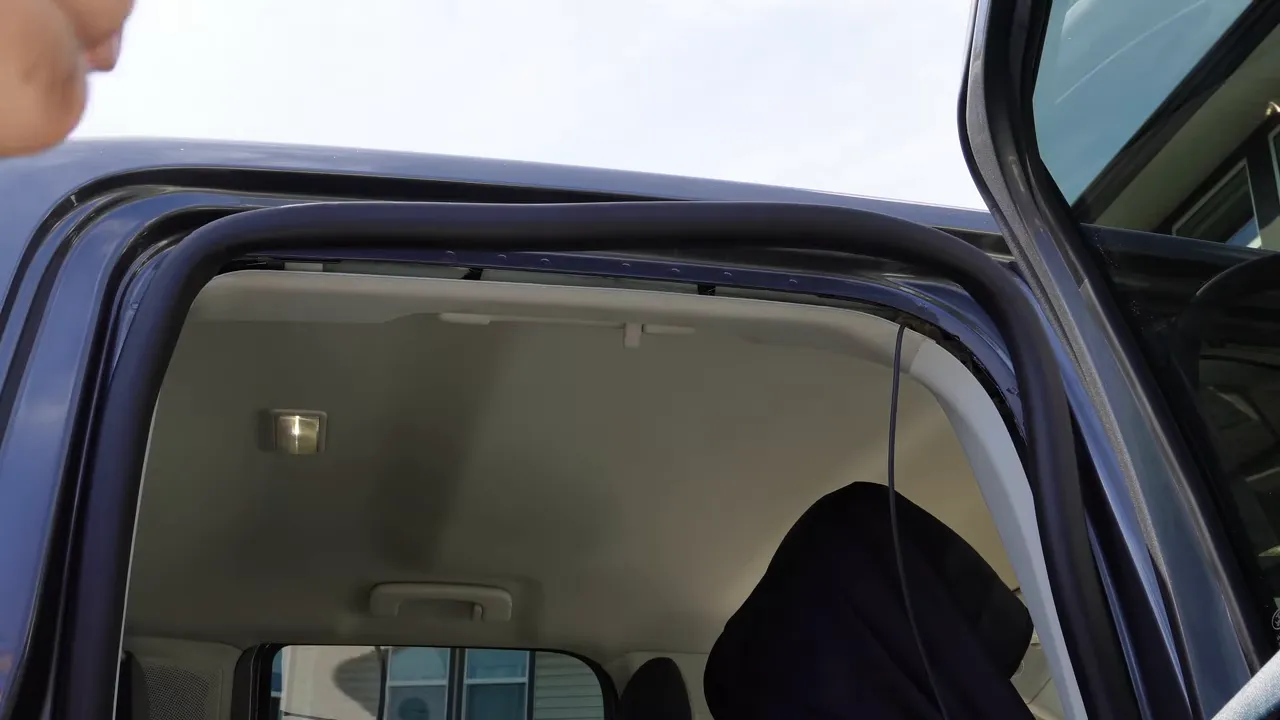
When you reach the lower A-pillar area, tie any extra rear-camera cable together with the power cable and factory harness. Nothing should hang loose, drop into the footwell, or obstruct the airbag in any way.
Route the Rear Camera Cable to the Back Window
With the front-to-A-pillar portion complete, continue the rear camera cable through the vehicle by lifting weather stripping and gently tucking the wire under the headliner. Take out excess cable as you go rather than pushing a large bundle into one spot.
The goal is straightforward: the cable should be invisible after the vehicle is reassembled, secured so it cannot rattle, and safely routed away from every airbag.
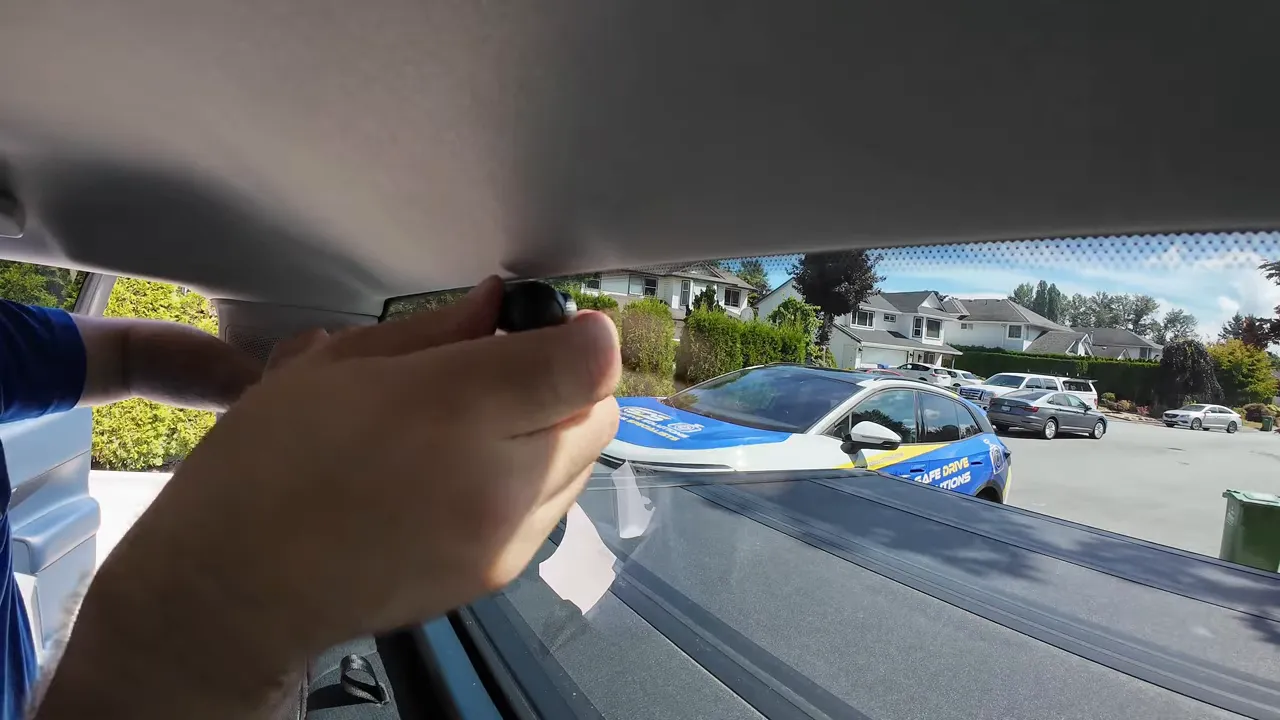
At the rear, clean the mounting area on the back glass before applying the rear camera adhesive. Plug in the rear camera, position it to monitor the roadway behind the truck, and press the mount firmly into place.
Connect Constant Power, Ignition Power, and Ground
There are a few ways to power a dash cam. Fuse taps are one option. An appropriate OBD2 power cable is another. For this installation, the dash cam hardwire kit was connected directly to the vehicle wiring near the fuse box.
Direct wiring is not something to attempt without the right tools and confidence. If you are not comfortable identifying circuits, soldering, insulating electrical connections, and working around vehicle wiring, use fuse taps, a proper OBD2 cable, or hire a professional installer.
For this Ford Maverick setup:
- Green factory wire: ignition-switched power.
- Red factory wire: constant power.
- Red Viofo hardwire lead: constant power connection.
- Yellow Viofo hardwire lead: ignition power connection.
After carefully exposing the required sections of wire, make the connections and solder them properly. Be especially careful with a soldering iron near live automotive wiring. You only want to heat and work on the intended conductors.
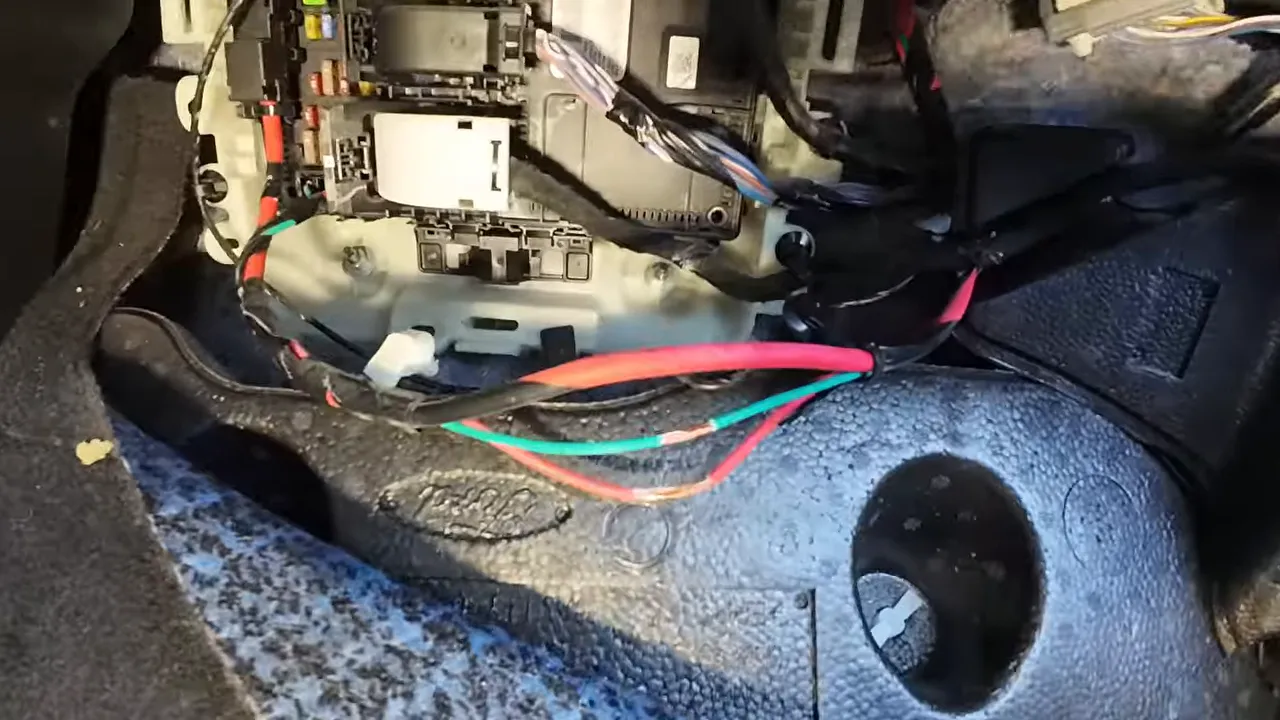
Once the connections are complete, insulate them thoroughly with quality electrical tape. Double-wrap power connections, particularly where constant power and another wire are close together. Then rewrap the factory harness, reinstall the clips, and secure the fuse holder and excess wire in the kick-panel area.
For ground, loosen the nearby 10 mm grounding bolt just enough to slide the ground terminal underneath. Do not remove the bolt completely. Tighten it back down, secure any remaining cable, and reinstall the fuse-box cover, sill plate, A-pillar trim, weather stripping, and side panels.
Choose an OBD2 Cable Carefully
If you choose the OBD2 route instead of direct wiring, use a cable designed for dash cam power. Avoid cheap adapters with unnecessary pins. A proper setup should use the required connections, such as pin 4 and pin 16, or use Viofo’s purpose-built OBD2 cable.
Clean the Glass and Mount Both Cameras
Old adhesive needs to come off before mounting the new camera. Use a suitable blade tool carefully to remove the old tape, then clean the glass with alcohol wipes and dry it with a clean towel or paper towel.
For the front camera, plug it in and mount it high behind the rearview mirror. Remove the lens and adhesive protective films only when you are ready to make the final placement.
Then start the vehicle and go through the camera’s initial setup:
- Select the language.
- Set the correct time zone.
- Choose kilometres per hour in Canada or miles per hour in the United States.
- Format the memory card.
- Confirm the camera is powered and recording.
The final result is a front camera that is hidden neatly behind the rearview mirror, a rear camera monitoring traffic behind the truck, and no dangling wires distracting you while driving.
Why a Rear Dash Camera Is Worth It
Some truck owners wonder whether a rear dash camera is really necessary. It is. A rear camera can capture the exact evidence needed after a rear-end collision, sideswipe, hit and run, or other incident behind your vehicle.
In one Highway 1 collision, a customer had been hit from behind. Police were prepared to interview more than 50 people, but the dash cam footage clearly documented what happened. Once the footage was provided, there was no need to continue interviewing everyone because the video showed the evidence.
That is the value of a reliable front and rear setup. It is not just about recording a drive. It is about having clear video evidence when the details matter.
|
Final Checklist for a Professional Ford Maverick Dash Cam Installation
- Remove old dash cam wiring, mounts, and adhesive completely.
- Mount the front camera high behind the rearview mirror.
- Create a small clearance path so the mirror housing does not pinch the cable.
- Secure front power wiring to factory harnesses.
- Route the rear cable behind, never in front of, the side curtain airbag.
- Control all excess cable with tie straps or harness tape.
- Use proper constant power, ignition power, and ground connections.
- Insulate and secure every electrical connection.
- Clean glass thoroughly before applying camera adhesive.
- Initialize the camera, format the card, and confirm front and rear recording.
A clean installation is about more than appearance. Proper cable routing protects the airbag system, hardwiring unlocks features such as parking mode, and a front and rear camera system gives you a much better record of what happens around your Ford Maverick.
Ford Maverick Dash Cam Installation FAQ
Can a dash cam be hardwired in a Ford Maverick?
Yes. A hardwire kit can be connected to constant power, ignition-switched power, and a chassis ground point for a clean installation with parking mode capability.
Should a rear dash camera cable go in front of the airbag?
No. Route the cable behind the side curtain airbag and away from its deployment path. Do not place wiring across the front of an airbag.
Do I need parking mode to hardwire a dash cam?
No. You can hardwire a camera for a cleaner power connection and turn off parking mode if you do not want to use it.
Is a rear dash camera useful on a Ford Maverick?
Yes. A rear camera records incidents behind the truck and can provide critical evidence after rear-end collisions or other disputes.