iRoad Powerpack Pro 15 Unboxing: The Biggest Dash Cam Battery Pack Yet?
If you thought dash cam battery packs had already hit their size limit, the iRoad Powerpack Pro 15 says otherwise. iRoad took the Powerpack Pro 12 and pushed it further, bumping capacity up to 15,000mAh, or 15Ah. For anyone serious about parking mode and longer recording time, that gets interesting very quickly.
The whole point of a battery pack like this is simple: keep your dash camera powered while parked without leaning on your vehicle battery the whole time. If that is the part you are trying to solve, it helps to understand how dash cams record while parked and why a dedicated power source can make such a big difference.
What the Powerpack Pro 15 actually is
The iRoad Powerpack Pro 15 is a dedicated dash cam battery pack designed to power a parking mode setup after the vehicle is turned off. Compared to the previous Pro 12, this new version increases capacity while keeping the installation concept familiar.
That is one of the nicest things about it right away. It is bigger where it counts, but iRoad did not reinvent the whole system. The cables, inputs, and general install logic stay very close to what existing iRoad users already know.
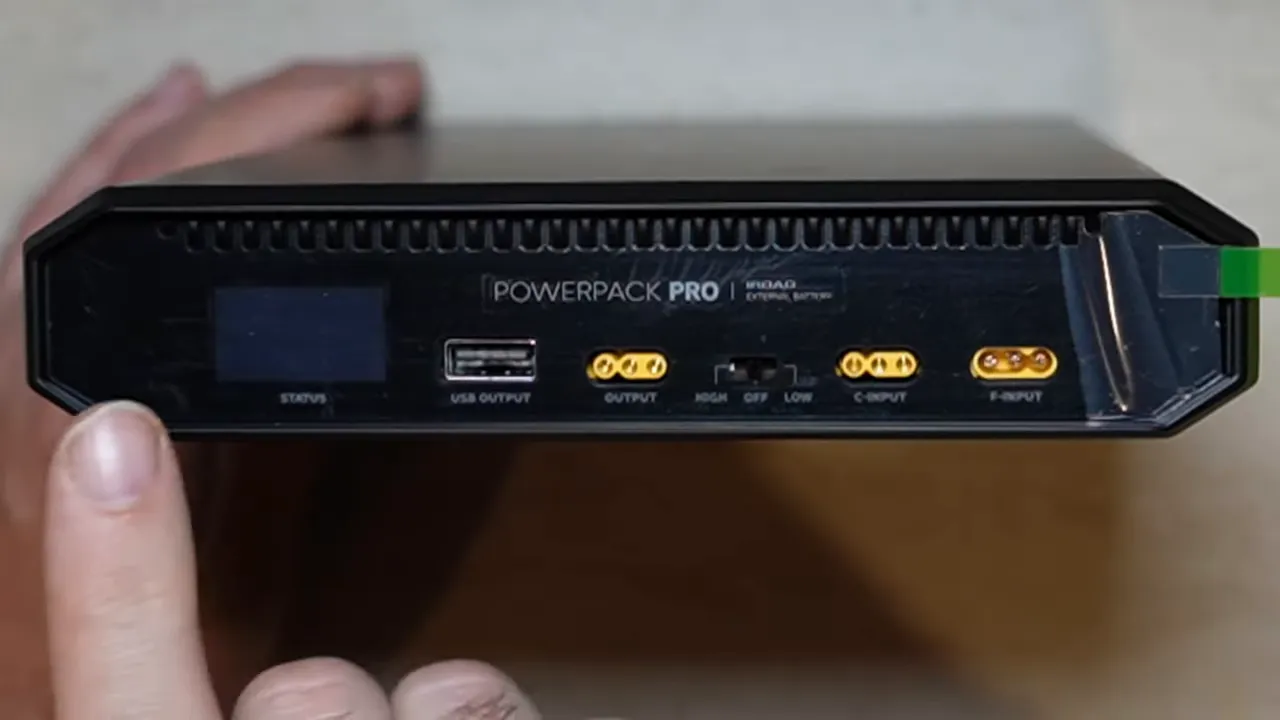
Main panel layout: inputs, outputs, and LCD screen
The main side of the unit is where everything happens. You get:
- F input for high-current charging
- C input for cigarette lighter charging
- Dash cam output for your hardwire cable connection
- USB output for accessories like a hotspot or charging smaller devices
- LCD display to show charging and operating status
- Off / Low / High switch to match the charging method being used
F input: the high-current charging side
The F input is the one you use for proper hardwired charging. This is meant to be connected to a higher-current source, typically a 15A or 20A source, so the battery pack can charge the way it is intended to.
If you are installing this as part of a full parking mode setup, this is the connection most people are going to care about. It is the hardwire method and the one associated with the unit’s high input setting.
C input: cigarette lighter charging
The C input is for a cigarette lighter style charging cable. That cable does not come in the box and is sold separately, but it is available as an option. It works, but it charges more slowly than the hardwired high-current method.
This can be useful for people who want a simpler install path, but there is one important detail: if you are using the cigarette lighter input, you must set the switch to the correct input mode. If the switch is left on high input, it will not charge properly through the low-current method.
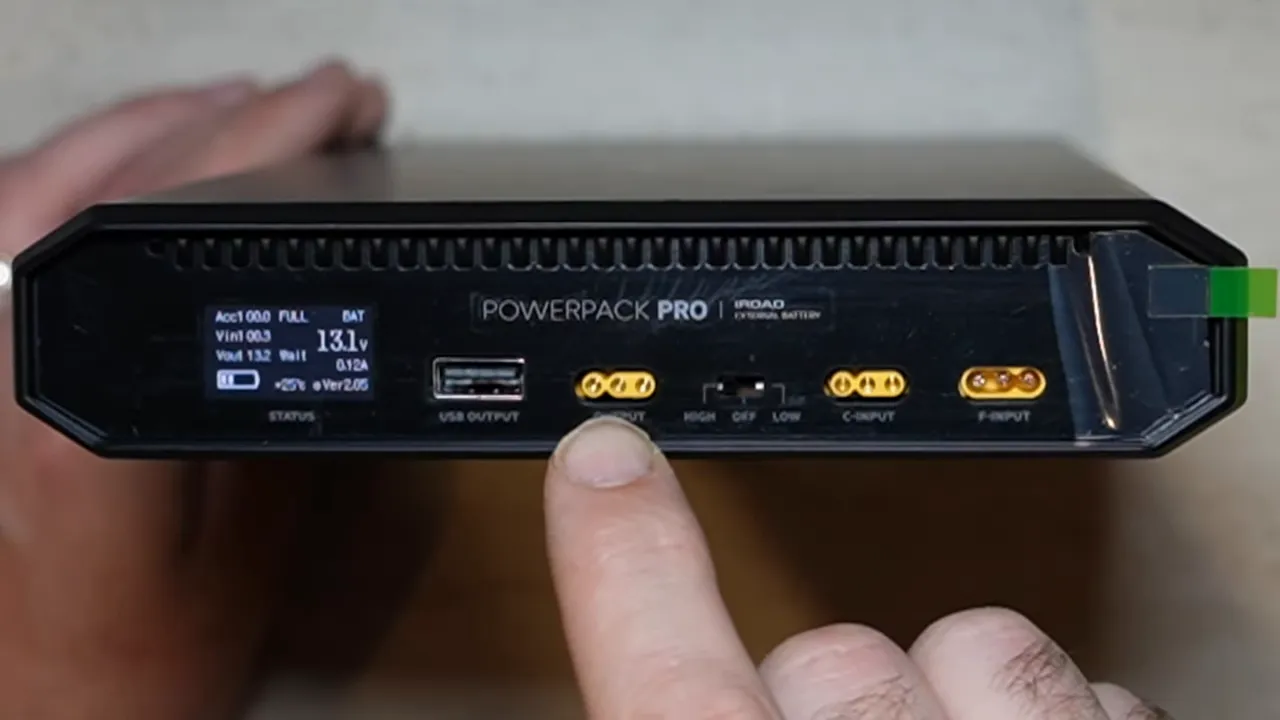
Why the input switch matters
The side switch has three positions:
- Off
- Low
- High
Use Low for cigarette lighter or home charger style input. Use High for hardwired high-current charging. That sounds basic, but it is exactly the sort of little setup detail that causes confusion if missed.
The LCD display helps here as well, since it gives you status information so you can confirm whether the battery pack is actually charging.
Dash cam compatibility: what works and what you need
The output side is designed to feed a dash camera directly, but there is a condition: the camera needs to use a three-wire hardwire cable.
That means this is not about plugging in a standard USB-powered dash cam and calling it a day. You need a proper hardwire setup for parking mode operation.
Brands commonly using a compatible three-wire input include:
- iRoad
- Thinkware
- Vueroid
- GNET
- FineVu
- Blackvue
For Viofo, you would need a compatible hardwire cable such as the Viofo HK4 hardwire kit or HK6 style equivalent depending on the camera. Without that three-wire hardwire connection, the battery pack will not integrate properly for parking mode.
If you are still sorting out the difference between event recording, time-lapse, and other parked recording options, this guide on dash cam recording modes helps make sense of how the power setup and recording mode work together.
What comes in the box
Inside the box, you get the basics needed to get started:
- User guide
- Hardwire input cable
- Output cable for the dash camera
- Three fuse taps
- Two Velcro mounting pieces
User guide
Yes, most people toss manuals aside. But in this case, the guide is actually useful because it explains the LCD display indicators in detail. Since the battery pack has multiple inputs and operating modes, it is worth knowing what the screen is telling you.
Hardwire input cable
The included hardwire cable plugs directly into the F input. This is your charging cable when the battery pack is hardwired into the vehicle.
The wire functions are straightforward:
- Thicker wire goes to constant 12V
- Smaller wire goes to ignition
- Ground wire goes to ground
That thicker constant wire makes sense, because this is the higher-current charging side.
Output cable
The output cable has three wires as well:
- Yellow = constant power
- Red = ignition
- Black = ground
There is one important compatibility note for Viofo setups. Viofo reverses the usual colour convention on some hardwire cables, so:
- The battery pack’s yellow wire connects to Viofo’s red
- The battery pack’s red wire connects to Viofo’s yellow
- Black goes to black
If this part is wired incorrectly, your parking mode will not work properly. So this is not one of those “close enough” installs. The wire mapping needs to be right.
Fuse taps
The package includes three fuse taps, but honestly, that is pretty limited. A better approach is to have a proper assortment on hand so you are covered across more vehicle fuse types.
That is why using a broader kit such as the SDS fuse tap kit makes a lot more sense in the real world. It gives better vehicle coverage than relying only on the few adapters included in the box.
Velcro mounting pieces
The Powerpack Pro 15 includes two Velcro pieces that stick to the bottom of the battery pack so you can mount it to carpet or another flat surface.
One thing to note here is that there are no mounting feet or tabs built into the unit. Mounting is basically Velcro-based, so placement matters.

A big advantage: Pro 12 and Pro 15 cable compatibility
This is one of the smartest parts of the design. The Powerpack Pro 15 uses the same cabling as the Powerpack Pro 12.
That means if you already have a Pro 12 setup and later upgrade, the accessories are interchangeable, including:
- Hardwire cable
- Home charger
- Cigarette lighter charging cable
That matters more than it might seem. If a customer has an older Pro 12 installed and it ever needs replacement years down the road, swapping to a Pro 15 is much easier because the existing wiring can remain in place.
That kind of cross-compatibility saves time, reduces installation hassle, and makes future upgrades a lot cleaner.
If you want a broader look at how battery packs compare across the market, this ultimate guide to dash cam battery packs is a good companion read.
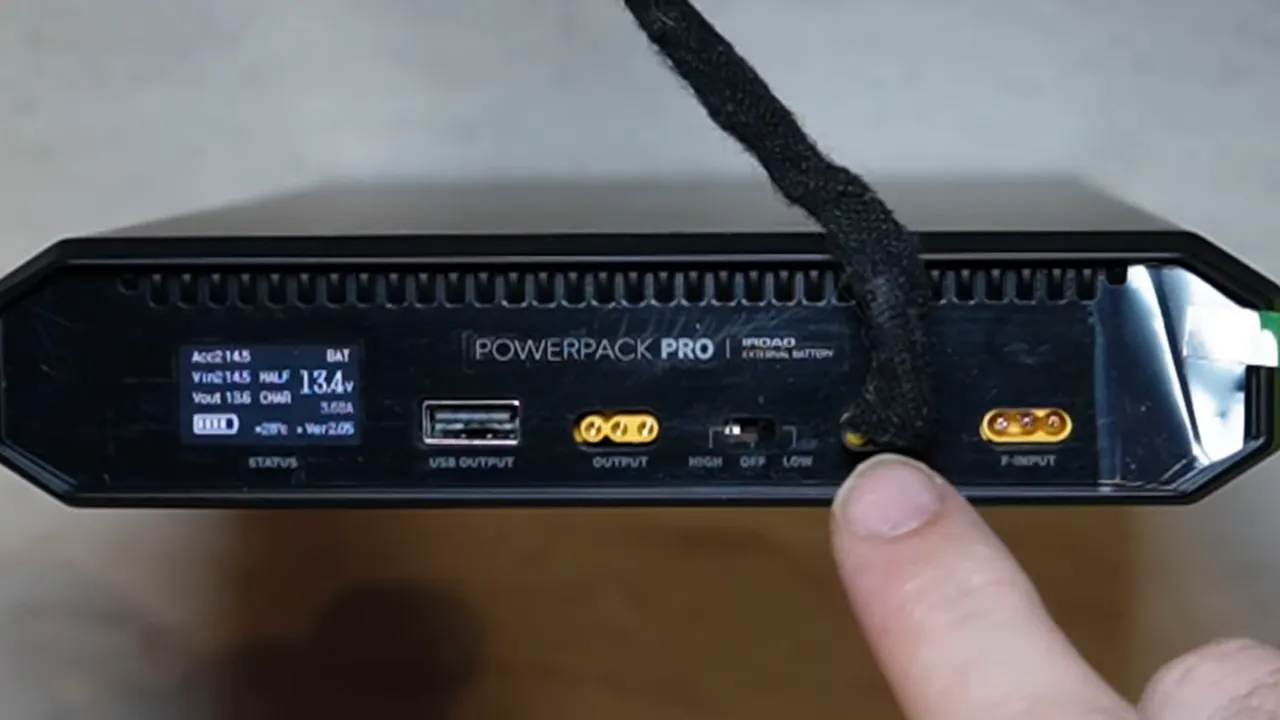
Charging with the home charger
If you already own the home charger for the Pro 12, good news: it also works with the Pro 15.
Plug it in, set the unit to the correct input mode, and the LCD display shows charging activity. The same goes for the cigarette lighter charging cable. Both are compatible, provided the switch is set to Low input.
That point is worth repeating because it is easy to miss:
- Low input = home charger or cigarette lighter charging
- High input = hardwired charging only
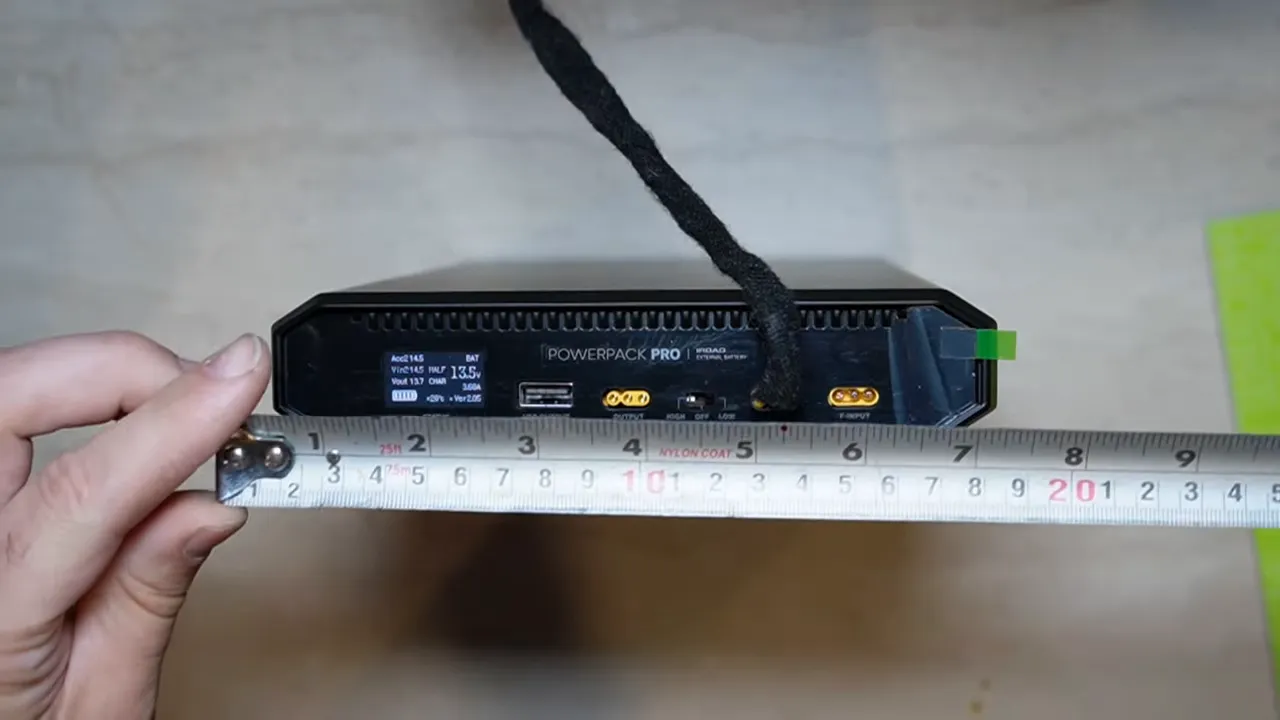
Dimensions: will it fit under your seat?
Size is always a practical question with dash cam battery packs, especially if the goal is to tuck everything neatly under a seat.
The approximate dimensions shown were:
- Width: about 7 inches
- Thickness: about 1.5 inches
- Length: about 10.5 inches
Those dimensions make it large, no question, but still very manageable for under-seat installs in many vehicles.
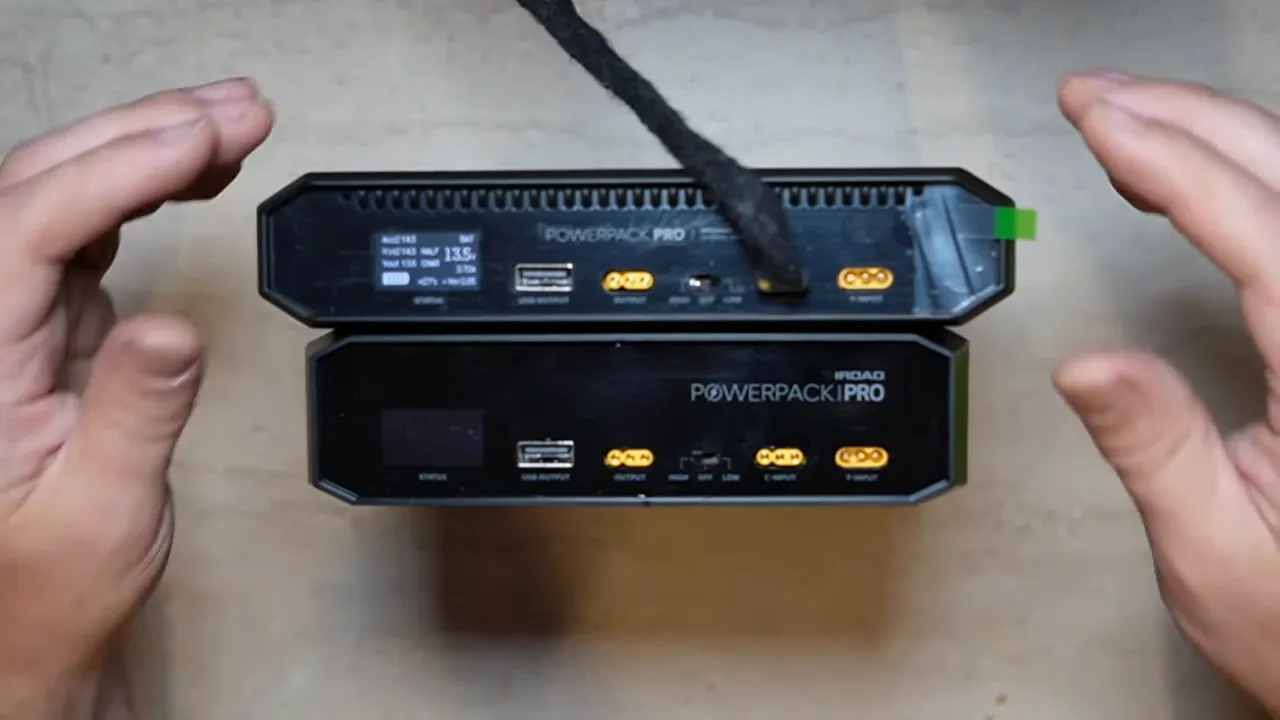
Pro 15 vs Pro 12: what changed physically?
Compared to the older Powerpack Pro 12, the Pro 15 is:
- A little thinner
- A little wider
- Only slightly longer
That shape change is actually useful. Even though the Pro 15 is wider, being less deep can help with under-seat placement. Sometimes a small reduction in thickness is exactly what makes the difference between a tight fit and an easy fit.
In other words, this is not just a bigger brick. It is bigger in capacity, but the physical redesign may actually make installation easier in some vehicles.
Who this battery pack makes the most sense for
The iRoad Powerpack Pro 15 is aimed at someone who wants longer parking mode runtime and does not want to compromise on power capacity.
It makes the most sense if:
- You park for long periods and want extended dash cam recording time
- You already use a three-wire hardwired dash cam system
- You are upgrading from a Powerpack Pro 12 and want easy compatibility
- You want a dedicated battery pack instead of relying on the vehicle battery alone
If that sounds like your setup, the iRoad Powerpack Pro 15 product page is the best place to check current availability and details.
Final thoughts
The iRoad Powerpack Pro 15 really does look like one of the biggest dash cam battery packs currently available, and more importantly, it feels practical rather than oversized just for the sake of it.
You get more capacity than the Pro 12, a slightly refined shape, familiar wiring, and nice compatibility with existing iRoad accessories. That last part is huge. When companies keep the same ecosystem working across generations, everybody wins.
For anyone building a serious dash cam parking mode setup, especially with Thinkware, iRoad, Vueroid, GNET, FineVu, or a properly hardwired Viofo, this is a battery pack worth paying attention to.
If you need help choosing the right battery pack or want a clean professional install in Vancouver or Toronto, you can always check the dash cam installation service options as well.

