
2026 Lexus RX350h Dash Camera Battery Pack Installation (iRoad Powerpack Max 8 + Thinkware U3000)
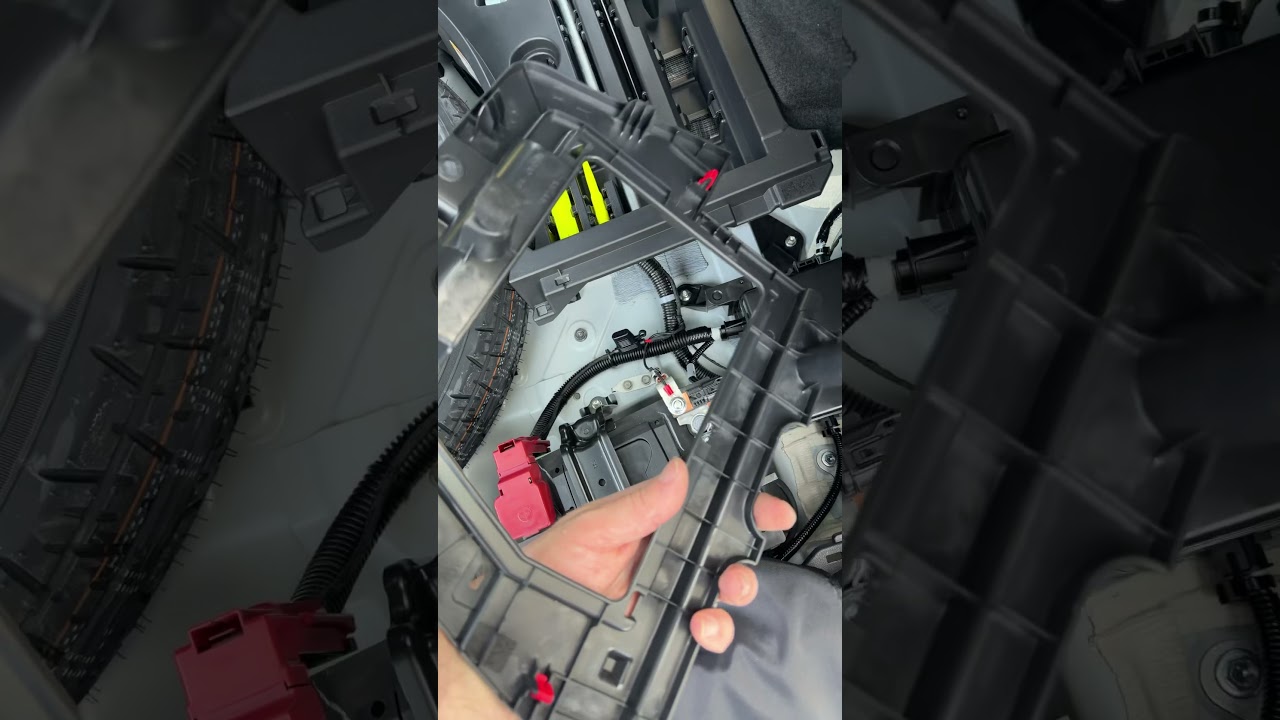
Installing a dash cam battery pack is one of those upgrades that sounds technical until you break it down into simple, physical steps. For the 2026 Lexus RX350h, the good news is that there is a practical setup built into the vehicle: a battery location in the hatch area that you can access for constant power and grounding.
This guide walks through how a safe, clean installation is done using a three-wire dash cam battery pack, specifically the iRoad Powerpack Max 8, paired with a Thinkware U3000 Pro front and rear dash cam.
What you are installing (and why the wiring matters)
The configuration covered here is:
- iRoad Powerpack Max 8 dash cam battery pack
- Thinkware U3000 Pro front and rear cameras
- Power connection made directly to the vehicle battery in the hatch
- Ignition trigger taken from a fuse tap in the rear fuse box
The main idea is to keep the installation protected, tidy, and factory-like by using proper mounting locations and routing methods. Rather than tapping random points, the power is handled in a way that stays secure and organized.
Plan your power and trigger points
The most important part of this installation is knowing what wire does what:
- Constant power: connected to a known always-on supply point at the battery
- Ground: connected to a solid ground bolt
- Ignition (trigger): fed through an ignition fuse tap inside the rear fuse box
On the Lexus RX350h hatch battery area, constant power and ground are accessible in a straightforward way, and the battery connections can be clipped back on correctly after the installer work is done.
Step-by-step: Connect the battery pack in the hatch
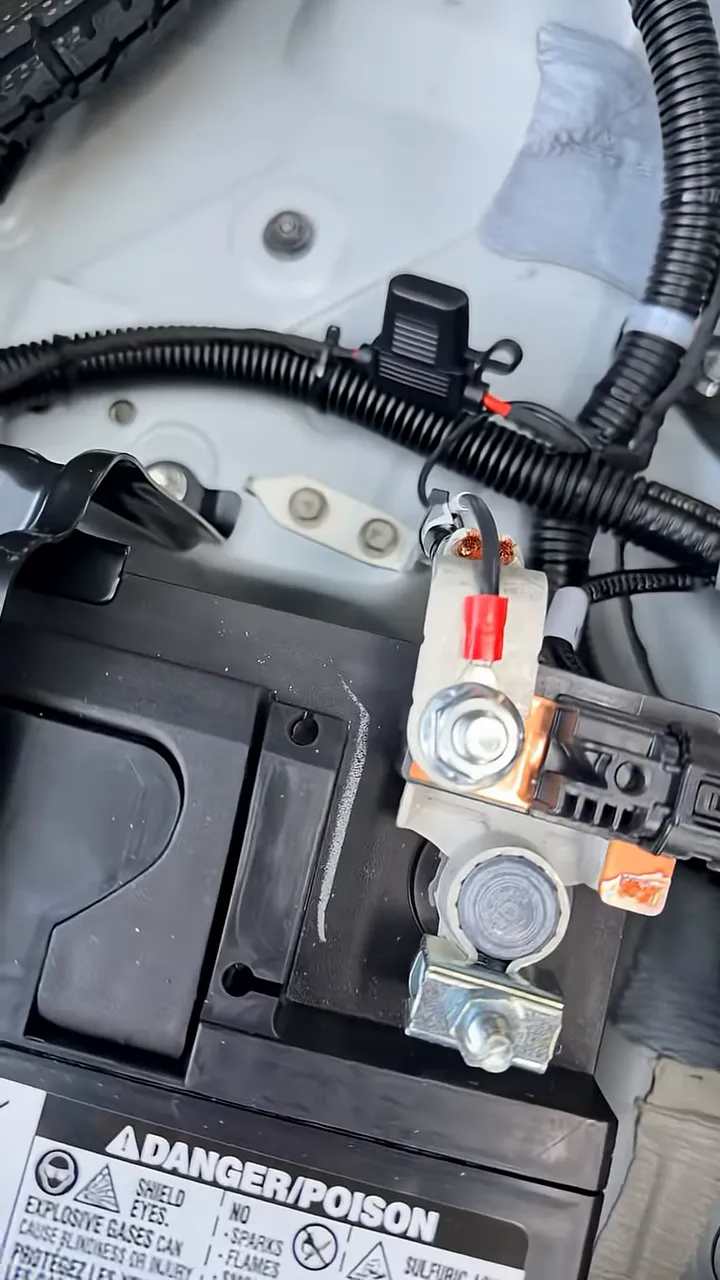
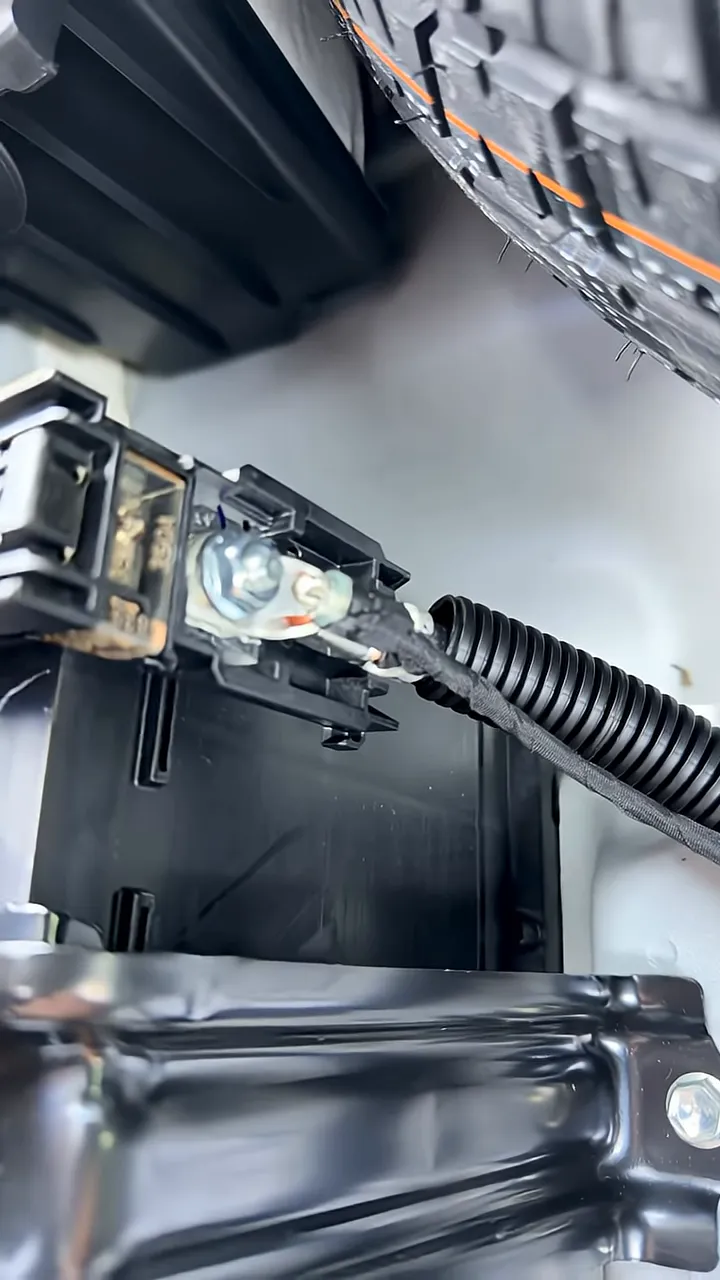
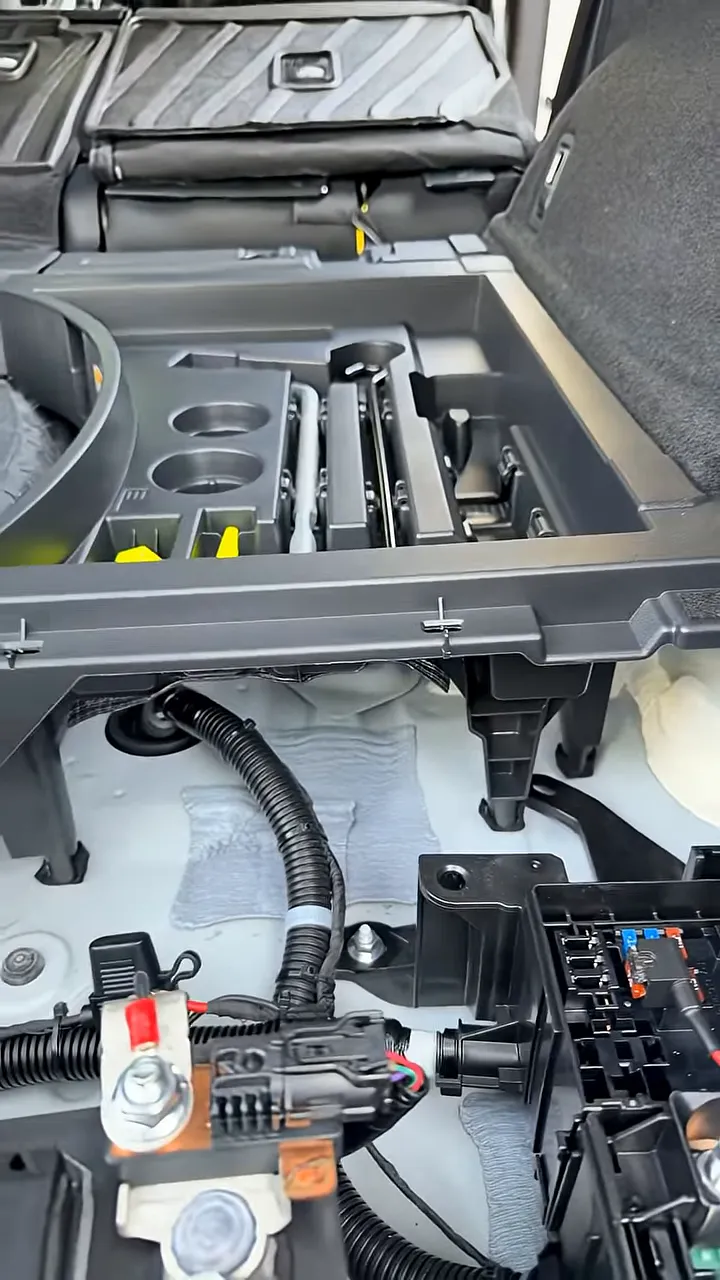
1) Use the constant power and ground bolts in the hatch battery area
Constant power is hooked up to the 10 mm bolt, and ground is attached to the ground bolt. The installer also takes care to secure the wiring so it stays neat and follows the vehicle’s existing layout.
In practice, the wiring is:
- Connected using appropriate points at the battery area
- Tied into place with factory-style tie straps alongside existing wiring
- Left protected and organized before closing everything up
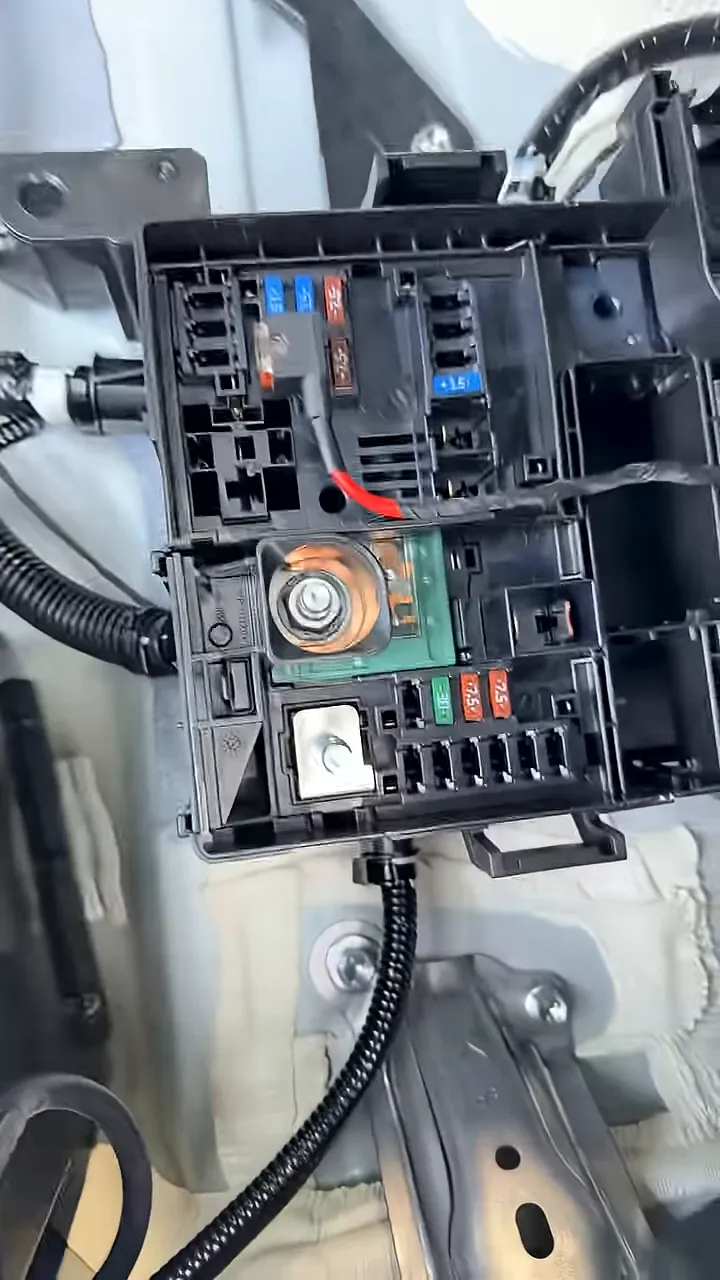
2) Run the ignition wire using a fuse tap in the rear fuse box
The ignition trigger is not taken directly from the battery. Instead, the installer uses an ignition fuse tap inside the rear fuse box.
This approach keeps the ignition reference controlled and tidy, and it avoids messy or improvised power hunting.
3) Reinstall and secure the battery terminal connection
Once the battery connections are made, the positive battery terminal connection is clipped back on. The goal is for the setup to be fully protected and properly secured so nothing is left exposed or loose.
Then the work can shift from wiring to reassembly.
Step-by-step: Reassemble the rear panels and hide the battery pack
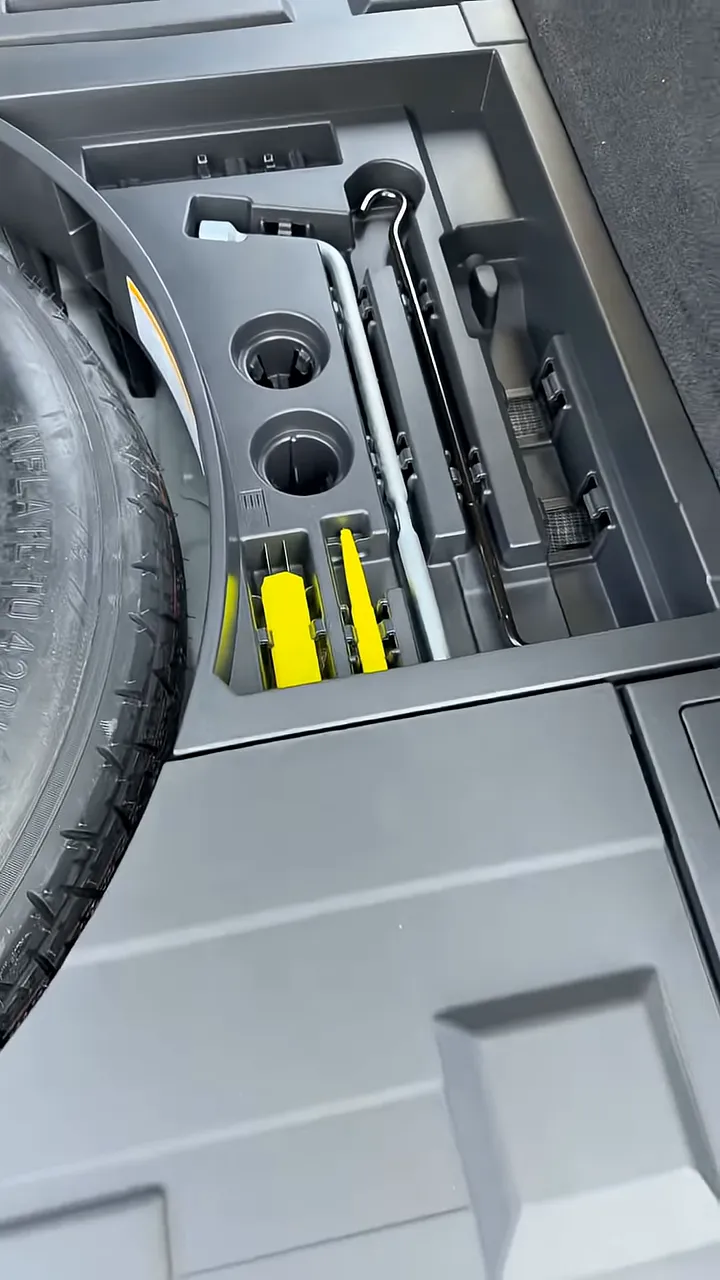
4) Slide in the jack accessory kit and position the battery pack
The battery pack is designed to be hidden under the rear paneling using the available space. The jack accessory kit slides into place, and the battery pack ends up completely hidden underneath.
This is one of the reasons this installation method is so appealing on newer hybrid vehicles. Instead of leaving the pack exposed or in an awkward spot, it is tucked away where it fits the vehicle layout.
5) Refit the relay and fuse box cover
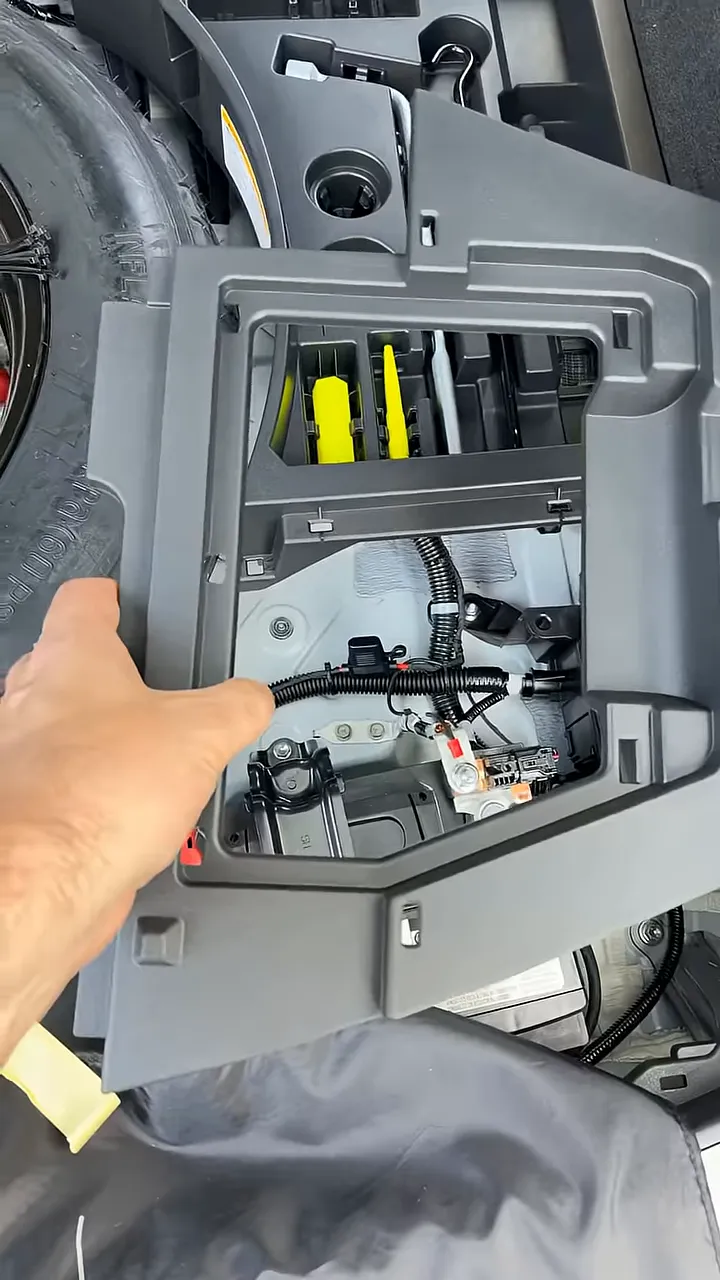
With the wiring complete, the relay and fuse box cover is put back on. The panel alignment is straightforward:
- Line up the panel
- Use the clips (noted as having multiple clip points, including one in the corner)
- Press the panel into place
The installer emphasizes that the process is simple once the panel is aligned correctly and the clip points are seated.
6) Reinstall the final panels so everything sits flush
After the relay and fuse box area is covered, the last panel goes back in place using the visible clips. A final corner cover is also installed, and when the inner paneling goes over top, it sits flush with the rest of the area.
The end result is a build that looks factory-finished: the battery pack is hidden, the wiring is secured and protected, and the access panels are reassembled properly.
When this method is the right choice (three-wire battery packs)
This installation method is specifically recommended for three-wire battery packs. In this setup, the three-wire design is described as completely safe to install in the back of the vehicle using the way shown.
If your goal is a clean, hidden installation in the hatch area, using the correct wire configuration is the deciding factor.
Important warning: Do not use two-wire packs with this exact approach
If you are planning to use one of the two-wire battery packs, this exact installation approach is not recommended.
The reason is simple: two-wire battery packs require a different installation method. Attempting to use the same routing and connection strategy can lead to the wrong behavior or an unsafe setup.
Three-wire packs are the match for the wiring method described here.
Key takeaways for a clean Lexus RX350h dash cam battery install
- Connect constant power to the hatch battery’s constant power point (10 mm bolt) and ground to the ground bolt.
- Use an ignition fuse tap in the rear fuse box for the trigger wire.
- Tie strap the wiring neatly using factory-style routing so it stays secure.
- Hide the battery pack under the rear paneling using the available space (battery pack ends up concealed).
- Reassemble panels carefully so clips seat correctly and the final look is flush and factory-like.
- This method is intended for three-wire battery packs, not two-wire packs.
If you are working on a newer Lexus hybrid and want a professional-looking dash cam power setup, the biggest win is getting the wiring strategy right: constant power at the hatch battery, ignition via a fuse tap, then a properly organized, fully concealed reassembly.