2026 Mazda CX-5 Dash Camera Installation Notes
The 2026 Mazda CX-5 is not just a carryover when it comes to dash cam installation. This is the first one we’ve done with a VIOFO dash camera, and right away a few things stood out. Mazda changed enough on this vehicle that you cannot assume the older CX-5 process will transfer over exactly the same.
The good news is that some of the core routing points are still familiar. The less good news is that key areas like the fuse box, the mirror housing, and some cable retention points have changed enough that you need to adjust the install plan.
What changed on the 2026 Mazda CX-5
The first thing that jumps out is the interior. There is now a much larger centre display, almost Tesla-sized compared to the older setup. The steering wheel design is different too, but from an installation standpoint the biggest change is the fuse box layout.
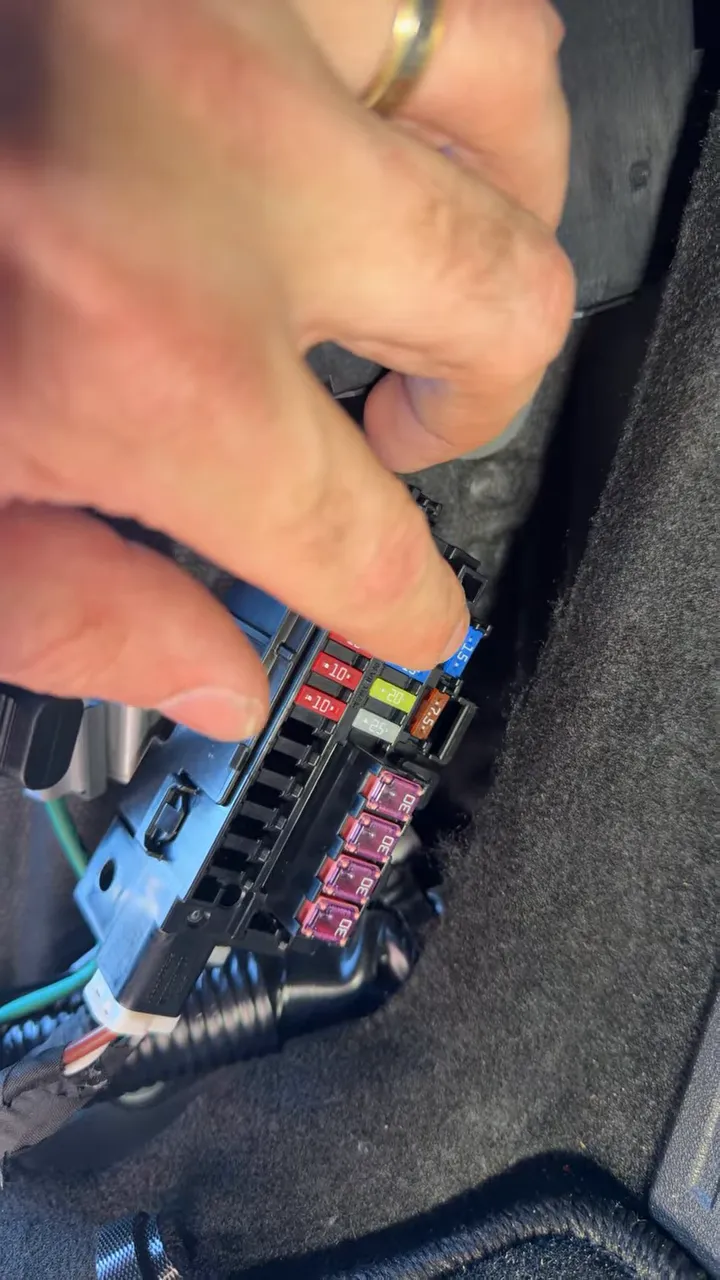
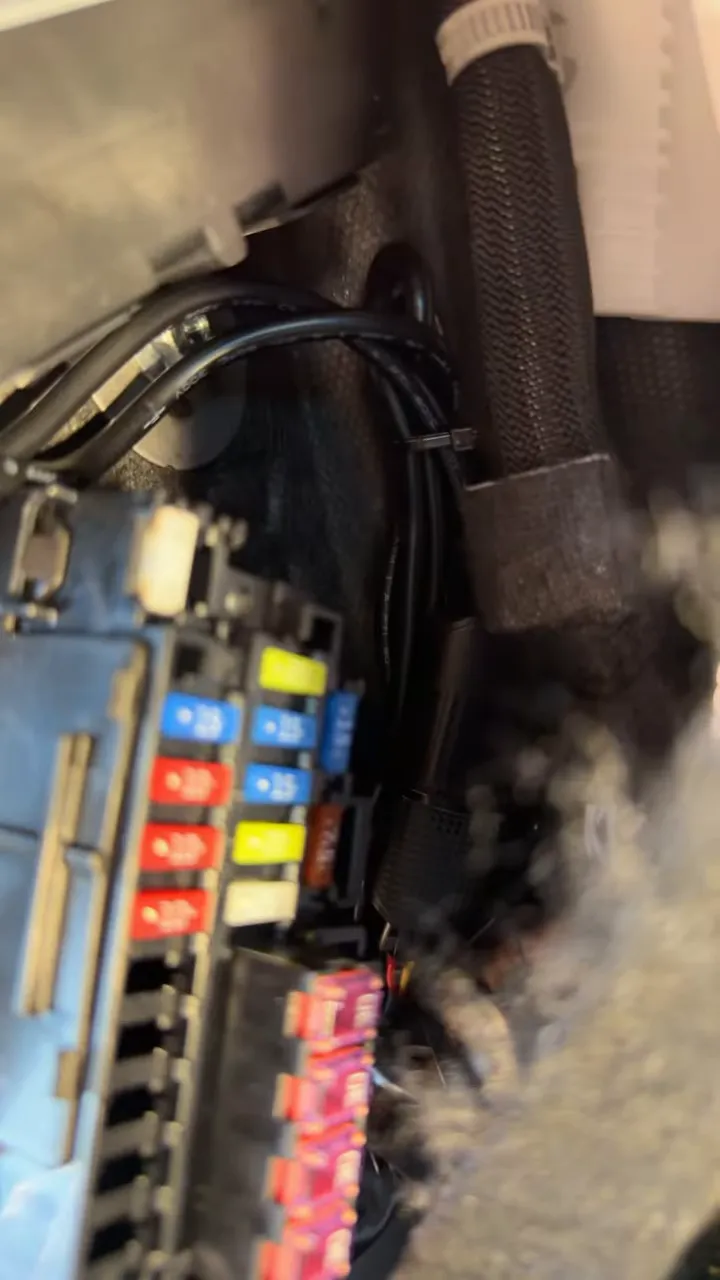
On this 2026 model, the fuse box has been completely revised. That matters because fuse selection is one of the most important parts of a clean hardwire install, especially if you want proper ignition-switched power behaviour.
On this vehicle, both the 15 amp and 7.5 amp fuses identified during testing were ignition fuses. If you are choosing between the two, the recommendation here is to use the 15 amp fuse, which appears to be the power outlet circuit.
Rather than using a simple tap in the old familiar spot, the hardwire connection on this CX-5 was made to the backside of the fuse box, tying into the wiring coming out from that area.
If you want a more general breakdown of fuse selection and hardwire basics, this guide on how to hardwire a dash cam is a helpful companion piece.
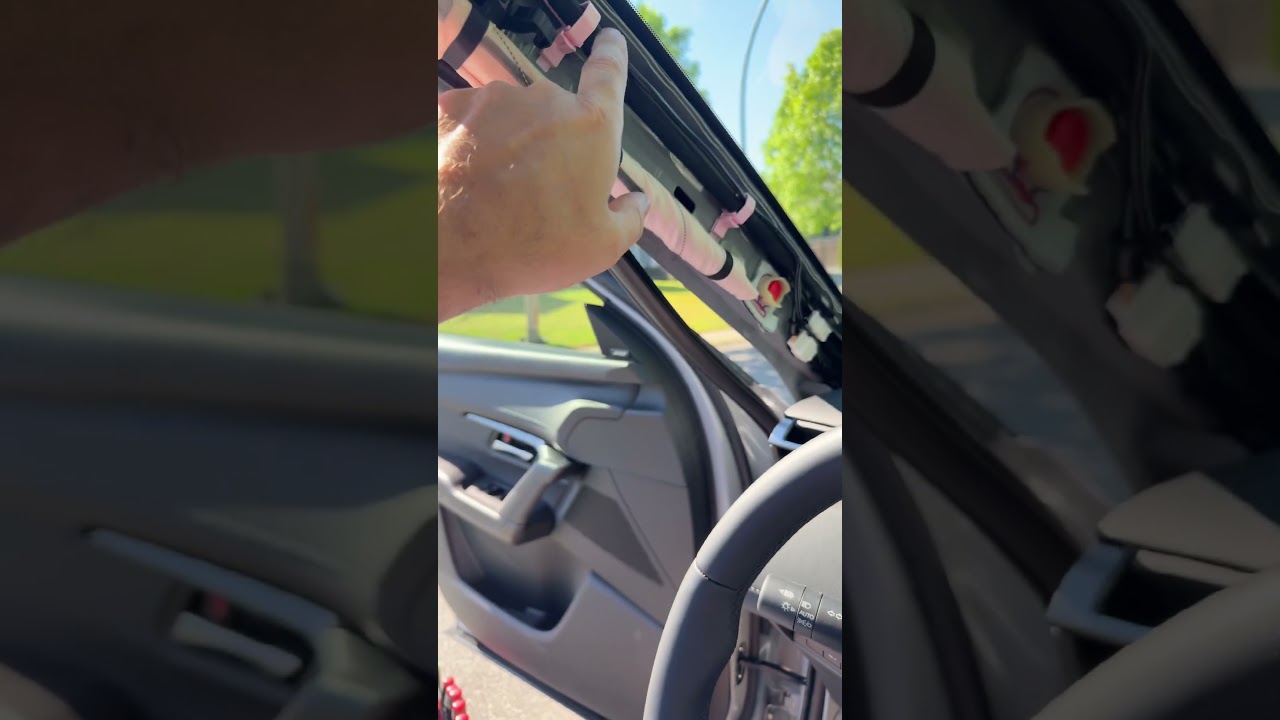
The A-pillar is still basically the same
One thing Mazda did not really change is the A-pillar removal process. If you’ve worked on a previous-generation CX-5, the disassembly approach here is familiar. That means the cable can still be routed down the pillar in the same general way.
That said, there is a small but important difference. The little built-in clips used to tuck and secure the wire are reduced on this model. On the prior generation there were three. On the 2026 CX-5 there are only two.
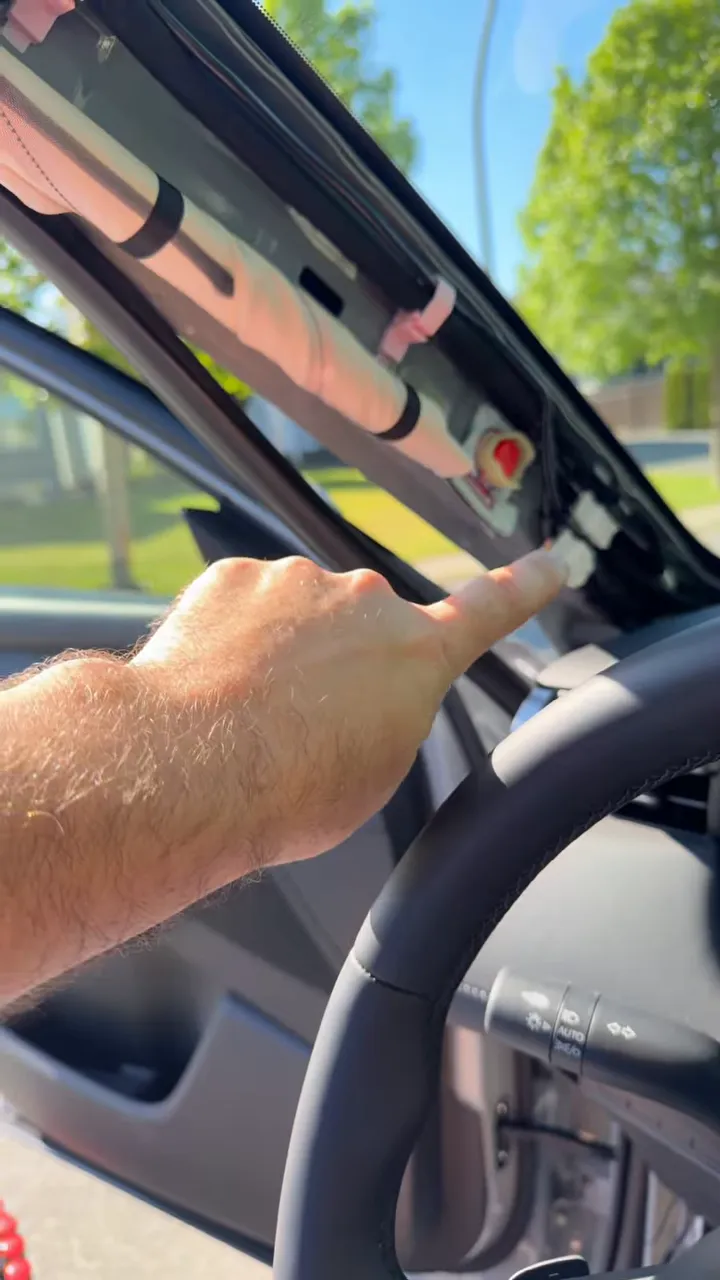
That does not stop the install, but it does mean the wiring needs a bit of extra support. In this case, a couple of tie straps were used to hold everything securely in place.
Whenever routing dash cam wire through the A-pillar area, the big concern is always safety around the airbag system. The goal is to keep the wiring hidden and secure without interfering with airbag deployment. If that’s an area you want more detail on, this article on dashcam wiring by airbags in a vehicle is worth reading.
Front camera placement is different because of the mirror housing
This is one of the biggest practical changes on the 2026 Mazda CX-5.
The housing behind the rearview mirror is quite different from the previous version. On the older CX-5, there was a convenient square area that allowed the front dash camera to be mounted neatly without causing any problems with the mirror.
That does not work the same way here.
If the front camera is mounted in the old preferred location, it will actually hit the mirror and interfere with proper operation. So for this vehicle, the front VIOFO camera needs to move over toward the passenger side.
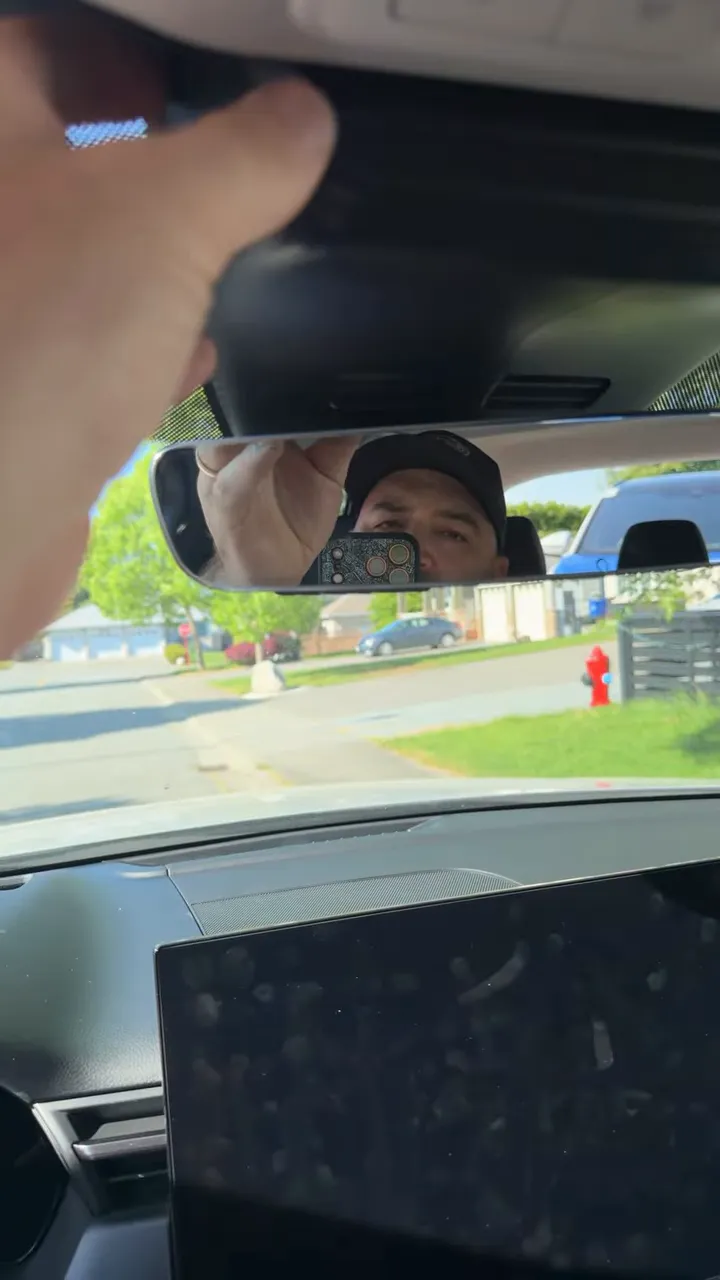
That new position keeps the mirror clear and still gives a proper mounting location for the dash camera. It is a small change, but it is exactly the kind of thing that can ruin an install if you assume the old placement still works.
Where the extra wiring gets hidden
A clean install is not just about getting power and mounting cameras. It is also about where all the extra cable ends up.
On this CX-5, the excess wiring was tucked into a small cubby area so it stays hidden. That allows the kick panel to go back on properly without bulging or pinching anything.
Once the wiring was stored, the following trim pieces went back into place:
-
The A-pillar trim
-
The kick panel
-
The sill plate
That leaves the cabin looking factory again, which is always the goal.
Running the rear camera cable to the hatch
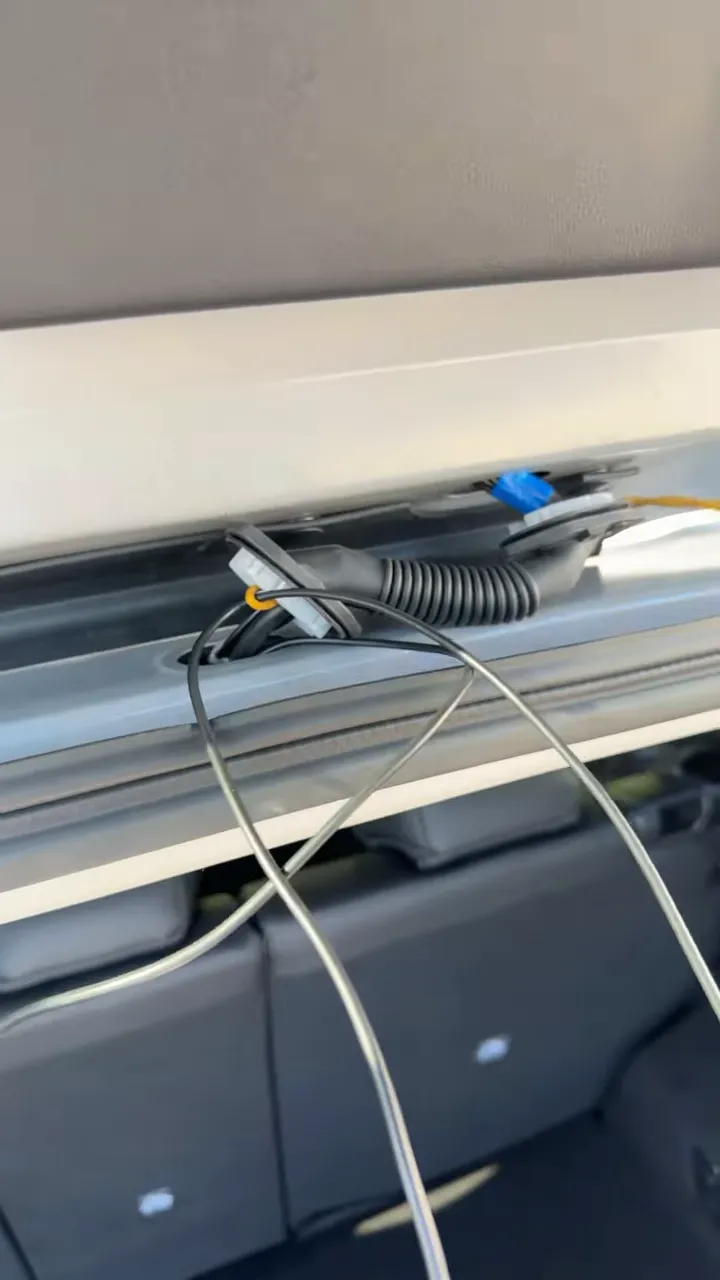
The rear cable route on the 2026 CX-5 is refreshingly familiar. Mazda kept the same general setup in the back, including the same grommet arrangement, so the cable path is basically unchanged from the previous generation.
There is also a panel that still needs to be removed just like before.
When routing through this section, it is important to work carefully with the tabs. The tabs sit in the same area, and they need good contact when being released or reinstalled. Push too hard and you risk breaking them.
A fish tool was used to help pull the cable through, which is often the cleanest way to get rear camera wiring through tighter body sections without damaging trim or weather seals.
Rear hatch panel removal and cable management
At the hatch, the rear interior panel is held on by seven clips. Once that panel is removed, the rear camera cable can be routed neatly inside.
The cabling was then:
-
Run into the hatch area
-
Tie strapped alongside factory wiring
-
Secured so it does not move around
-
Excess cable tied up inside the hatch
This is the kind of detail that keeps an install from rattling later or looking like an afterthought. A proper dash cam install should feel invisible once everything is back together.
Rear camera mounting
Once the cable was fully routed and secured, the rear camera was mounted at the back glass. With the hatch wiring tied in cleanly and the extra length hidden away, the rear section was finished off just as neatly as the front.
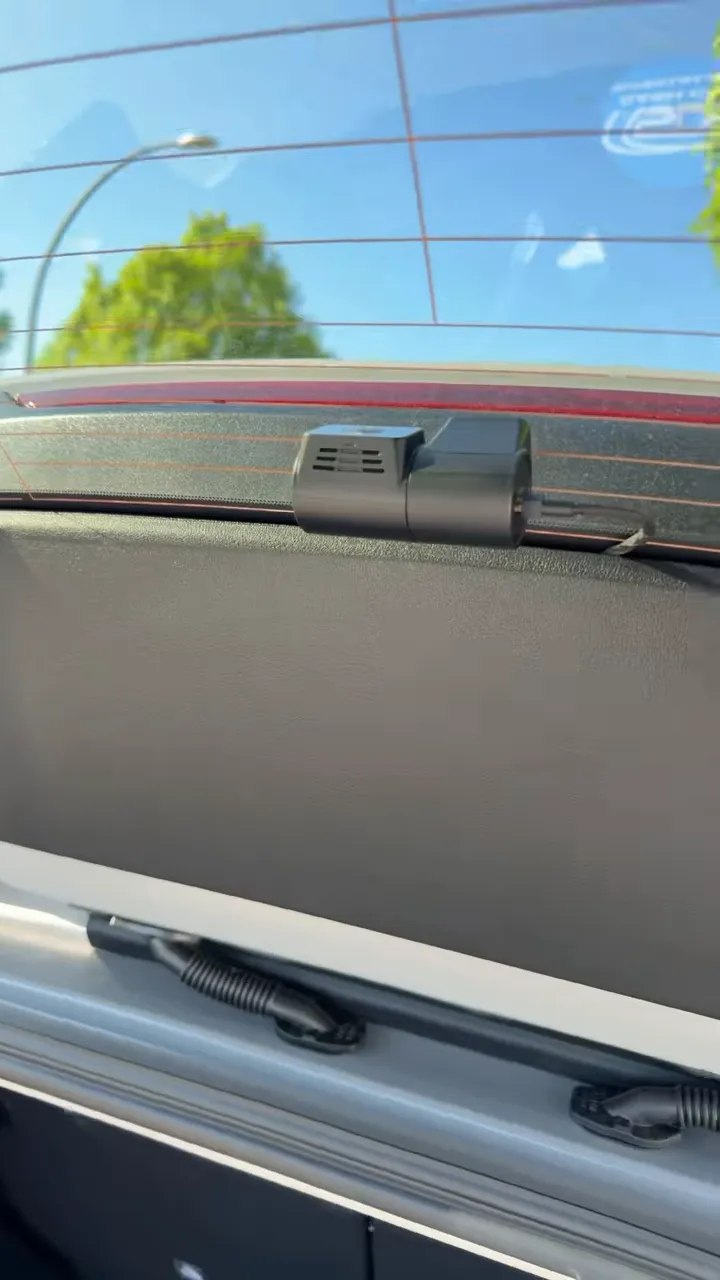
At that point, the VIOFO dash cam installation was complete.
Key takeaways for a 2026 Mazda CX-5 dash cam install
If you are installing a dash camera in a 2026 Mazda CX-5, here are the main things to keep in mind:
-
The fuse box is different. Do not assume previous CX-5 fuse locations or access points still apply.
-
The 15A and 7.5A fuses tested as ignition fuses. The 15A power outlet fuse is the recommended choice here.
-
The A-pillar removal is still the same. That part of the process remains familiar.
-
There are fewer wire-retention clips in the A-pillar. Plan on using a couple of tie straps.
-
The front camera cannot go in the old spot behind the mirror. The revised mirror housing means the camera should be mounted more toward the passenger side.
-
The rear routing is largely unchanged. The grommet and rear panel process are similar to the previous generation.
-
The hatch panel uses seven clips. Remove it carefully and secure the cable to factory wiring for a clean finish.
When a newer generation needs a new approach
This install is a good reminder that even when a vehicle keeps the same name, the details can shift enough to matter. The 2026 Mazda CX-5 still has some familiar routing points, but the revised fuse box and front mirror area mean this is not just a copy-and-paste install from the older model.
If you want a professional install that hides the wiring, hardwires the camera properly, and avoids trial and error on new vehicle layouts, Safe Drive Solutions offers dash cam installation services in Vancouver and Toronto.
For anyone planning a front and rear setup in this vehicle, taking the time to adapt to these changes is what makes the end result look right and work right.

