
2026 Toyota RAV4 Dash Camera Install: Upgrade Your Built In Drive Recorder
The 2026 Toyota RAV4 comes with a built in drive recorder, but that does not automatically make it the best setup for every driver.
For a lot of people, there are two big issues. First, the factory system is usually pretty basic when it comes to video quality. Second, getting it going can involve profile creation and privacy settings that some owners simply do not want to deal with.
That is exactly why upgrading to a dedicated front and rear dash camera still makes a lot of sense on a brand new RAV4.
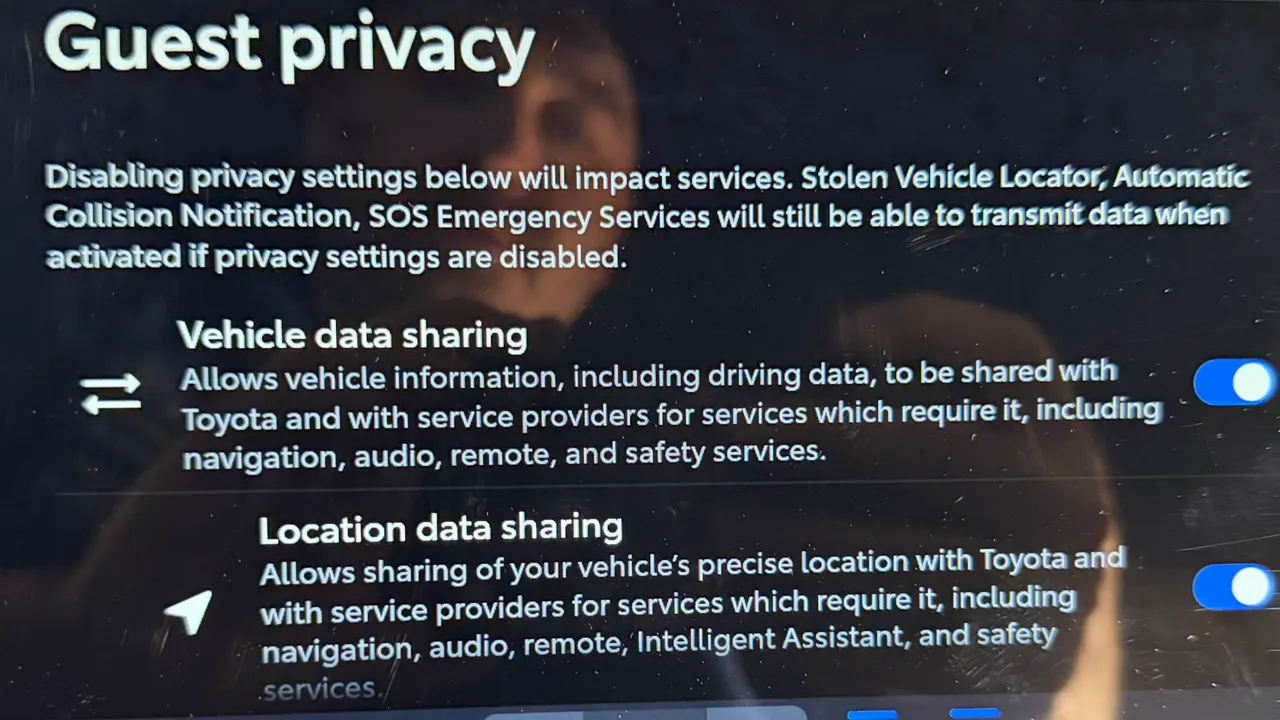
On this RAV4, enabling the built in drive recorder leads straight into profile and privacy choices. The menu clearly shows options for vehicle data sharing, location data sharing, and voice data sharing. If that gives you pause, you are not alone.
Some drivers are perfectly fine using the factory recorder. Others would rather have a separate dash cam that records locally, gives them better image quality, and does not tie the experience into broader connected services.
That is what this install solves. We are fitting a VIOFO A229 Plus front and rear dash camera into a 2026 Toyota RAV4 and doing it properly with hidden wiring, safe airbag routing, and a clean finish.
Why upgrade the 2026 RAV4 drive recorder?
The built in recorder in this Toyota covers the basics, but basic is the key word.
In real world use, factory systems like this are often lower resolution than a dedicated aftermarket dash cam. That matters when you want better detail, cleaner footage, and a stronger chance of capturing what actually happened on the road.
A proper front and rear dash cam upgrade gives you:
- Higher video quality than the basic factory recorder
- Rear camera coverage, not just front coverage
- Dedicated recording built around evidence capture
- More control over installation and power options
- Parking mode potential when wired correctly
If you are still weighing the pros and cons of different power methods, this guide on 5 ways to install a dash cam breaks down the most common approaches.
Starting at the front: removing the mirror housing
The install begins around the rear view mirror housing. On the 2026 RAV4, that trim needs to come down carefully.
The trick here is to push downward while moving the mirror stem fully down, then work the housing loose. There are clips at the top that lock it in above the headliner, so forcing it the wrong way is a great way to create a headache.
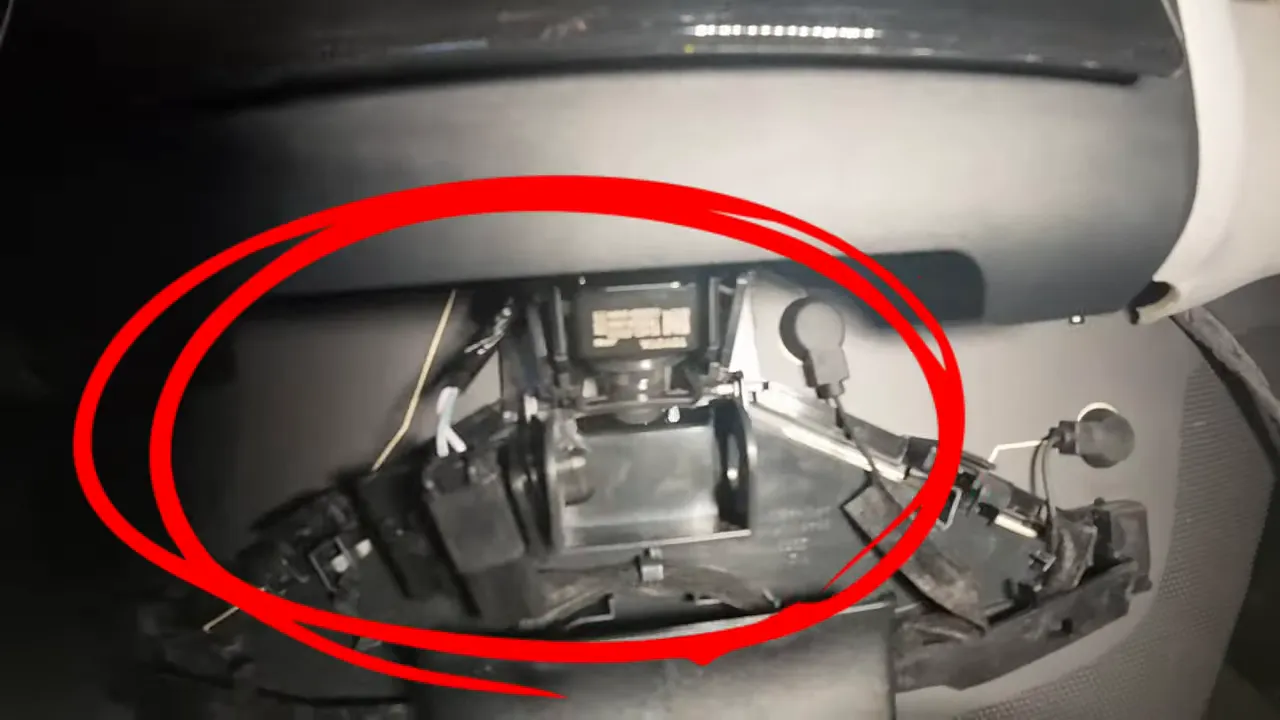
Once that housing is off, you can see why cable routing matters so much on this vehicle. The driver assistance area and the built in drive recorder camera are right there and accessible. If the wire is left loose or routed poorly, it can slip into the wrong spot and create an obstruction later.
So the front cable gets run up high, away from the clips, away from the factory camera, and away from anything that could interfere when the housing is clipped back into place.
After that, the mirror housing goes back in, centered and lined up properly so the clips engage without pinching the new wiring.
Removing the A pillar and routing around the airbag safely
Next up is the A pillar, and this is one of the most important parts of the whole job.
The 2026 RAV4 A pillar is a little easier to work with than some earlier versions, but it still needs to be handled correctly. There are yellow retaining tabs that must be released from the metal portion of the pillar before the trim can come fully off.
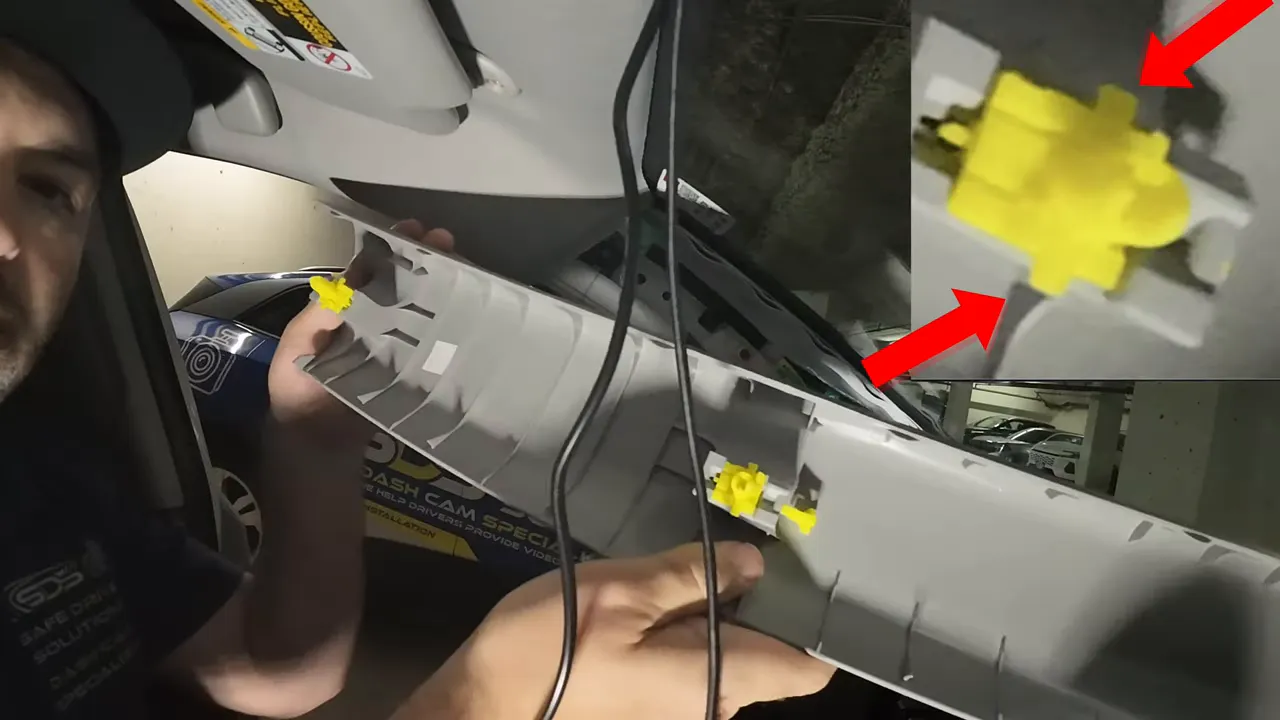
Once the trim is off, the rear camera wire gets tucked into the headliner while the power wire and rear cable are routed behind the airbag, not in front of it.
That is not a small detail. It is a safety issue.
If wiring is run in front of the airbag, it can interfere with deployment. On this RAV4, the goal is to keep the cable hidden but also keep it clear of anything that matters in an emergency. The power cable is then tie strapped to factory wiring behind the airbag so it stays tight and out of the way.
If you want a deeper breakdown of this exact topic, read our guide on safely running dash cam wiring near airbags.
Opening up the lower dash
From there, the install moves lower into the dash area.
The side panel comes off first so the wiring can be tucked cleanly. Then the sill plate is released, followed by the kick panel. On this RAV4, the kick panel uses a plastic nut that turns counterclockwise, plus a clip at the top.
This is where a lot of quick installs start cutting corners. We do not.
To build a clean and reliable setup, you need proper access, and that means dropping the under dash area. That involves removing three Phillips screws, working the panel loose from its clips, disconnecting the OBD2 cable from the panel, and then going deeper by removing the 10 mm hardware that holds the knee bolster metal bar in place.
Once that bar is moved aside, there is much better access to the back side of the fuse area, factory wiring, and the OBD2 circuit points being used for this install.
Why we do not love fuse taps in this RAV4
There is more than one way to power a dash cam, but not every method is equally clean on every vehicle.
On the 2026 Toyota RAV4, the fuse box location is still not our favourite place to use hanging fuse taps. It sits above the driver’s left foot. Toyota has improved the position a bit compared to previous generations, but the concern remains the same.
If fuse taps are hanging downward and something gets bumped, you can end up with a loose connection. If that happens on the wrong circuit, especially ignition related, that is not something you want to discover later.
That is why this install uses a cleaner approach.
Using the OBD2 connection for constant power and ground
Instead of relying on dangling fuse taps, this setup uses the OBD2 plug for constant power and ground, along with an ignition source from the factory harness.
On this vehicle:
- Pin 4 on the OBD2 plug is ground
- Pin 16 on the OBD2 plug is constant power
That gives a solid base for dash cam power, and it is something we do on thousands of vehicles. These circuits are commonly protected in the 5 to 10 amp range, which is appropriate for this kind of application.
An OBD2 based solution can also be a simpler option for some installs, especially if you want to avoid traditional fuse box work. We have also covered that style of setup in our broader installation resources.
Tapping ignition the right way
For ignition, the factory harness is opened carefully and the correct wire is identified. The insulation is stripped back just enough to make the connection, and the dash cam ignition lead is tied in directly.
This is not a twist and hope for the best kind of job.
The connections are soldered, then wrapped with quality electrical tape, and finally finished with Tesa tape so the harness looks neat and close to factory. Everything is then tie strapped into place with the factory wiring so there is no loose movement, no rattling, and no wire hanging around where it should not be.
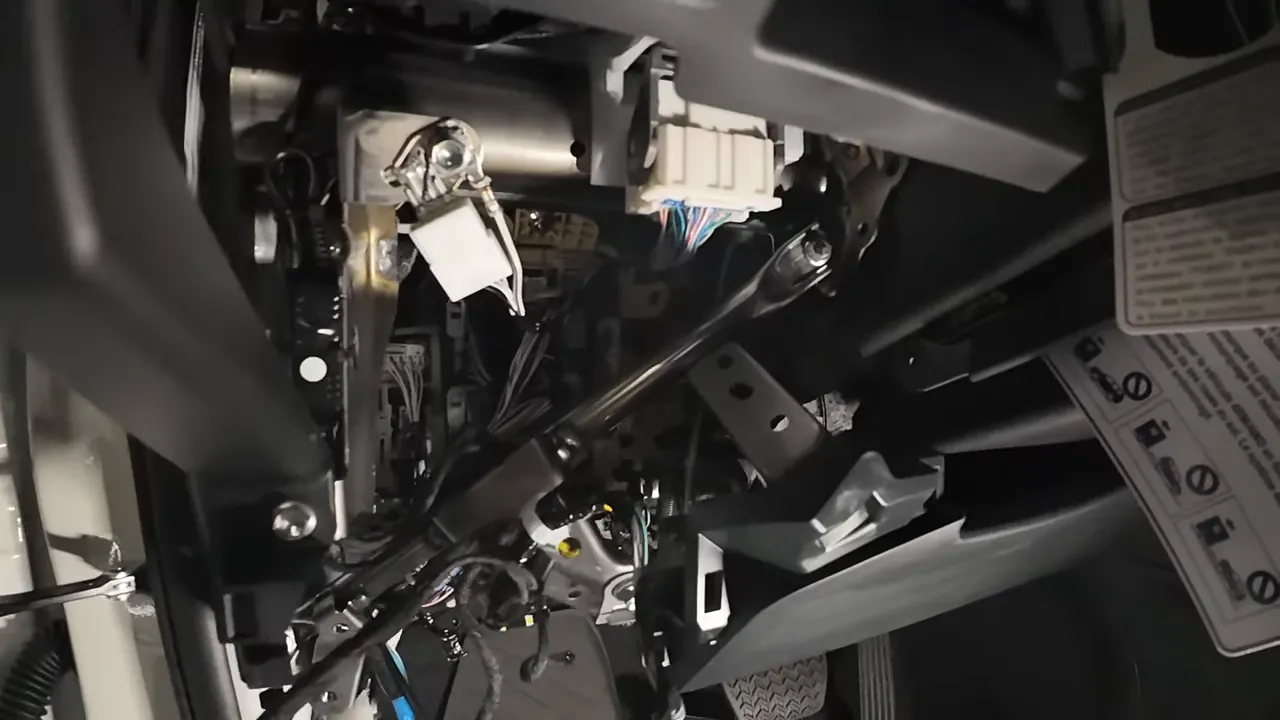
The low battery protection adapter is mounted securely to a metal bracket, keeping it fixed and accessible instead of floating around under the dash.
If battery drain is something you are worried about, it is worth reading our guide on dash cam low battery protection and battery drain.
Reassembling the dash without pinching anything
Once the wiring is finished, the lower dash has to go back together the same way it came apart, but with a bit of patience.
The knee bolster bar is reinstalled first. One small trick here is to thread the bolts and nut in only partway at first. That gives the bar a chance to line up properly before everything is fully tightened. Once alignment looks good, all the hardware gets snugged down the rest of the way.
This step matters because forcing the bracket into place can pinch wiring, throw off panel alignment, or create fitment problems later.
Running the rear camera cable to the hatch
With the front power side sorted, attention shifts to the rear camera cable.
The cable is routed high along the side of the vehicle, tucked safely beside the airbags, and worked back toward the hatch area. From there, the rubber boot between the body and the hatch has to be removed so the wire can pass through properly.
This part needs care. The goal is not just to get the cable through, but to keep the grommet sealed afterward so the vehicle stays protected from water and dust intrusion.
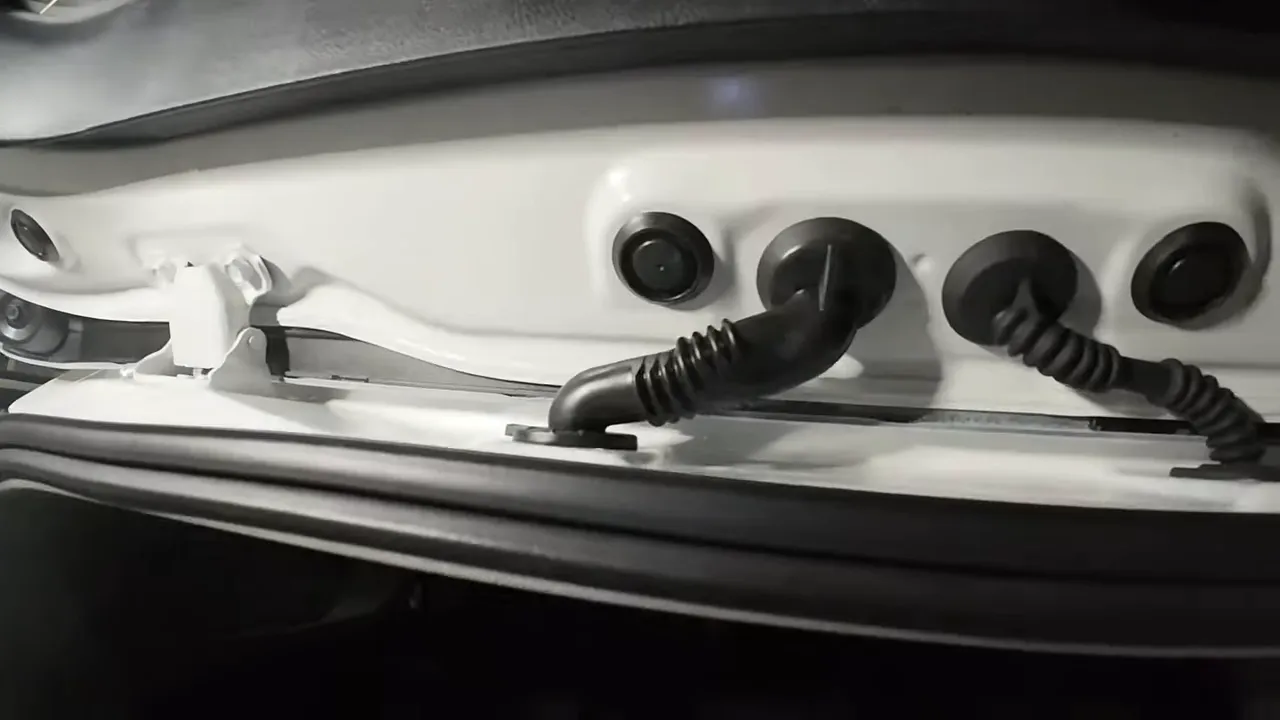
After the cable is passed through, the hatch trim panel comes off, the boot is reseated fully, and the excess cable is tie strapped to factory wiring. That last part is important. Loose cable inside a hatch is how you end up with rattles and annoying noise every time the door closes.
Tesa tape is added where needed to keep everything tidy and factory looking.
Mounting the rear camera
Before sticking any camera to glass, the surface needs to be cleaned properly. We use isopropyl alcohol wipes to prep both the front windshield and the rear glass.
That gives the adhesive the best chance to bond properly and stay put.
Once the rear wiring is in place and the glass is clean, the rear camera can be mounted on the hatch glass in its final position.
Mounting and setting up the front camera
At the front, the VIOFO A229 Plus is mounted high on the windshield near the mirror area, keeping it tucked up and clean while still giving it the proper forward view.
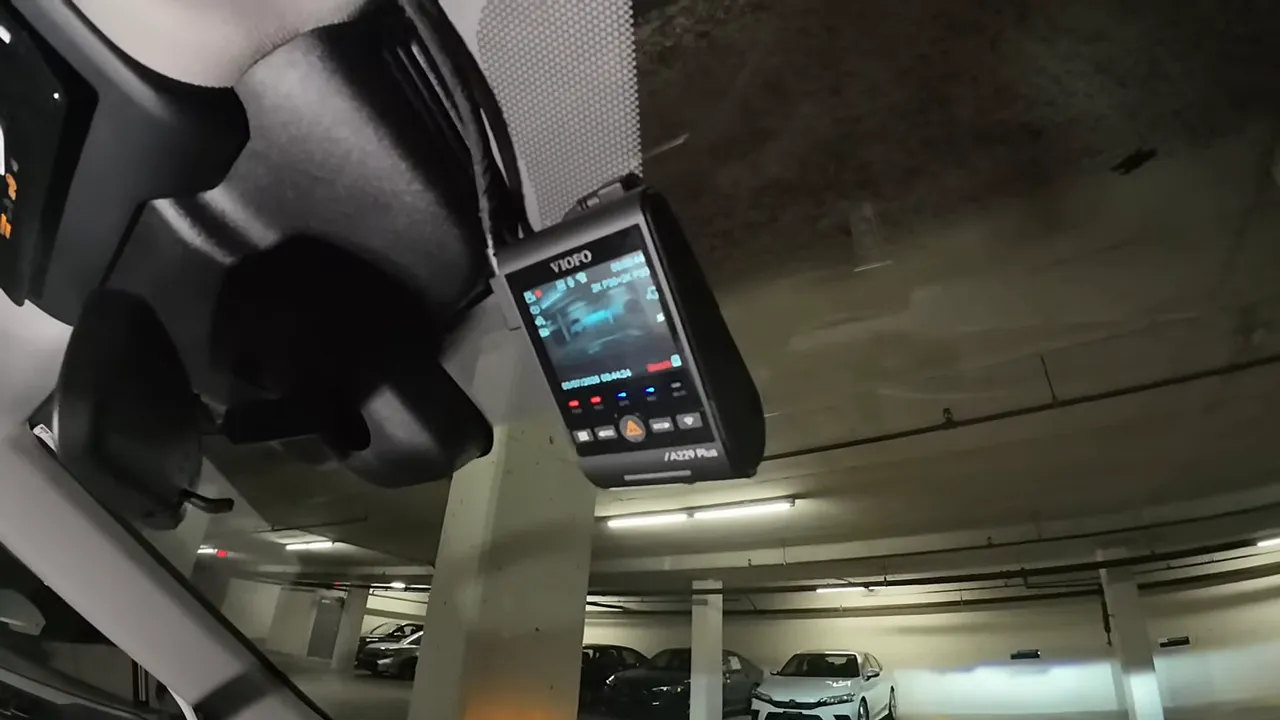
After mounting, the cable is tucked in fully and the quick setup process is completed so the system is ready to go.
The result is exactly what you want in a new RAV4:
- A clean front and rear dash cam install
- Hidden wiring
- Safe airbag conscious cable routing
- Stable power connections
- Better recording coverage than the built in basic drive recorder
What this install really comes down to
The 2026 Toyota RAV4 is a great vehicle, but the factory drive recorder is not automatically the best long term dash cam solution.
If you want better footage, front and rear coverage, more control over your setup, and less dependence on connected vehicle privacy choices, a dedicated dash cam upgrade is a smart move.
The big thing is doing it properly.
That means understanding the mirror housing, staying clear of the factory camera system, routing behind airbags, securing wiring to factory looms, choosing a sensible power source, and reassembling everything without creating future problems.
If you want that done professionally, our dash cam installation service handles front, rear, hardwire, and clean wire concealment for drivers in Greater Vancouver and Greater Toronto.
The final result on this 2026 Toyota RAV4 is a proper upgrade: a cleanly installed VIOFO A229 Plus that gives the driver stronger video evidence than the basic built in recorder.
Have a safe drive.