BMW i4 Rear Dash Camera Installation: A Step-by-Step Guide
Installing a rear dash camera on a BMW i4 is a practical upgrade that enhances your vehicle’s safety and security. Whether you want to protect yourself from accidents, capture unexpected events, or simply document your drives, a rear dash camera is an essential accessory for modern vehicles. In this detailed guide, we’ll walk you through the entire process of installing a rear dash camera on a BMW i4, sharing tips and tricks to ensure a clean, professional finish.
This installation process was expertly demonstrated by Safe Drive Solutions - Dash Cam Specialists, known for their meticulous and efficient dash cam installations. We’ll cover the key steps they took, including how to route the wiring through the hatch, securely manage excess cables, and maintain the BMW’s factory look without leaks or damage.
Understanding the Challenge: Wiring the Rear Dash Camera in a BMW i4
The BMW i4, like many modern electric vehicles, features a hatchback design that presents unique challenges when running wires for accessories such as a rear dash camera. The main goal is to route the camera’s wiring from the rear hatch into the vehicle’s interior without compromising the vehicle’s water tightness or aesthetics.
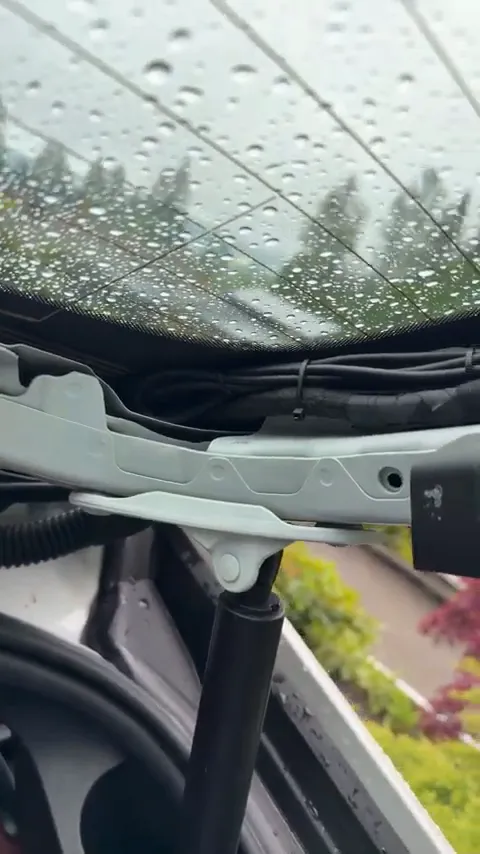
One of the first hurdles is dealing with the rubber grommet that seals the wiring passage through the hatch. This grommet must be carefully removed to fish the cable through, then replaced properly to avoid water leaks. The process requires patience and precision to ensure that the wire passes through smoothly without damaging the grommet or the wiring itself.
Step 1: Removing the Rubber Grommet to Route the Wire
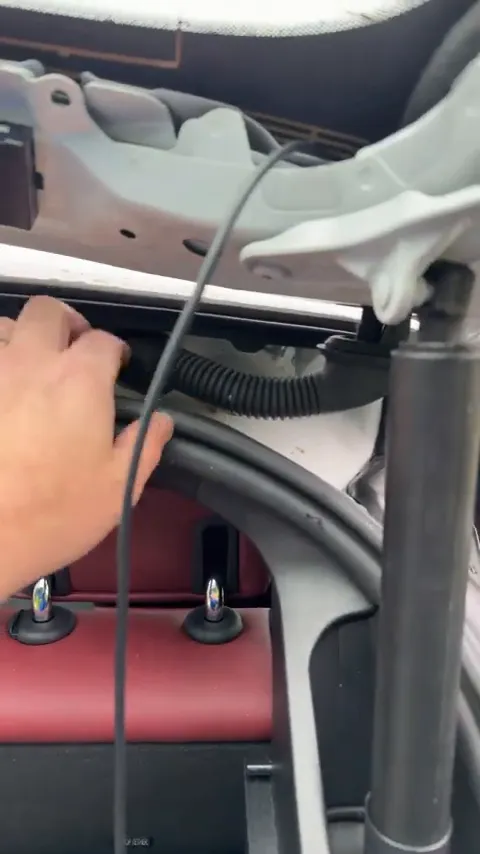
To get started, the rubber grommet located near the hatch needs to be gently removed. This step is crucial because the grommet acts as a water seal between the hatch and the vehicle body. Removing it allows you to fish the rear camera wire through the hatch’s opening and into the cabin.
Care must be taken not to tear or deform the grommet during removal. Once off, the wire can be carefully fed through the opening. This method ensures the wire is hidden and protected, maintaining the clean factory look that BMW owners expect.
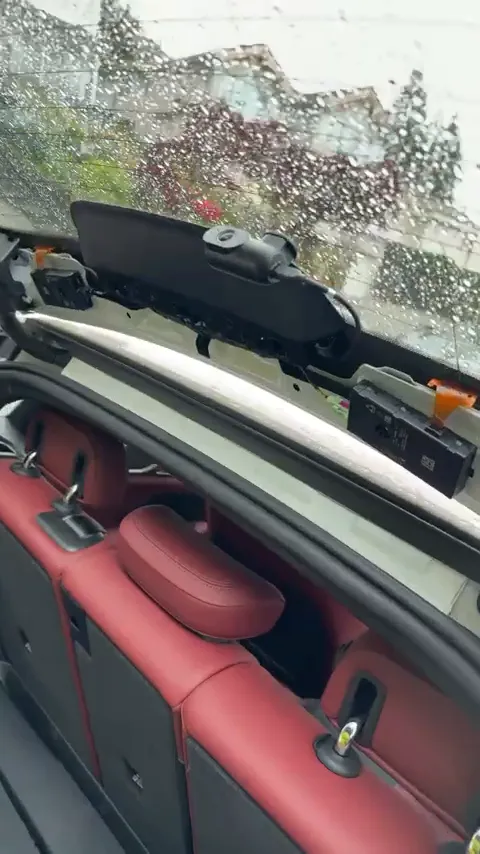
Step 2: Removing the Interior Hatch Panel
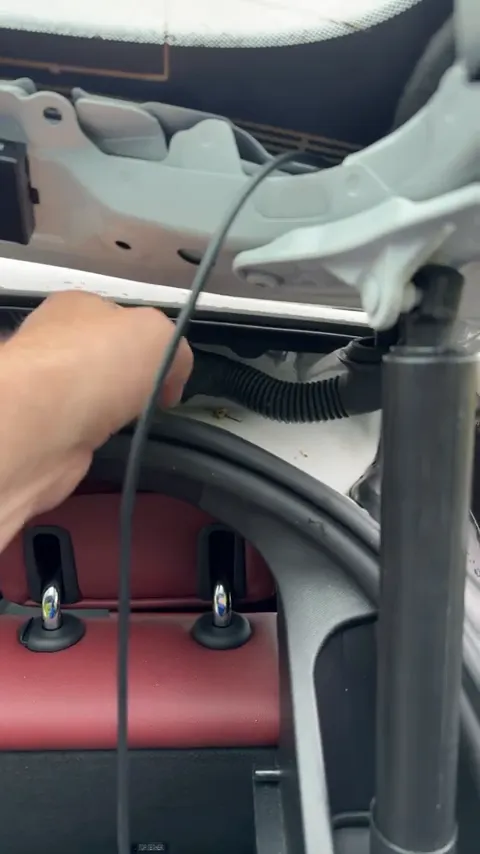
Next, to facilitate easier wire routing and to hide the wiring inside the vehicle, the interior panel of the hatch must be removed. This step is essential because it provides access to the factory wiring harness and creates space to neatly secure the rear camera cable.
Removing the panel is straightforward but requires gentle handling to avoid breaking clips or damaging the trim. Once removed, it becomes much easier to fish the wire through the hatch and organize the excess cable.
Why Remove the Panel?
- Allows easier access to factory wiring harness
- Provides a path to securely tie strap excess wiring
- Helps maintain a clean, hidden installation
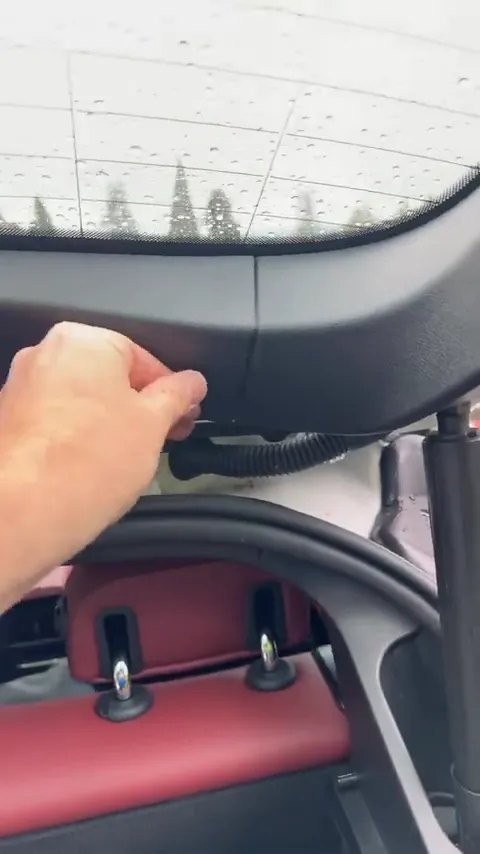
Step 3: Securing the Excess Camera Cable
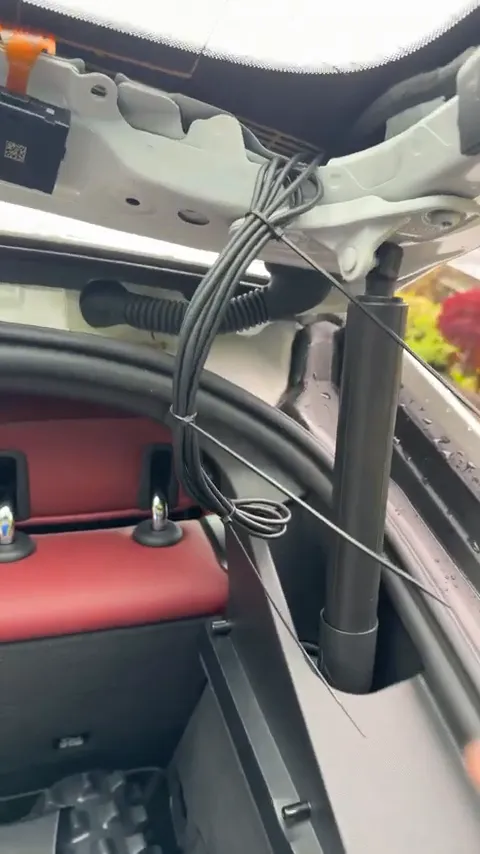
Once the wiring is routed through the hatch and panel area, the next step is to manage the excess cable length. This is important for both safety and aesthetics. Loose wires can rattle, get caught, or appear unsightly.
Using tie straps, the excess rear camera cable is bundled and fastened neatly to the factory wiring harness. This prevents any movement or noise and keeps the installation looking professional.
Safe Drive Solutions emphasizes the importance of securely tying the wires to avoid any future issues such as cable wear or accidental disconnections.
Step 4: Reinstalling the Rubber Grommet and Preventing Leaks
After the cable is routed and secured, the rubber grommet must be reinstalled carefully. This step ensures the hatch remains sealed against water and dust ingress.
The grommet is pushed back into place, ensuring a tight fit that prevents leaks. Proper resealing is critical, especially considering the weather exposure.
Ensuring this seal is intact preserves the integrity of your BMW i4 and the longevity of your dash camera installation.
Step 5: Final Wiring Tie-Strapping and Panel Reinstallation
With the wiring secured and the grommet sealed, the final step is to reinstall the interior hatch panel. Before doing so, the wiring is tied firmly to the factory harness to ensure everything stays in place.
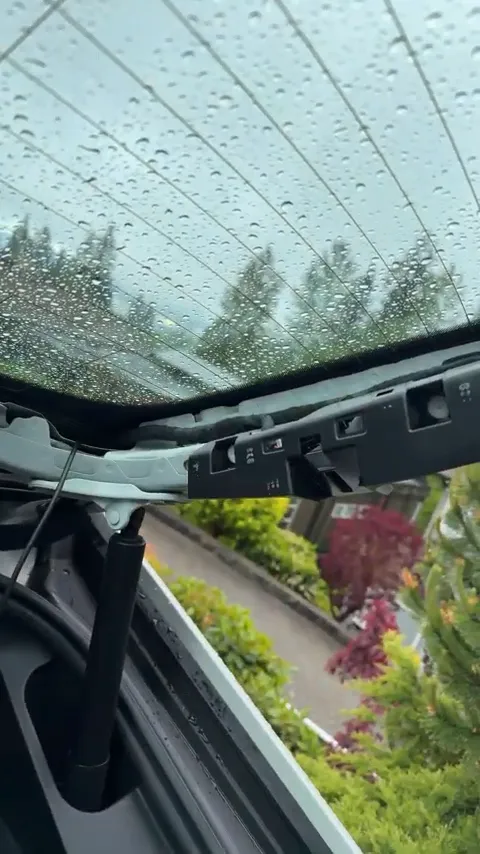
Reattaching the panel completes the installation, restoring the hatch’s interior to its original appearance. The rear camera is now mounted securely, with all wiring hidden and protected.
This careful attention to detail ensures the dash camera installation not only works perfectly but also maintains the premium look and feel of the BMW i4’s interior.
Benefits of a Professionally Installed Rear Dash Camera
Installing a rear dash camera on your BMW i4 offers numerous benefits:
- Enhanced Safety: Monitor blind spots and rear traffic, reducing the risk of collisions when reversing or changing lanes.
- Accident Evidence: Capture crucial video evidence in case of rear-end collisions or hit-and-run incidents.
- Parking Protection: Some rear cameras offer parking mode features, recording incidents even when the vehicle is parked and unattended.
- Peace of Mind: Knowing you have an extra set of eyes on the road increases confidence while driving.
To maximize these benefits, professional installation is recommended. Experts like Safe Drive Solutions ensure the wiring is hidden, properly sealed, and securely fastened, preventing future issues and preserving vehicle aesthetics.
Additional Resources for Dash Cam Enthusiasts
If you’re interested in upgrading your dash cam setup or learning more about dash cams, here are some helpful resources from Safe Drive Solutions:
- Why Professional Dash Cam Installation Matters – Learn why expert installation is vital for optimal performance and durability.
- Shop Dual Front and Rear Dash Cameras – Explore options for dual-channel dash cams that record front and rear views simultaneously.
- Dash Cam Installation in Electric Vehicles – Understand the nuances of installing dash cams in EVs like the BMW i4.
- Dashcam Wiring Tips for Vehicle Safety – Discover best practices for hiding wiring and maintaining airbag safety.
Conclusion: A Clean and Secure Rear Dash Camera Installation for Your BMW i4
Installing a rear dash camera on a BMW i4 requires careful attention to detail, particularly when routing wiring through the hatch and managing excess cables. By removing the rubber grommet and interior panel, fishing the wire through, securing it to the factory harness, and resealing the grommet, you ensure a professional, leak-free installation.
This approach not only guarantees the reliability and longevity of your rear dash camera but also preserves the sleek interior finish of your BMW i4. Whether you’re looking to enhance your driving safety, capture video evidence, or add parking protection, a professionally installed rear dash camera is a valuable addition to your vehicle.
For expert dash cam installations and high-quality products, visit Safe Drive Solutions, your trusted dash cam specialists serving Vancouver, Toronto, and beyond.

