Complete Guide to Installing a Dash Cam in a Ford F-150 (2015-2024)
Installing a dash cam in your Ford F-150 can enhance your driving experience by providing video evidence in case of accidents and ensuring your vehicle's safety while parked. This guide will walk you through the step-by-step process for installing a dash cam in models from 2015 to 2024. Whether you're a DIY enthusiast or looking for a comprehensive tutorial, this guide has got you covered.
Getting Started: Tools and Preparation
Before diving into the installation, gather your tools. You will need:
- Panel popper tool
- 10mm socket and impact wrench
- Zip ties
- Electrical tape
- Fuse taps (for 2015-2023 models)
- Test light
- Dash cam of your choice
Ensure that your work area is clean and organized to avoid losing any small parts during the installation process.
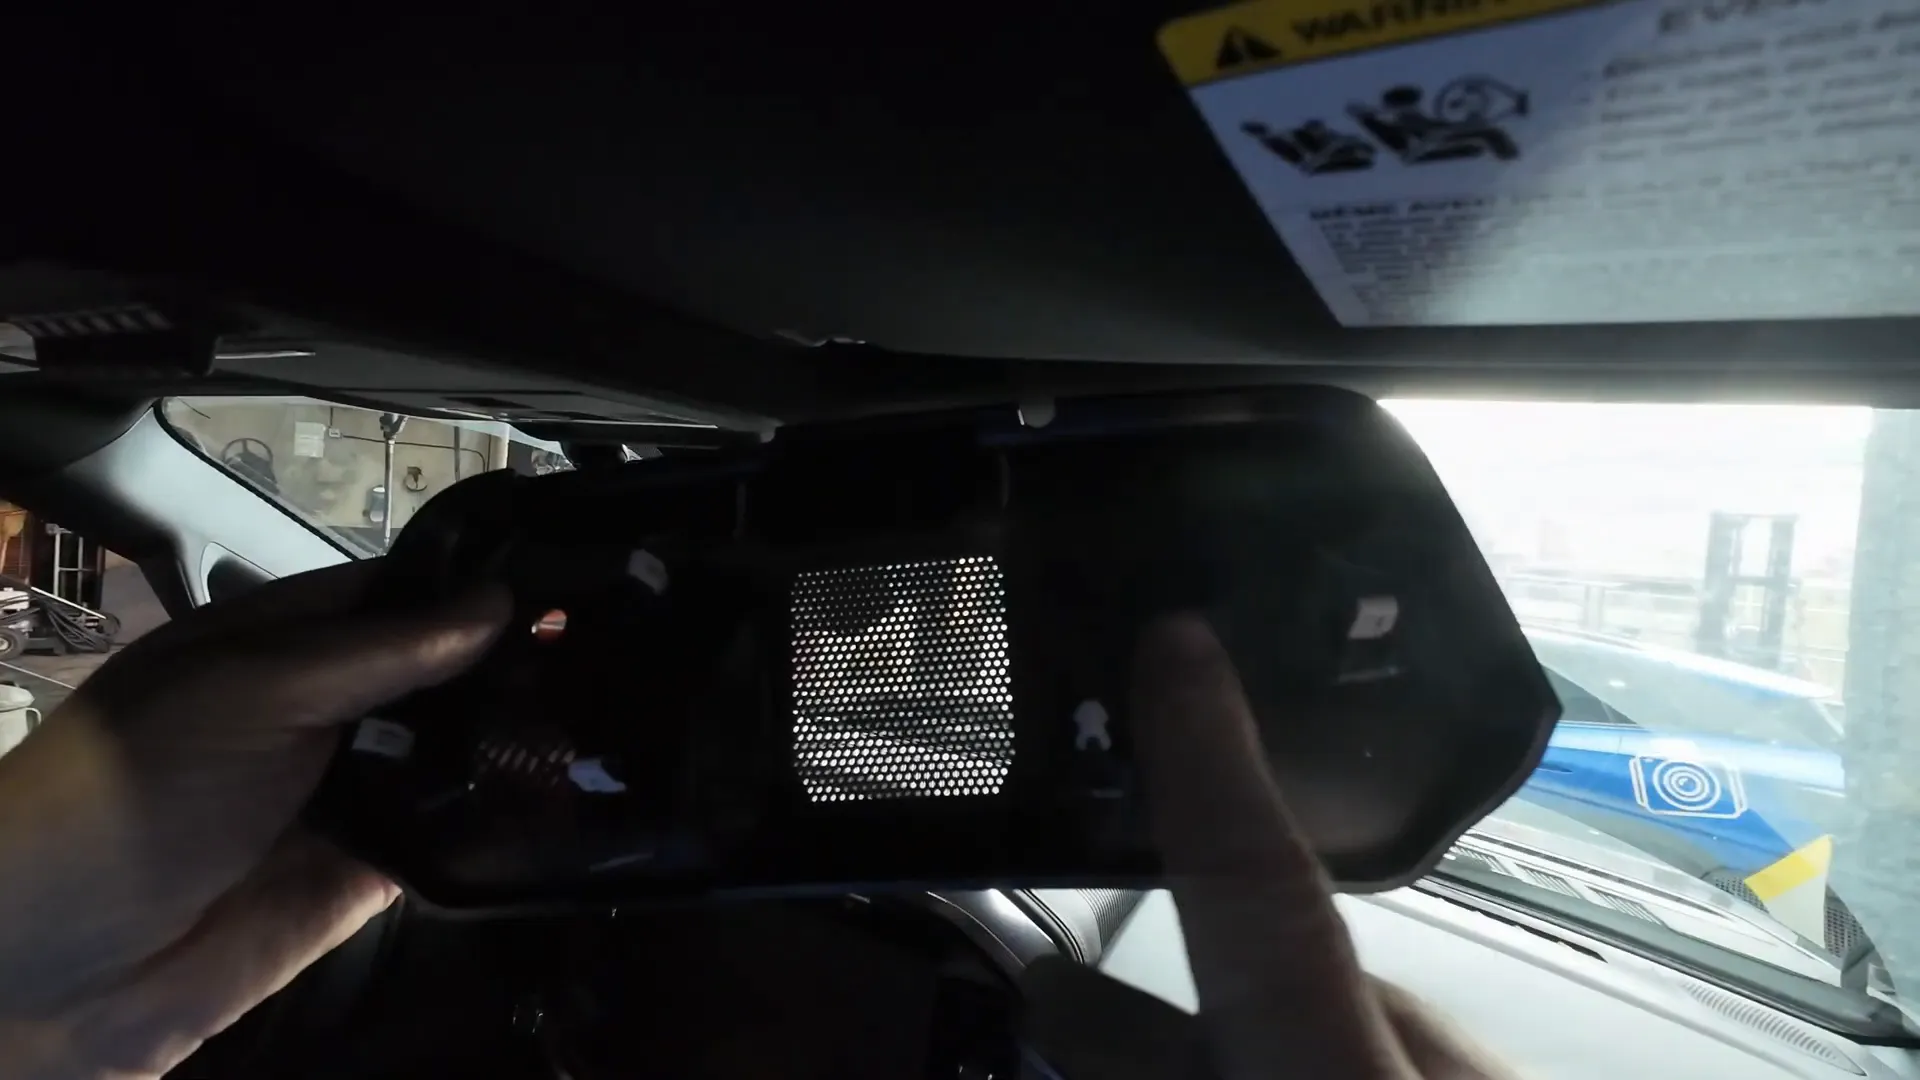
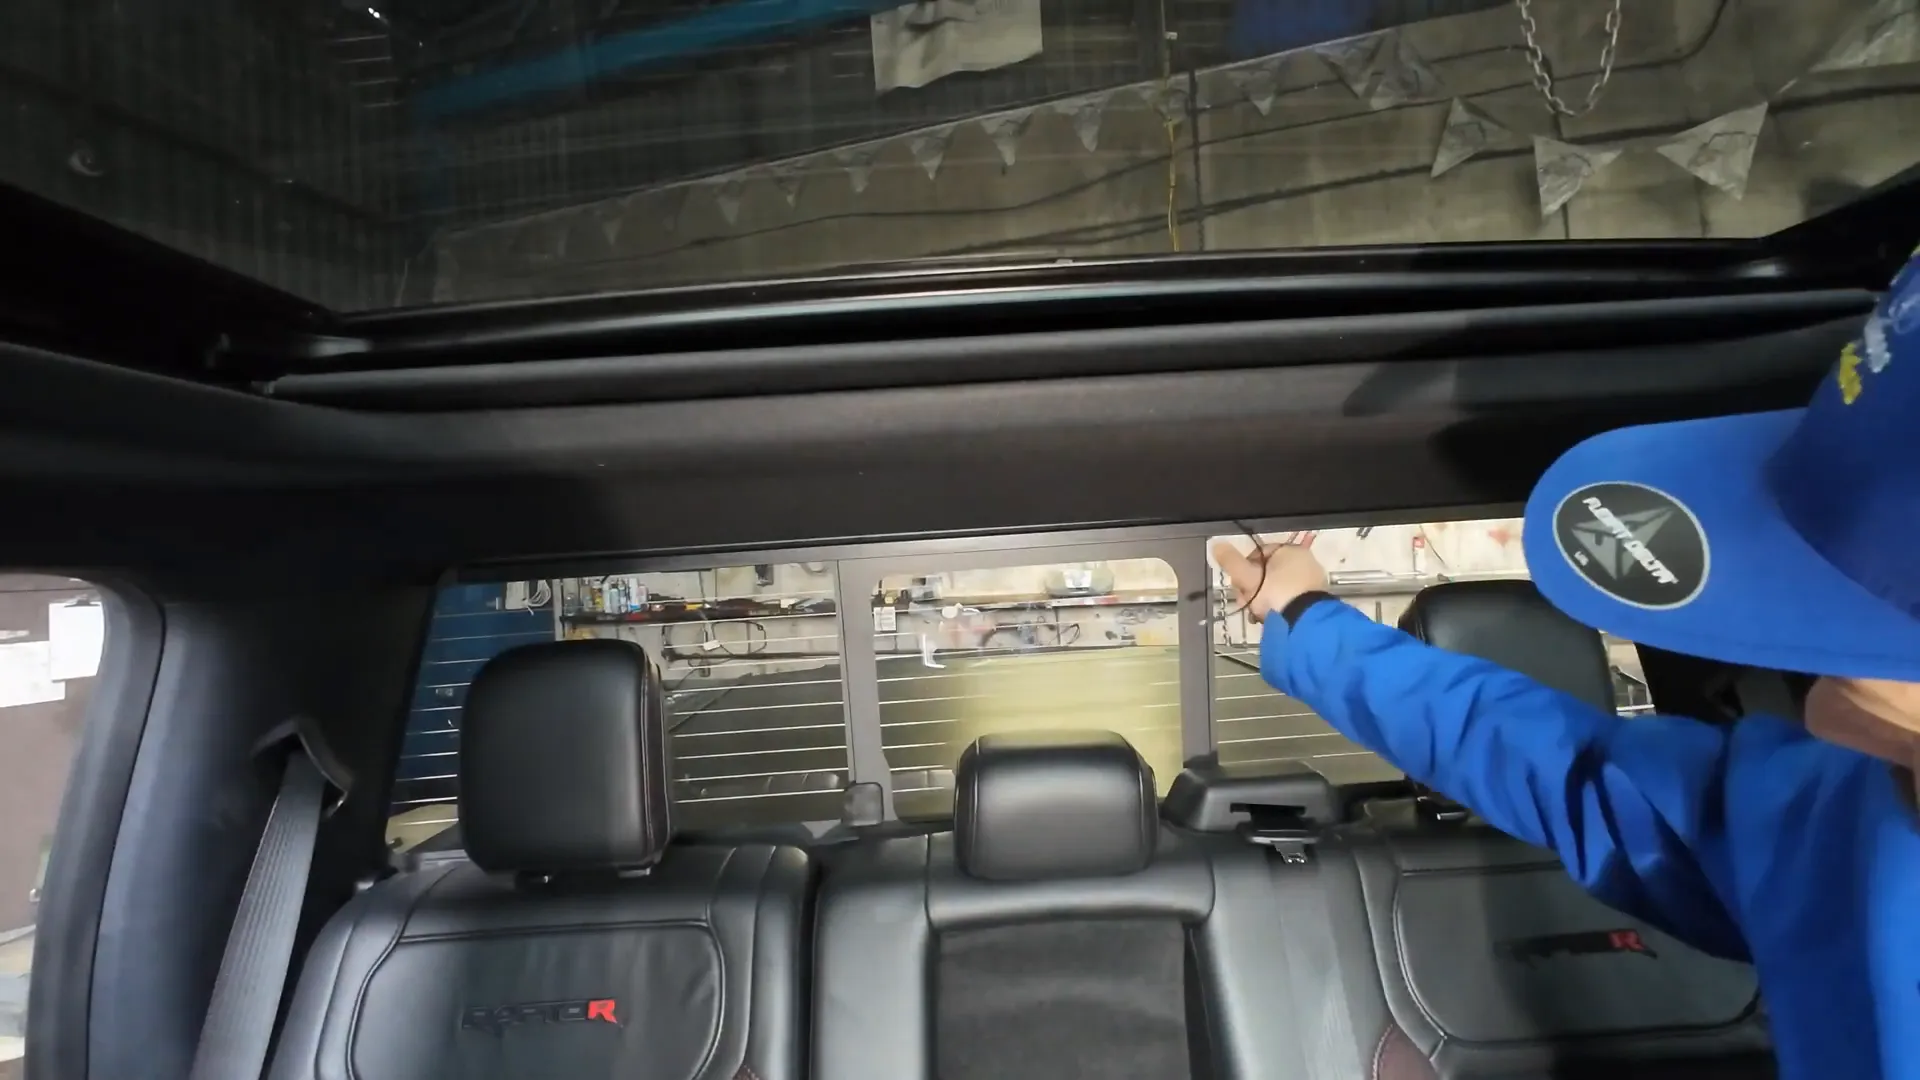
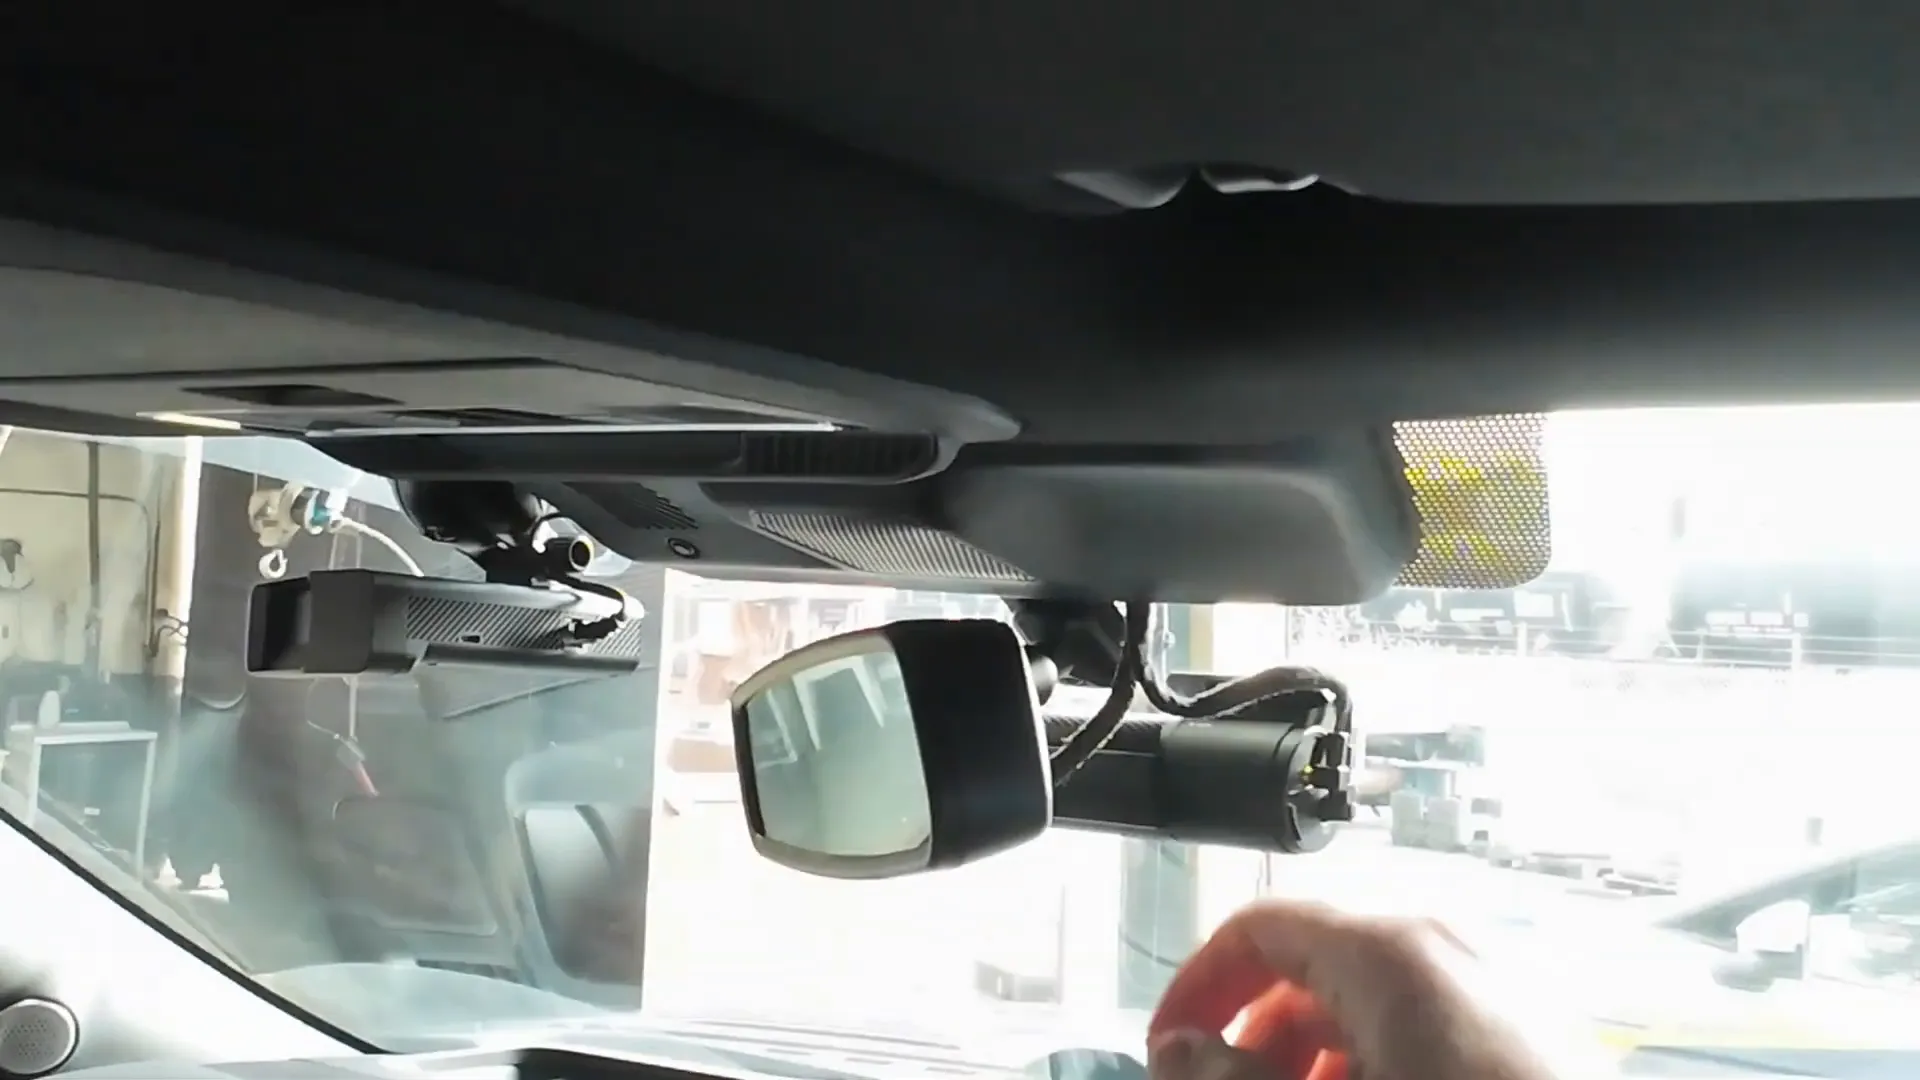
Step 1: Remove the Housing Behind the Rearview Mirror
To start, you need to remove the housing located behind the rearview mirror. Using a panel popper tool, gently pry off the housing. You should find five clips holding it in place. Once removed, set it aside for reassembly later.
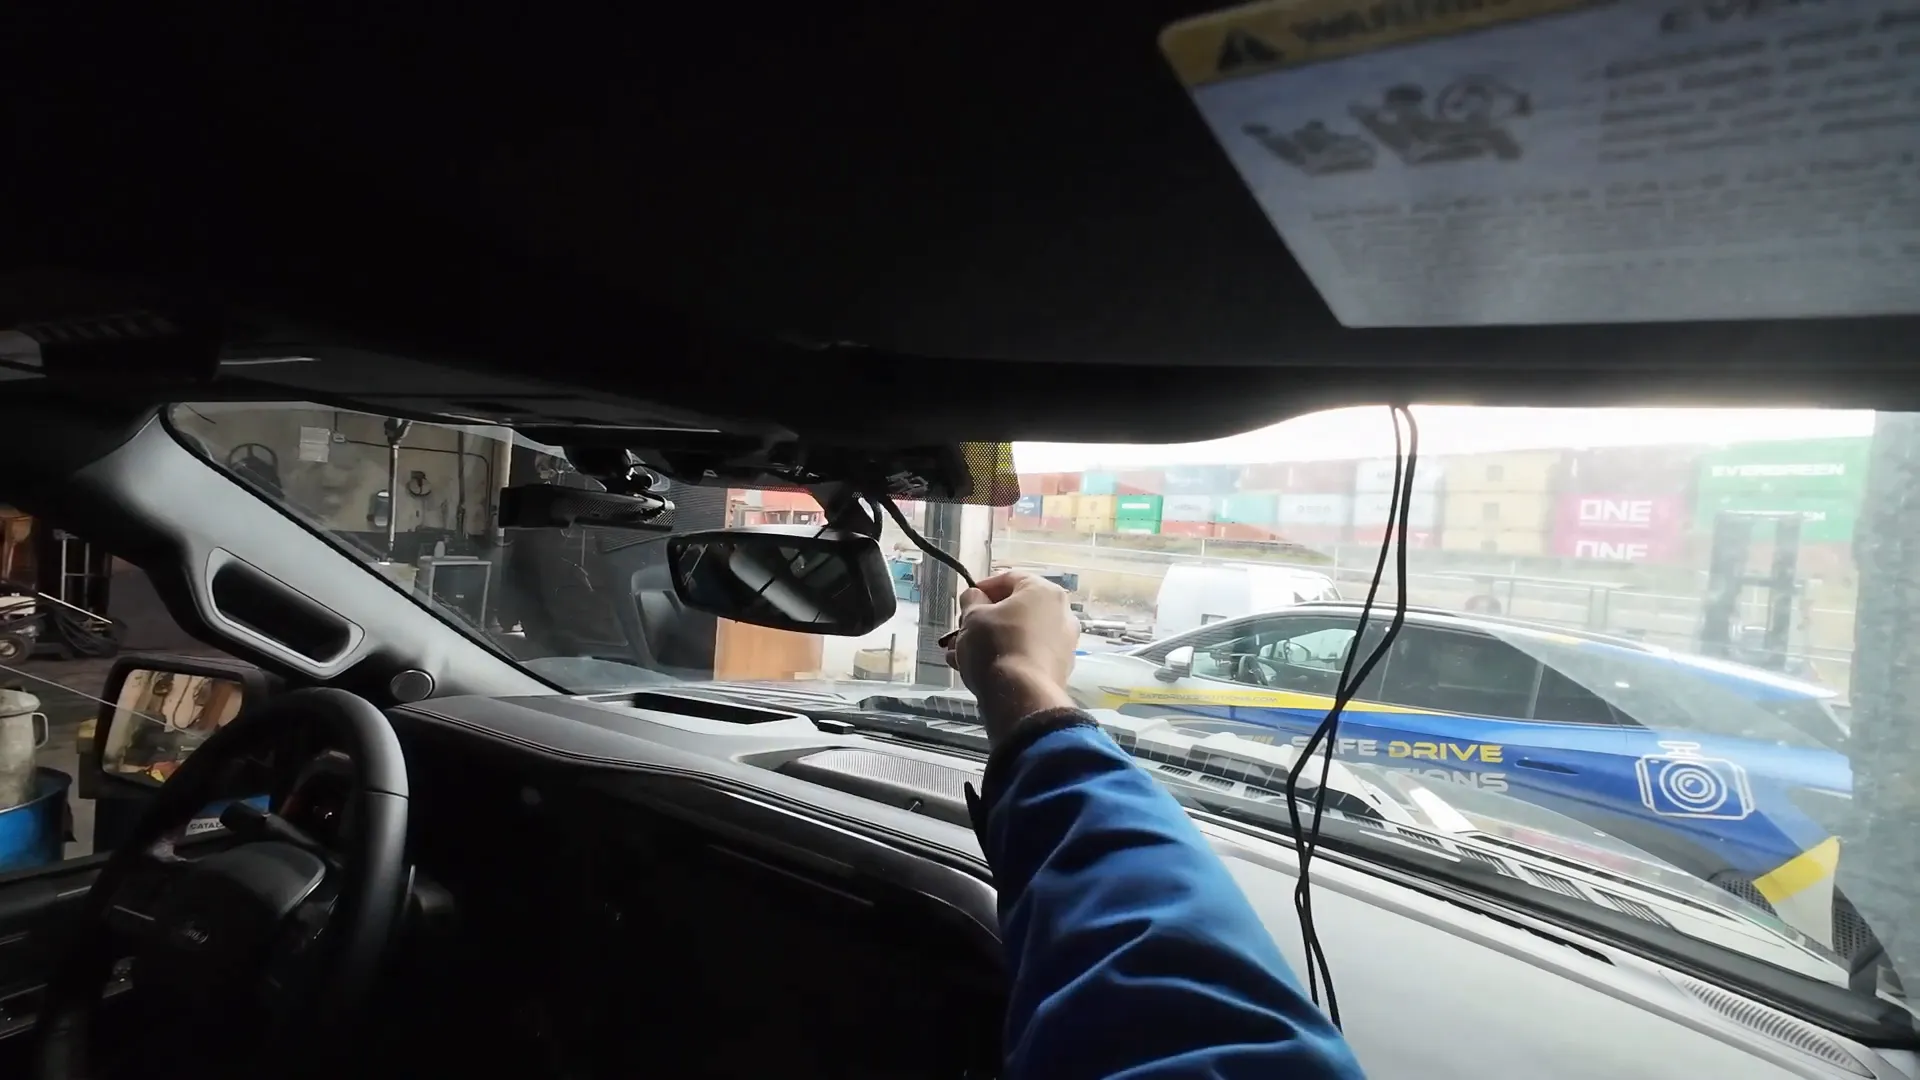
Step 2: Running the Wiring
Next, run the wiring from the dash cam along with the factory wiring behind the rearview mirror. This helps maintain a clean look. Use tie straps to secure the wiring in place before reattaching the rearview mirror housing.
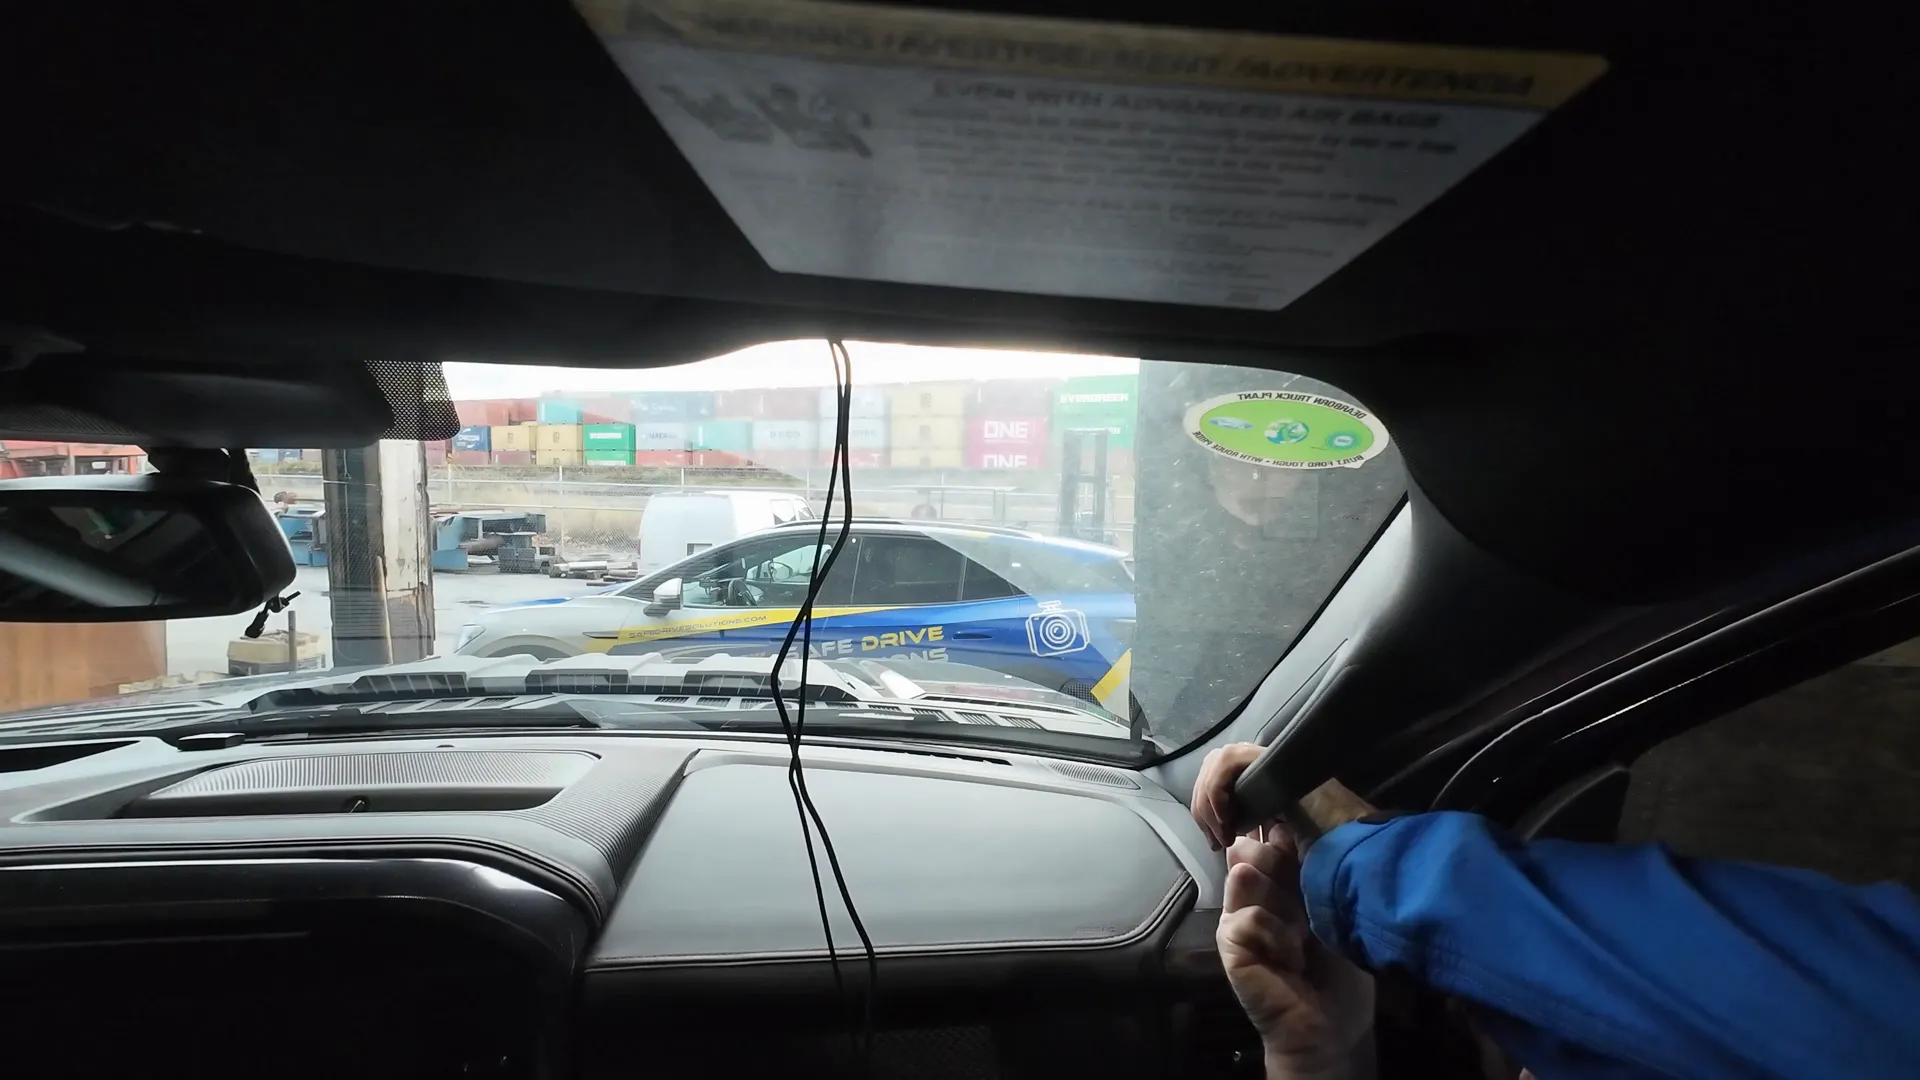
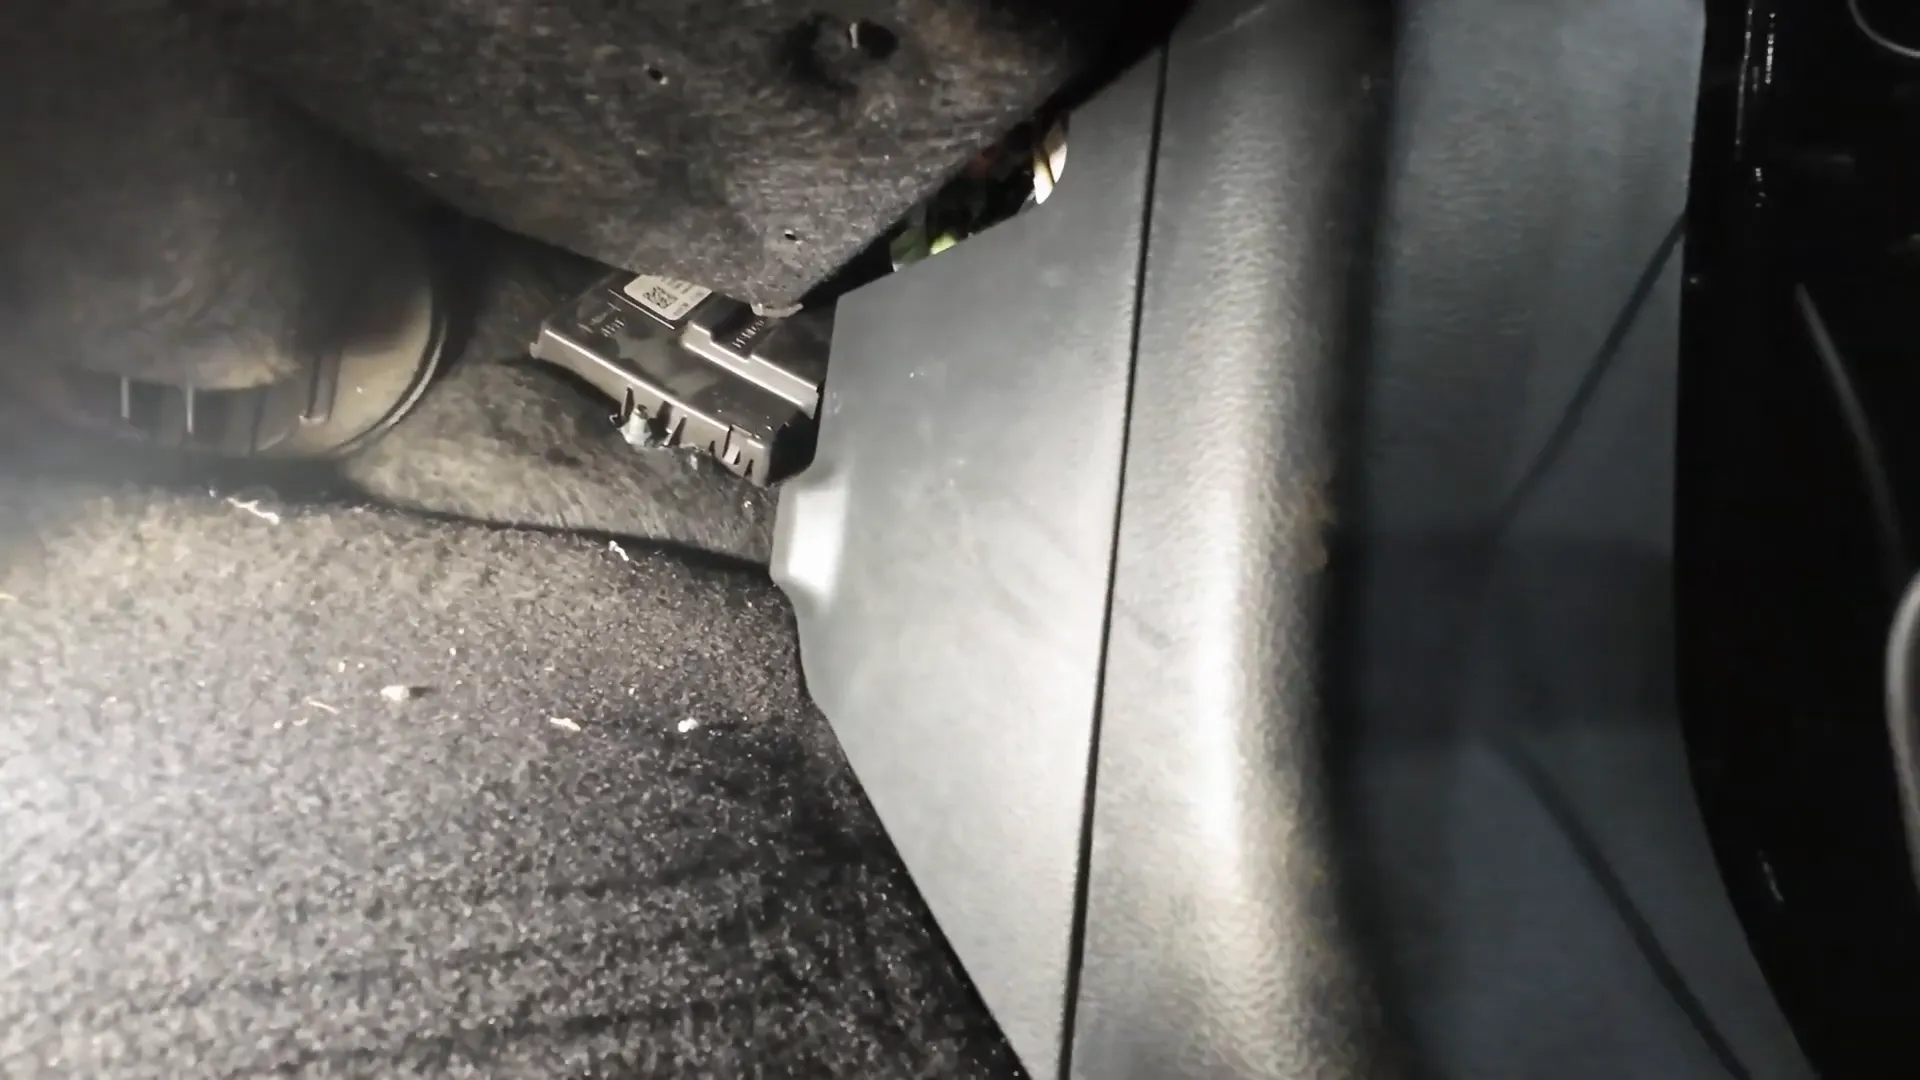
Step 3: Remove the A-Pillar
Now, it's time to access the A-pillar. Use a small pick to push a small hole at the bottom of the A-pillar cover. Once you loosen it, remove the two 10mm bolts. Carefully pull the A-pillar away and disconnect the tweeter speaker for easier access to the wiring.
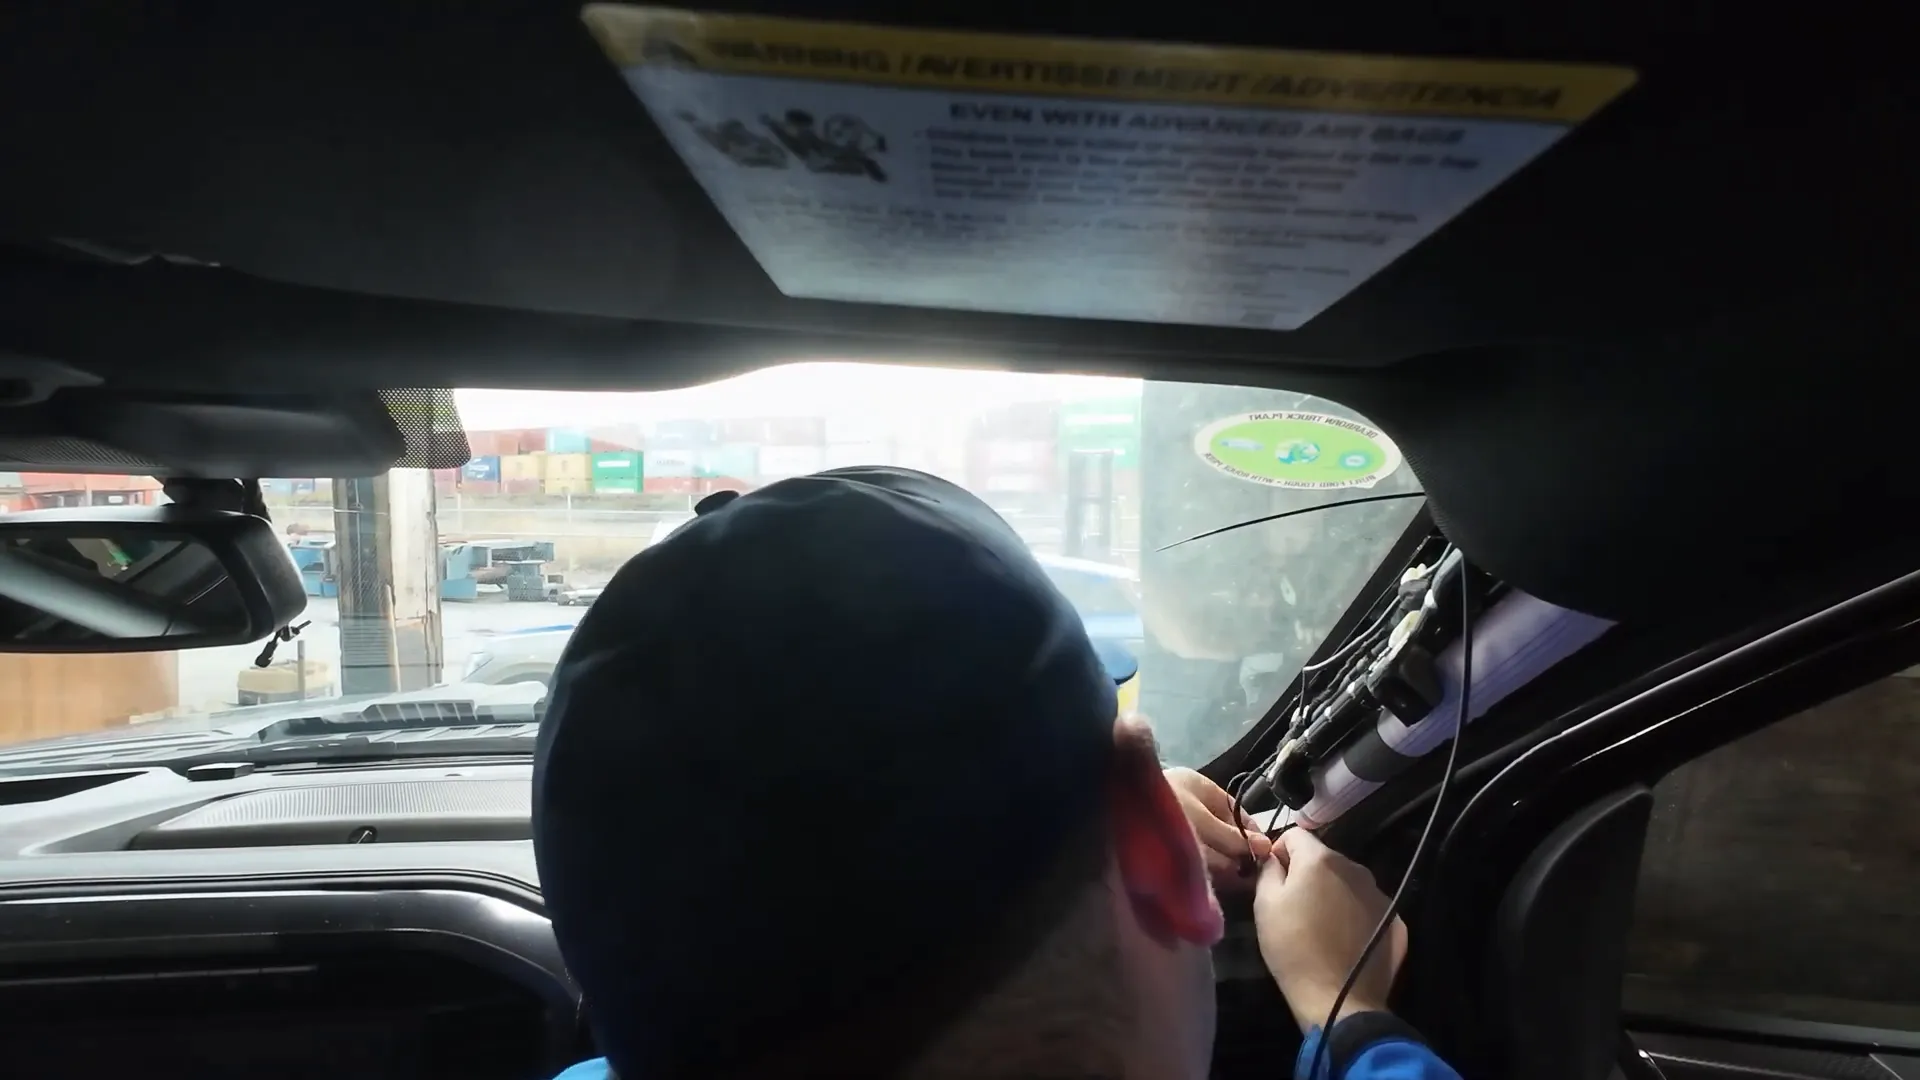
Step 4: Secure the Wiring
With access to the factory wiring, start tie-strapping the dash cam wiring to the A-pillar. You can also use white factory clips if available. Make sure to run the wiring behind the airbag and towards the rear of the vehicle.
Step 5: Installing the Rear Camera
Find a suitable placement for the rear camera, ideally on the driver's side rear window. Clean the window surface thoroughly before mounting the camera to ensure a secure fit. Be cautious of the rear window's sliding mechanism to prevent damage to the camera.
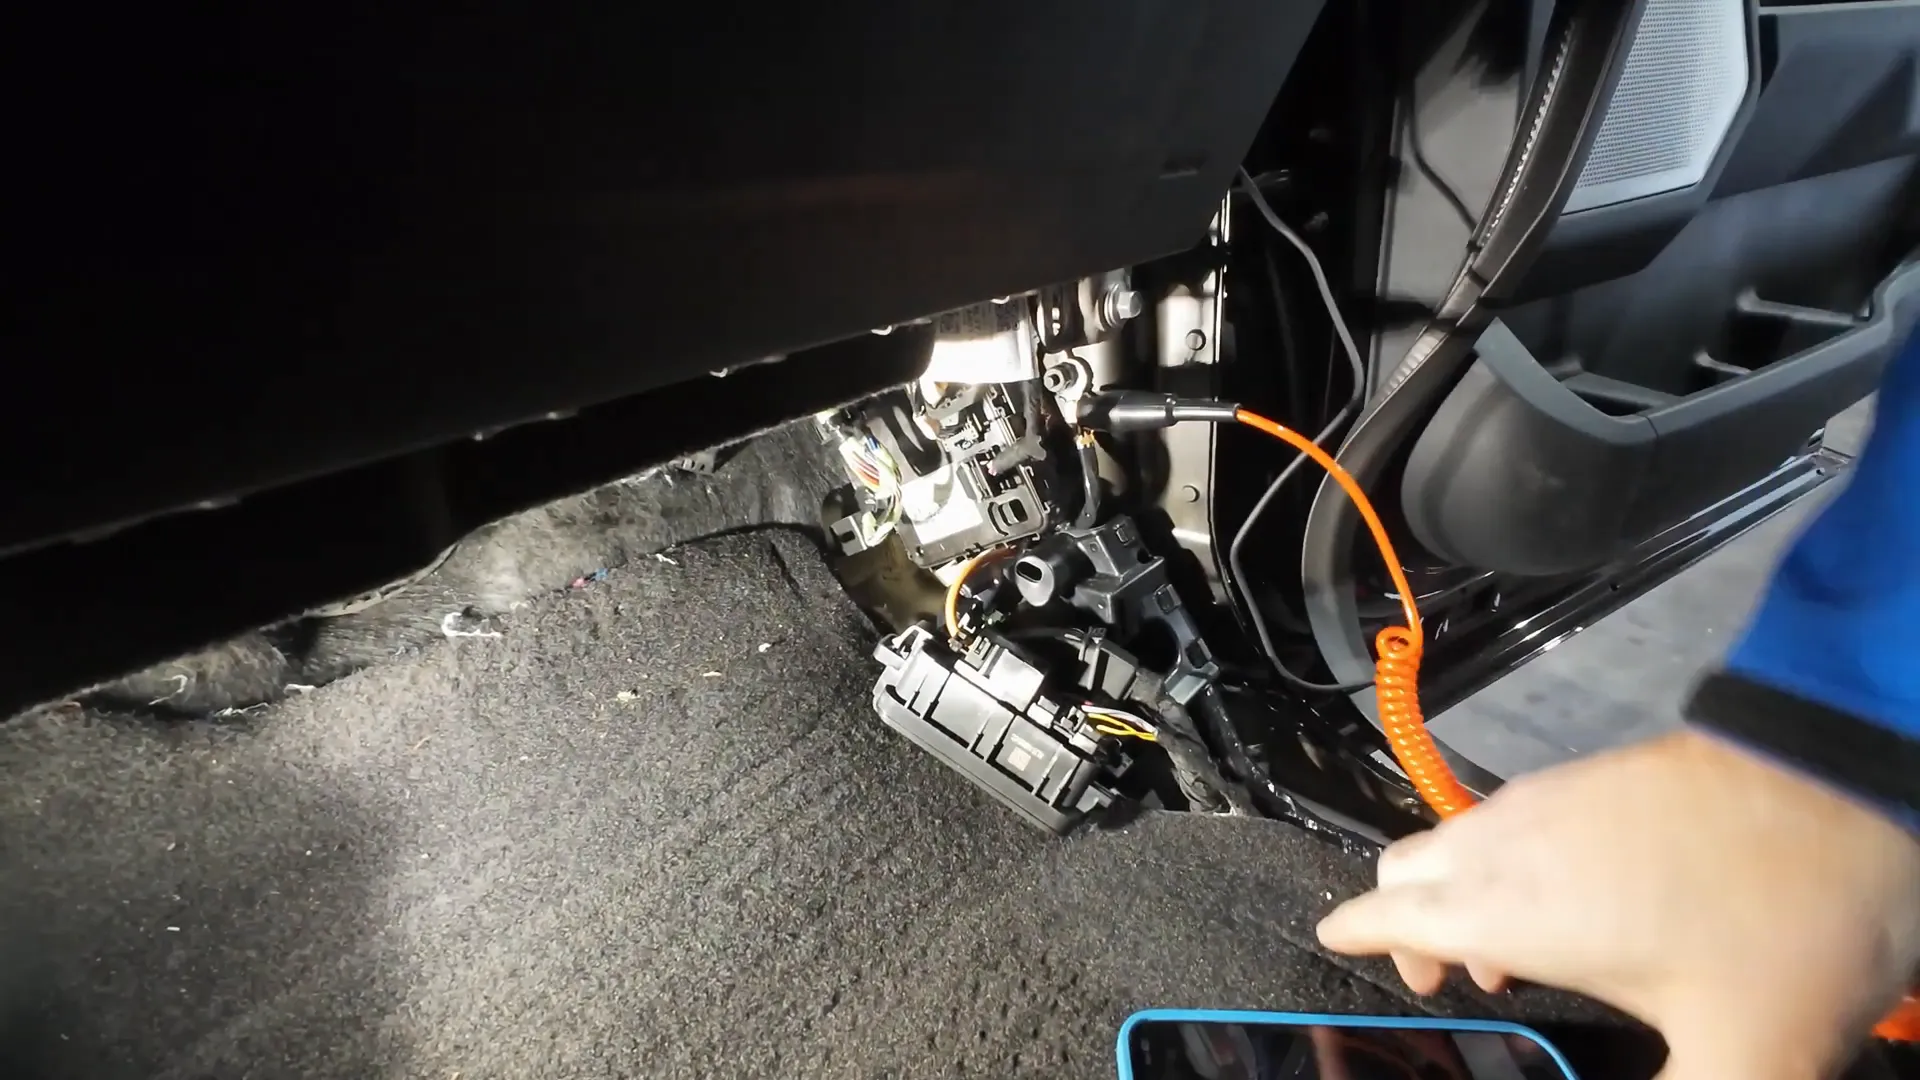
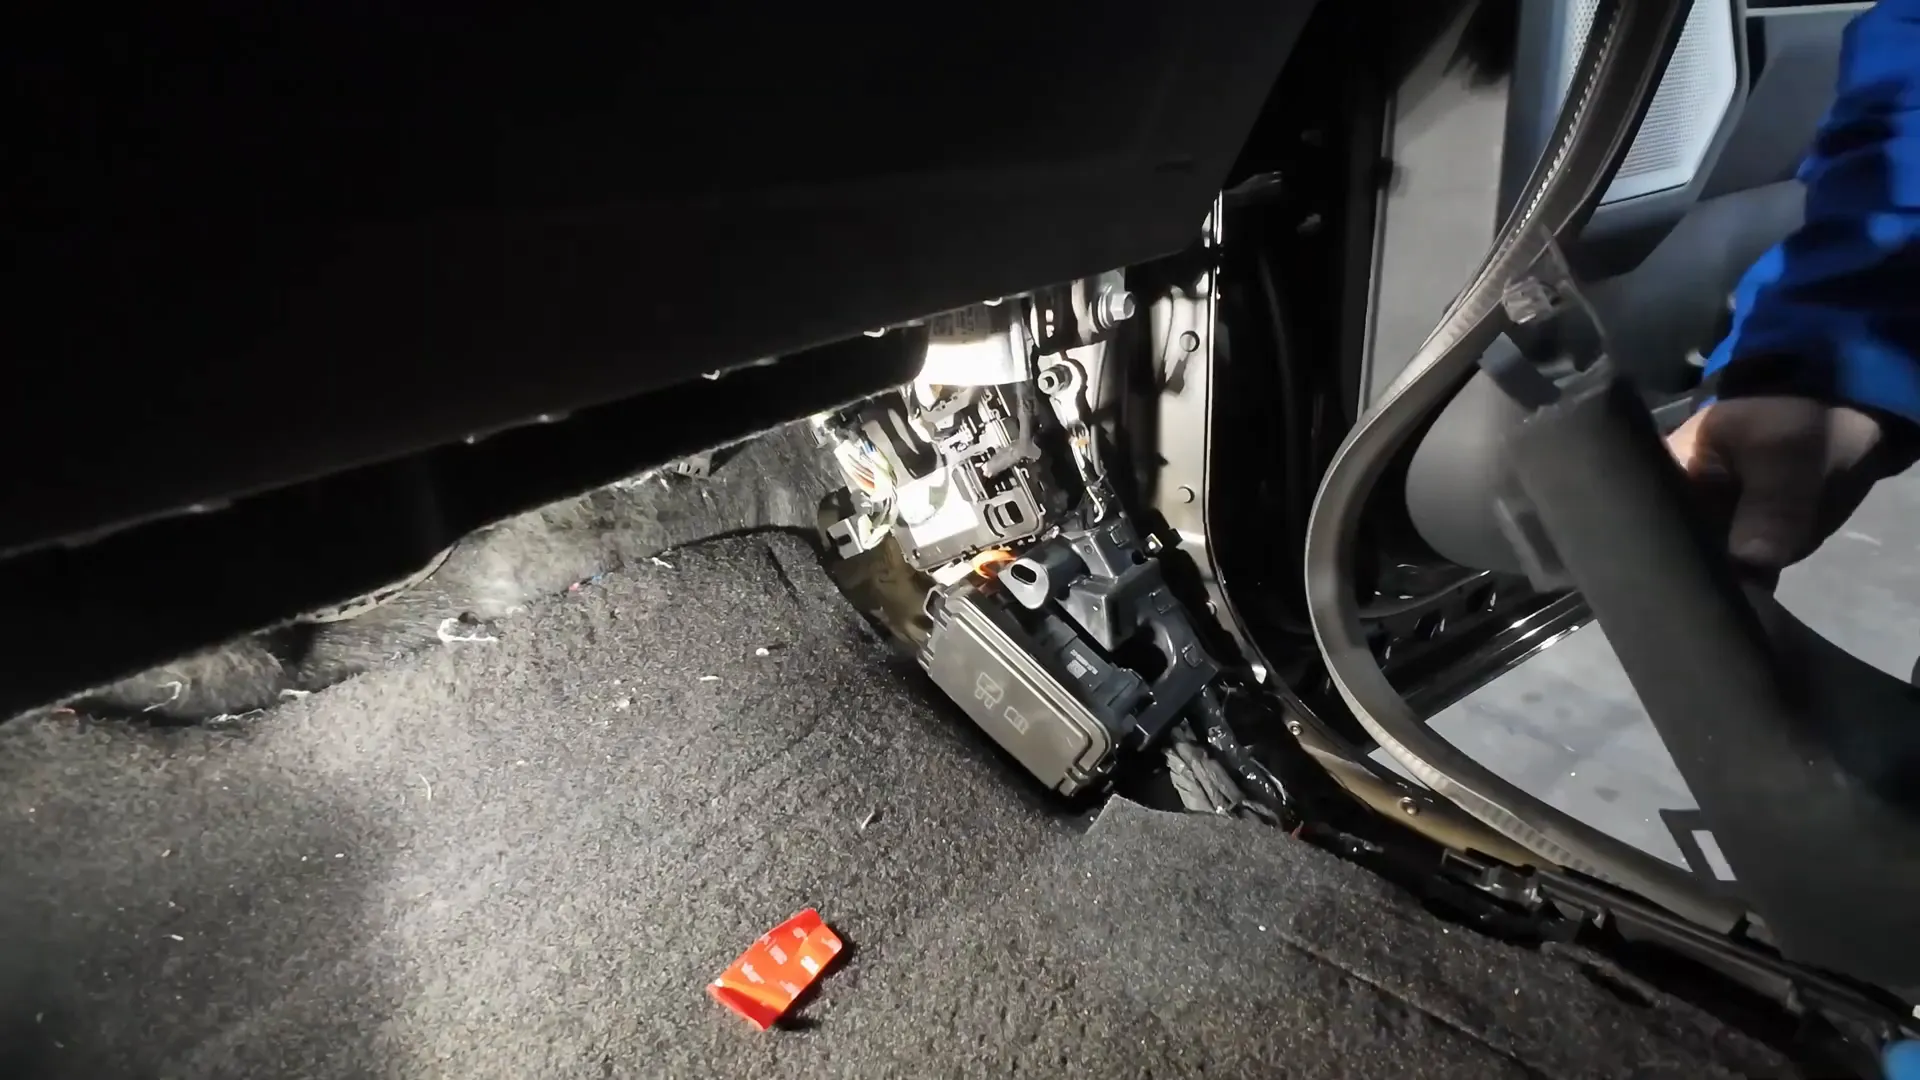
Step 6: Accessing the Fuse Box
To connect the dash cam to power, you will need to access the fuse box located on the passenger side. Use a panel popper tool to remove the sill plate and then the cover exposing the fuse box. Note that in the 2024 model, the fuse box is sealed, making it impossible to use fuse taps.
Step 7: Wiring the Dash Cam
For models from 2015 to 2023, you can use fuse taps. Pin 36 is typically the ignition switched power, while pins 29 and 31 serve as constant power. If you're working with a 2024 model, you will need to connect directly to the constant power wire found in the fuse box.
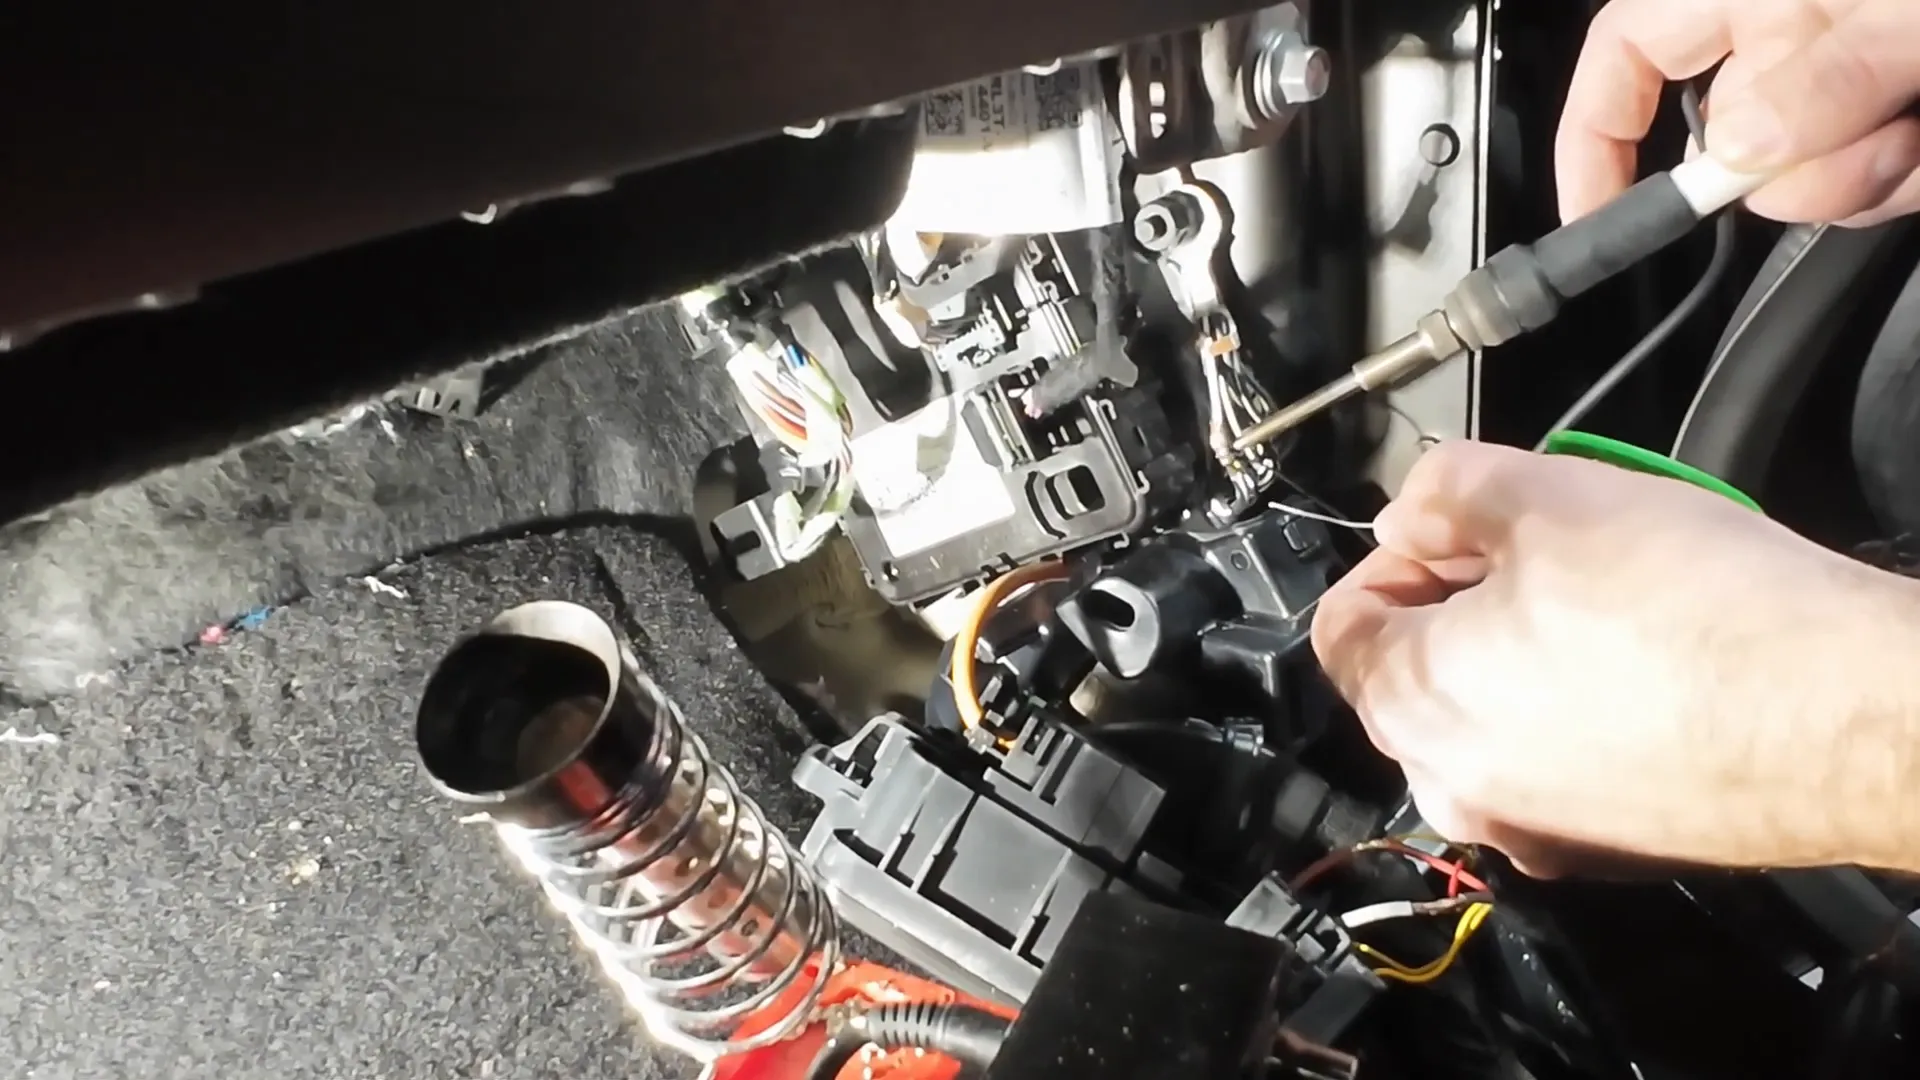
Step 8: Soldering Connections
After stripping the wires, connect the black view hardwire cable to the appropriate power wires. It's crucial to solder the connections for a solid and reliable setup. Use 3M electrical tape to wrap and protect the connections.
Step 9: Reassembly
Once the wiring is complete, reassemble the kick panel and ensure that all components are securely in place. Make sure to hide any exposed wiring to maintain a clean interior.
Step 10: Finalizing the Installation
Before mounting the dash cam, clean the windshield behind the rearview mirror again. This ensures that the camera adheres properly. Once mounted, you can enjoy the peace of mind that comes with having a dash cam installed in your Ford F-150.
Conclusion
Installing a dash cam in your Ford F-150 is a straightforward process that enhances your vehicle's safety. By following these steps and using the right tools, you can ensure a professional installation that looks clean and functions perfectly. For those who prefer a hassle-free experience, consider professional installation services available in your area.
If you're looking for high-quality dash cams, check out our selection at Safe Drive Solutions. We offer a variety of models suitable for different needs.
For installation services in Vancouver and Toronto, visit Dash Cam Installation for more information.

