Connecting the IROAD Powerpack Pro 12 to Your Dash Cam
When it comes to powering your dash cam, the IROAD Powerpack Pro 12 is a popular choice. Many users are curious about how to properly connect this battery pack to their vehicles and dash cameras. This guide will break down the process step by step, ensuring you have all the information you need for a successful installation.
Unboxing the IROAD Powerpack Pro 12
Inside the box, you'll find the IROAD Powerpack Pro 12 along with a user guide. The device features several important inputs and outputs that are essential for connecting to your dash camera and vehicle.
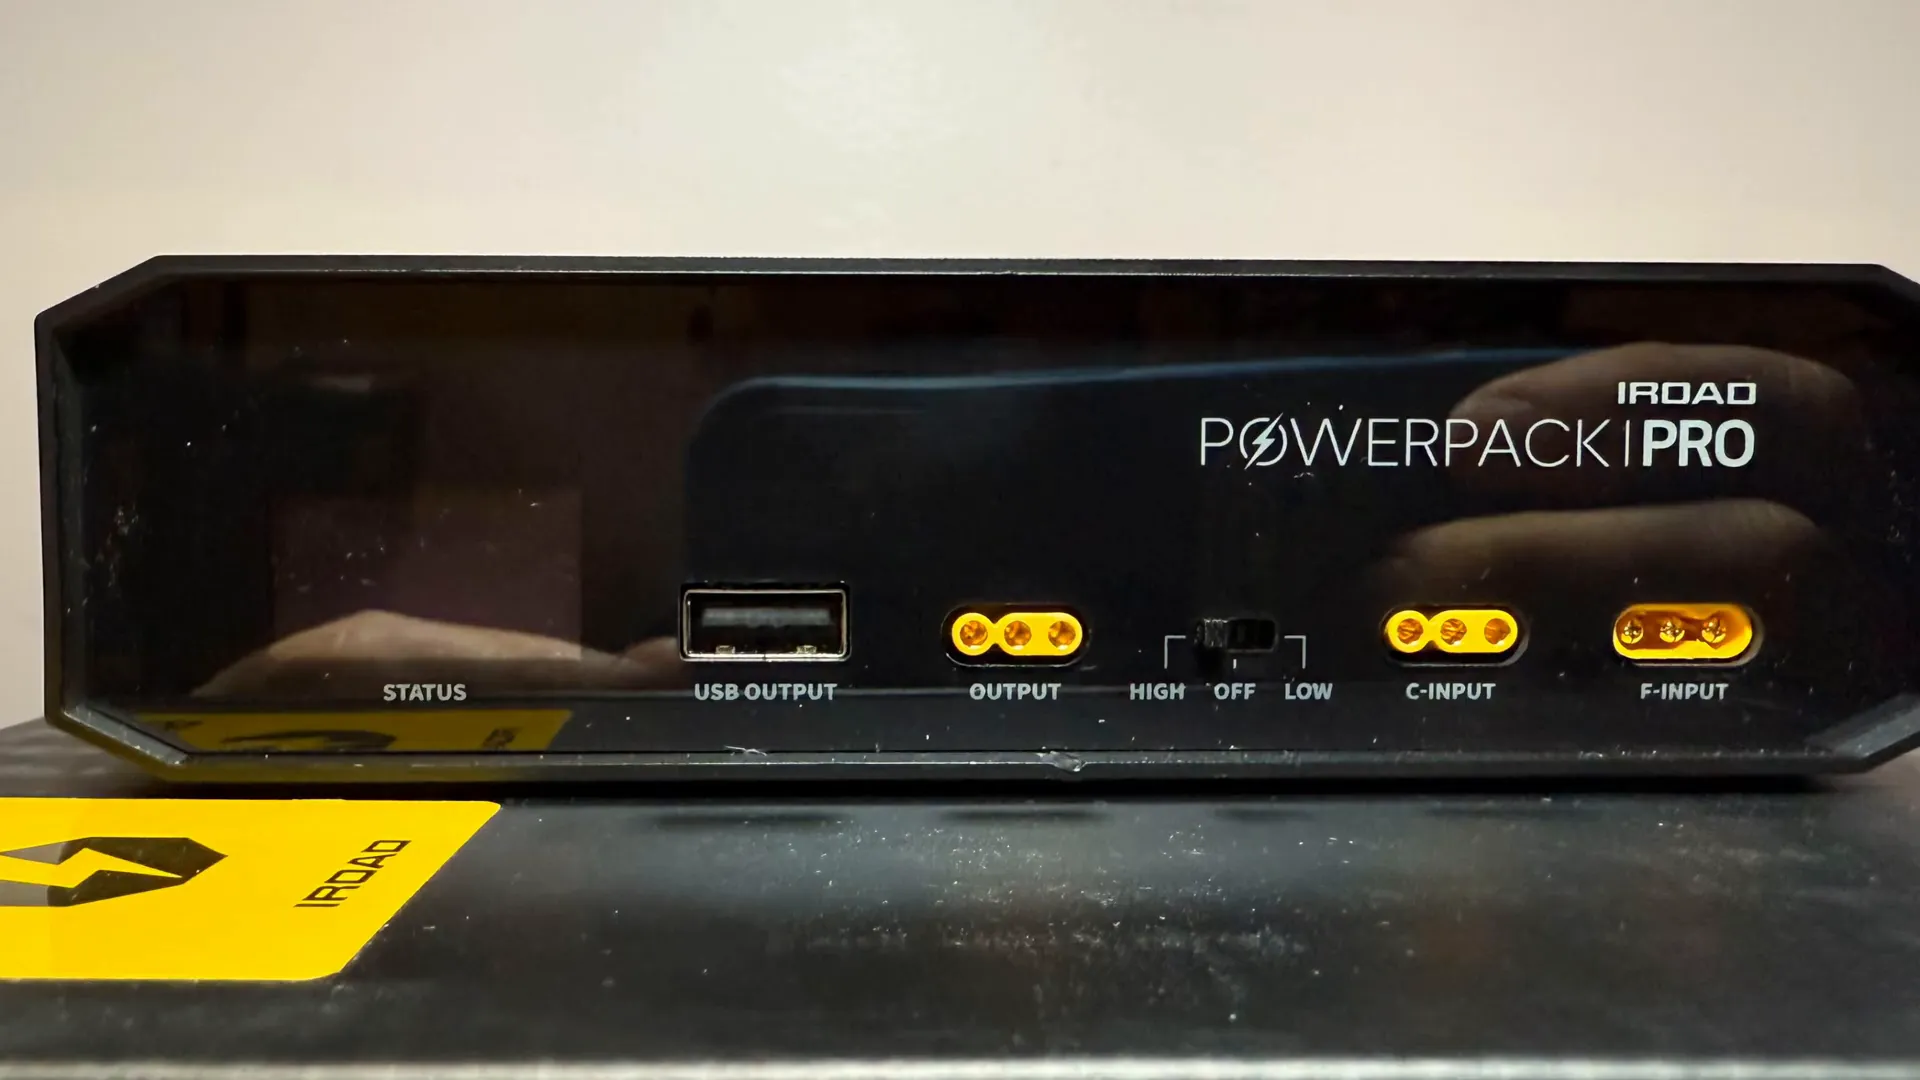
Here’s a quick overview of what you’ll find:
- Output for dash camera connection
- High/Low/Off switch
- Cigarette input for optional adapter
- Hard wiring input (F input)
- USB output for additional devices
Understanding the Inputs and Outputs
The IROAD Powerpack Pro 12 has multiple inputs and outputs designed to facilitate easy connections. Let's break down what each of these does:
Output for Dash Camera
This output connects directly to your dash camera and is crucial for its operation.
Cigarette Input
If you opt for the optional cigarette lighter adapter, this input allows you to plug the device directly into your vehicle's cigarette lighter jack, eliminating the need for hard wiring.
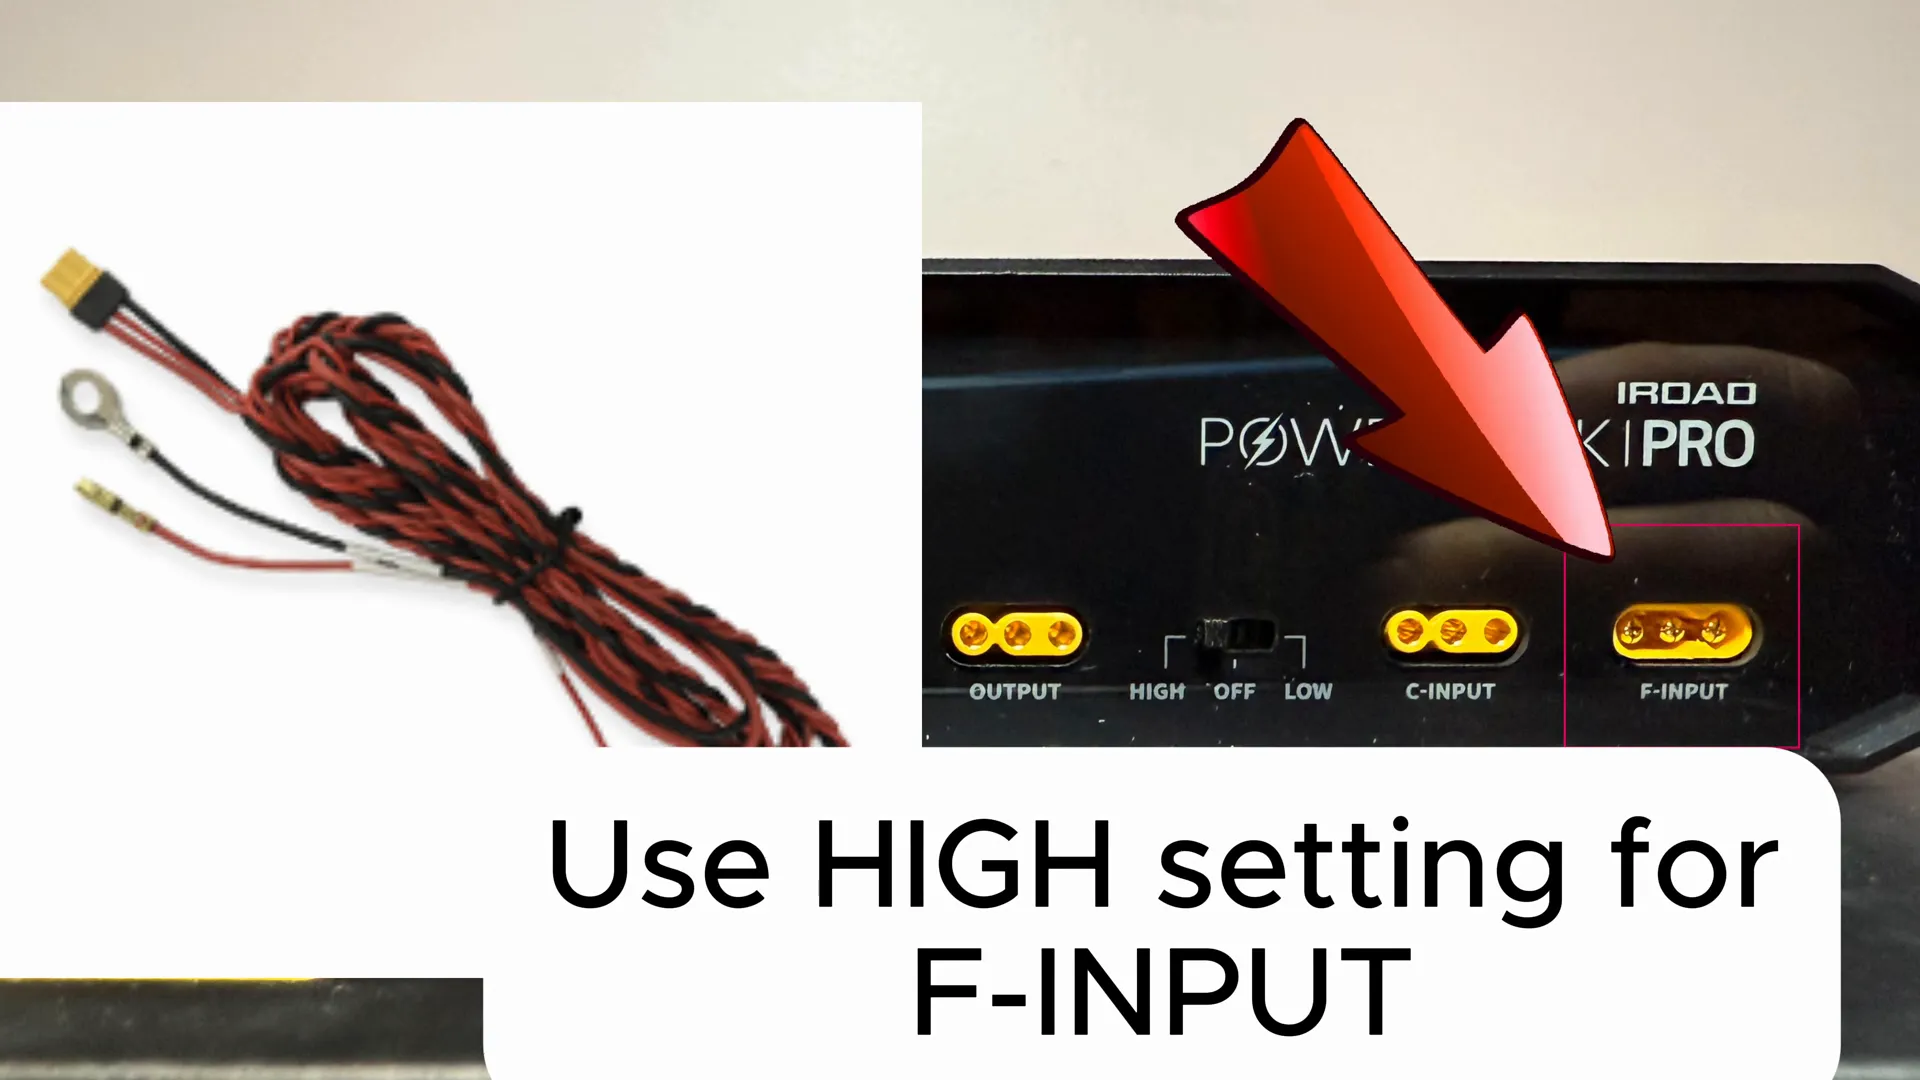
Hard Wiring Input (F Input)
This input is used for hard wiring, which requires connection to your vehicle's power, ground, and ignition systems. It’s the preferred method for those who want a permanent installation.
USB Output
This output can be used to power additional devices, such as a cellular modem for cloud-enabled dash cameras.
Wiring the IROAD Powerpack Pro 12
Now that you understand the inputs and outputs, let’s go over the wiring process. This is crucial to ensure your dash cam operates efficiently.
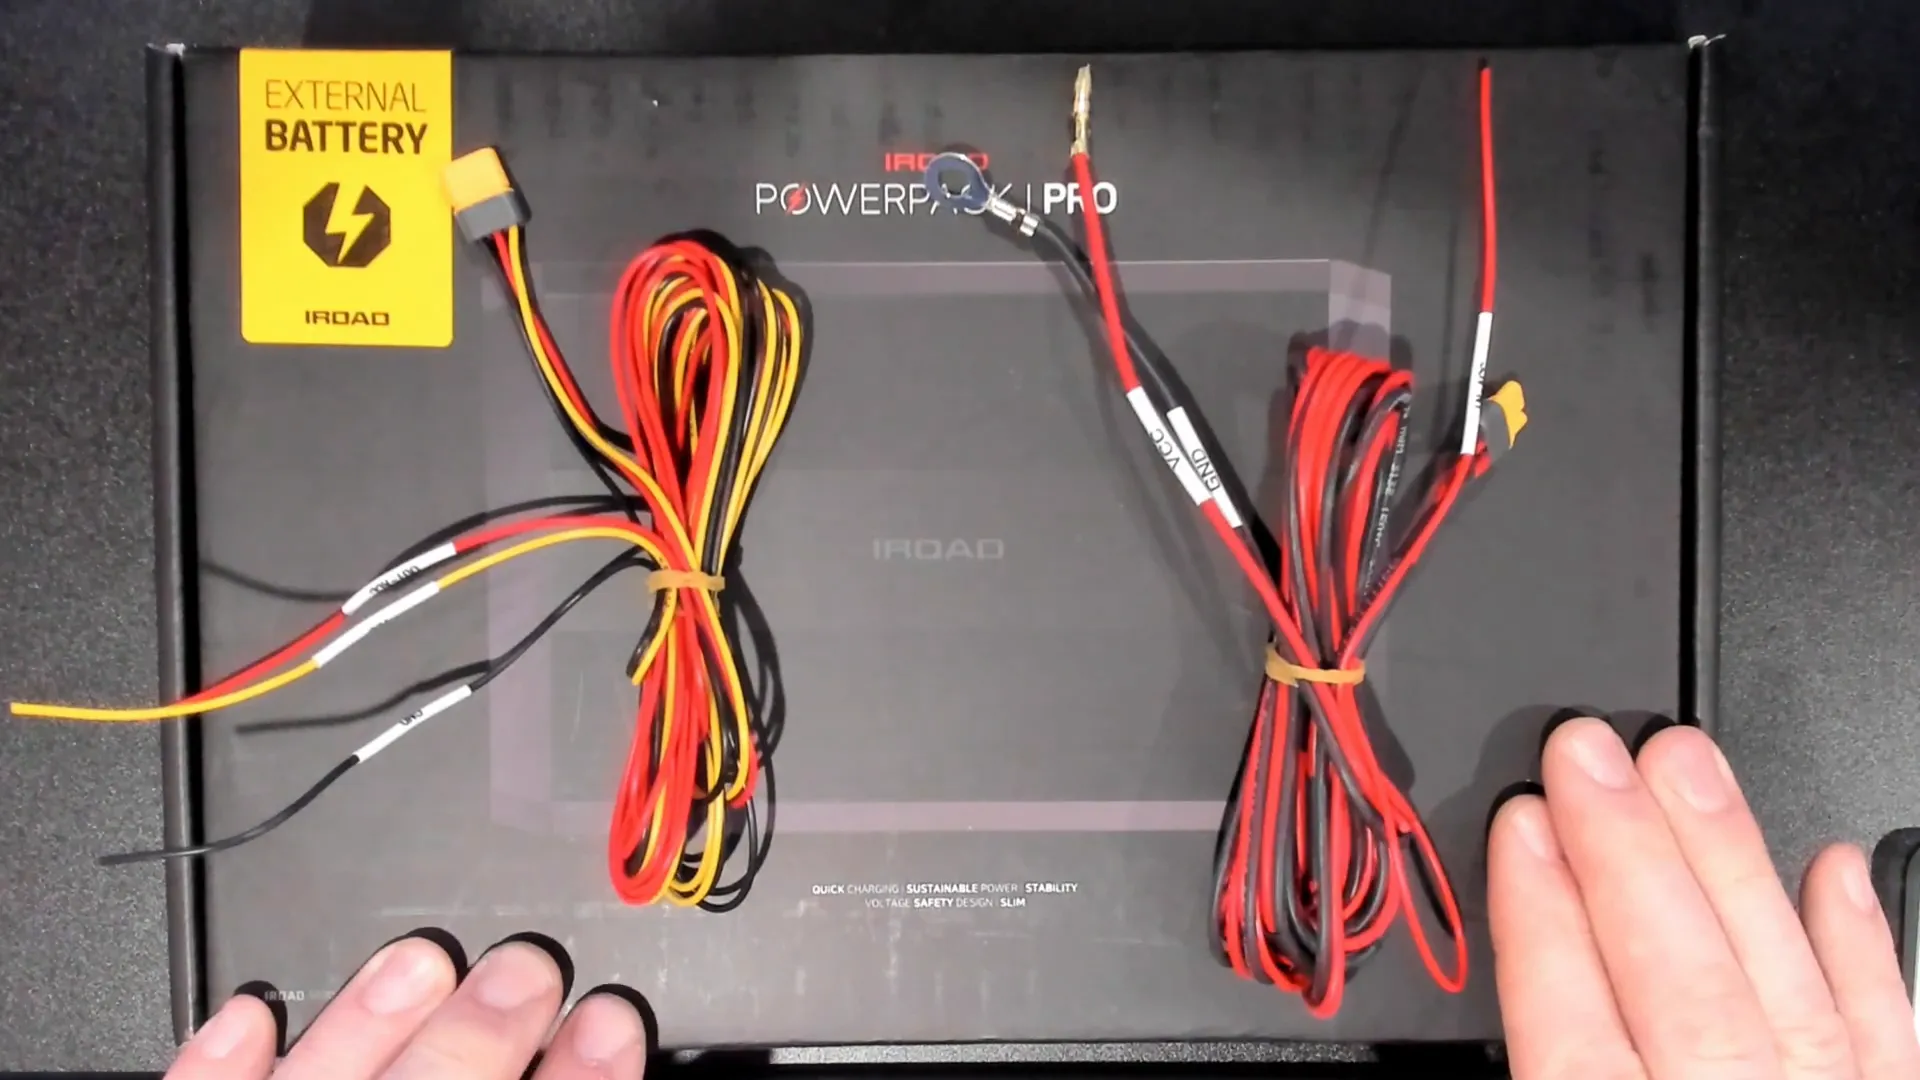
Input Harness
The input harness is essential for hard wiring your Powerpack to the vehicle. Here’s a breakdown of the wires:
- VCC (Constant Power): This wire connects to a power source that is always on.
- Accessory: This low current wire monitors the ignition state to charge the battery pack.
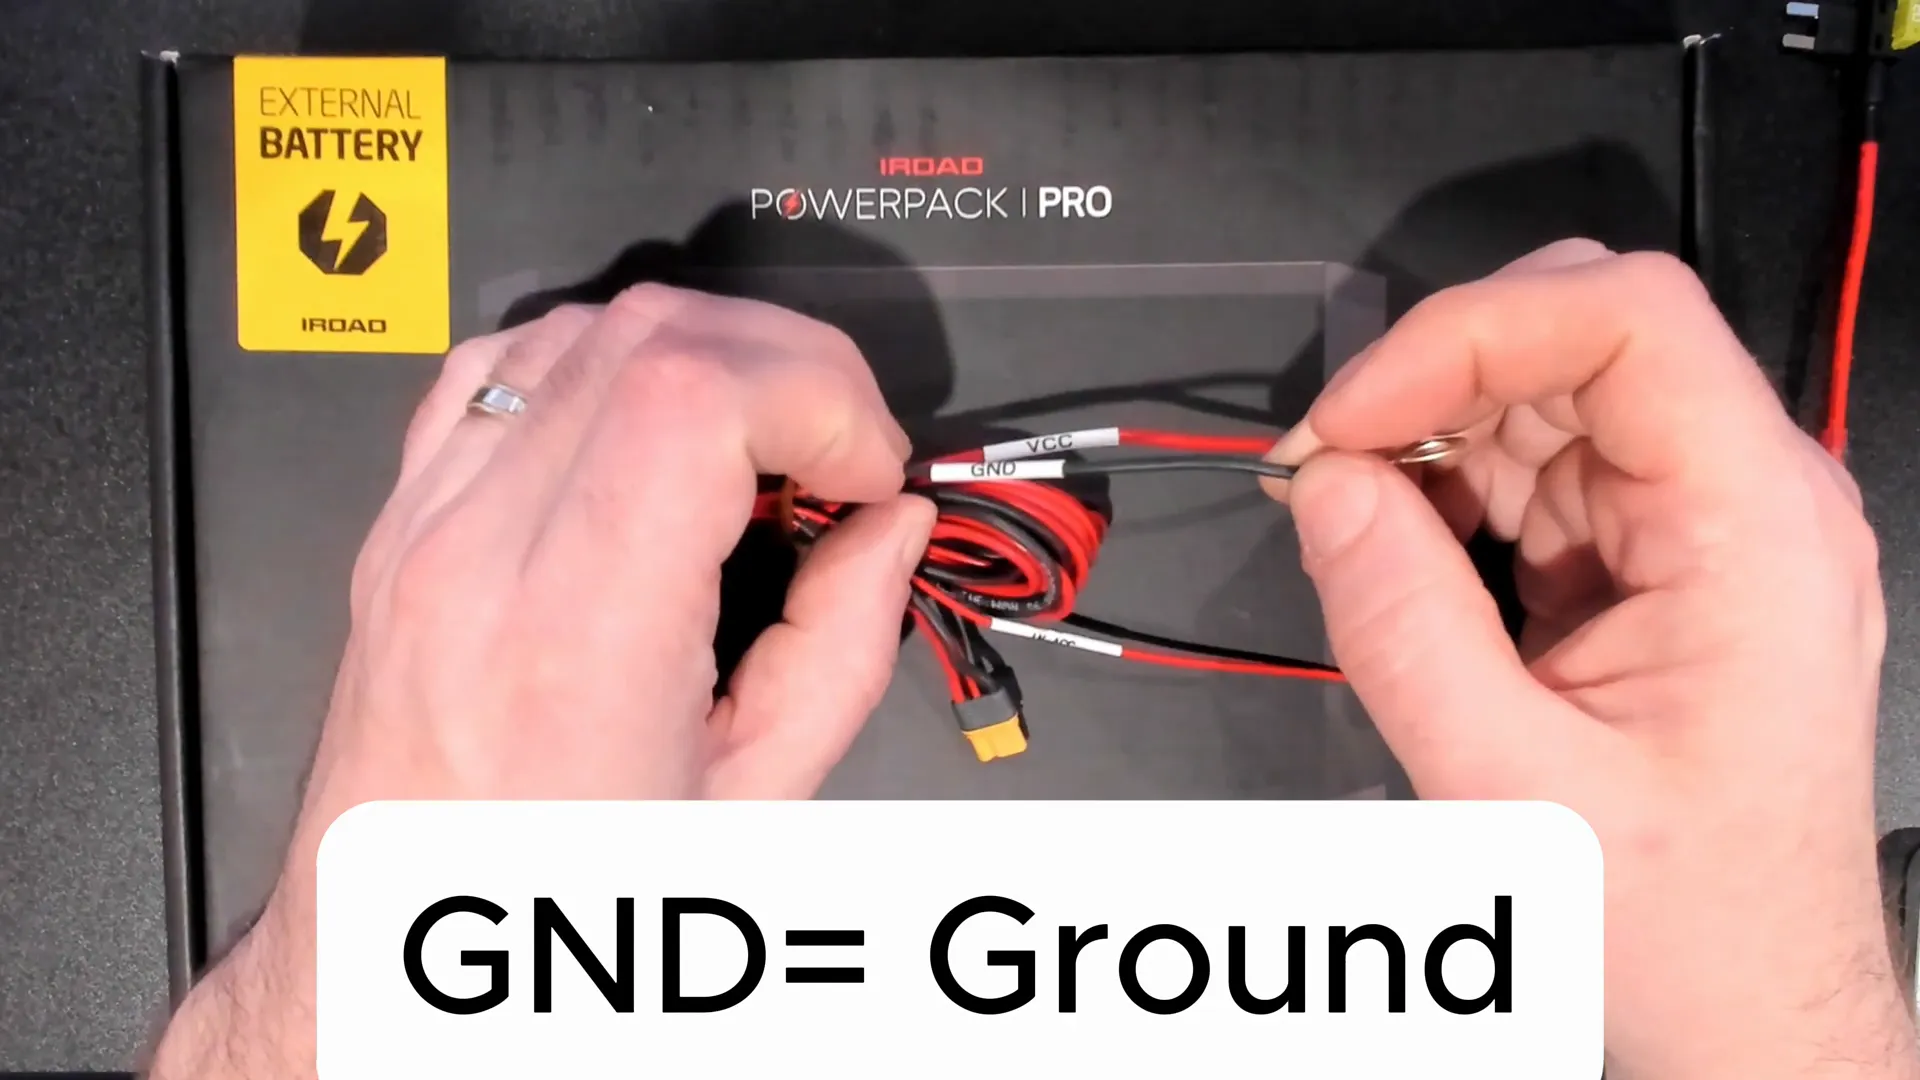
- Ground: This connects to a metal part of your vehicle for a solid ground connection.
Connecting the Input Harness
To connect the input harness, you can use a fuse tap to connect to the fuse box. This is where the current will be drawn. Alternatively, if you are comfortable with soldering, you can connect the wire directly to a high current wire in the vehicle.
For the accessory wire, it’s important to connect it properly to ensure the battery pack charges correctly while the vehicle is on. A low current fuse tap (2-5 amp) is recommended for this connection.
Ground Connection
When connecting the ground wire, find a factory bolt or ground point in your vehicle. It’s essential to ensure a clean connection, so you may need to remove paint from the surface for a solid connection.
Output Harness to Dash Camera
Next, let’s discuss how to connect the output harness to your dash camera. This part is crucial for ensuring your camera gets the power it needs.
Wiring Connections
Typically, the wiring follows a consistent color code:
- Black: Ground
- Yellow: Constant Power (VCC)
- Red: Accessory or Ignition Power
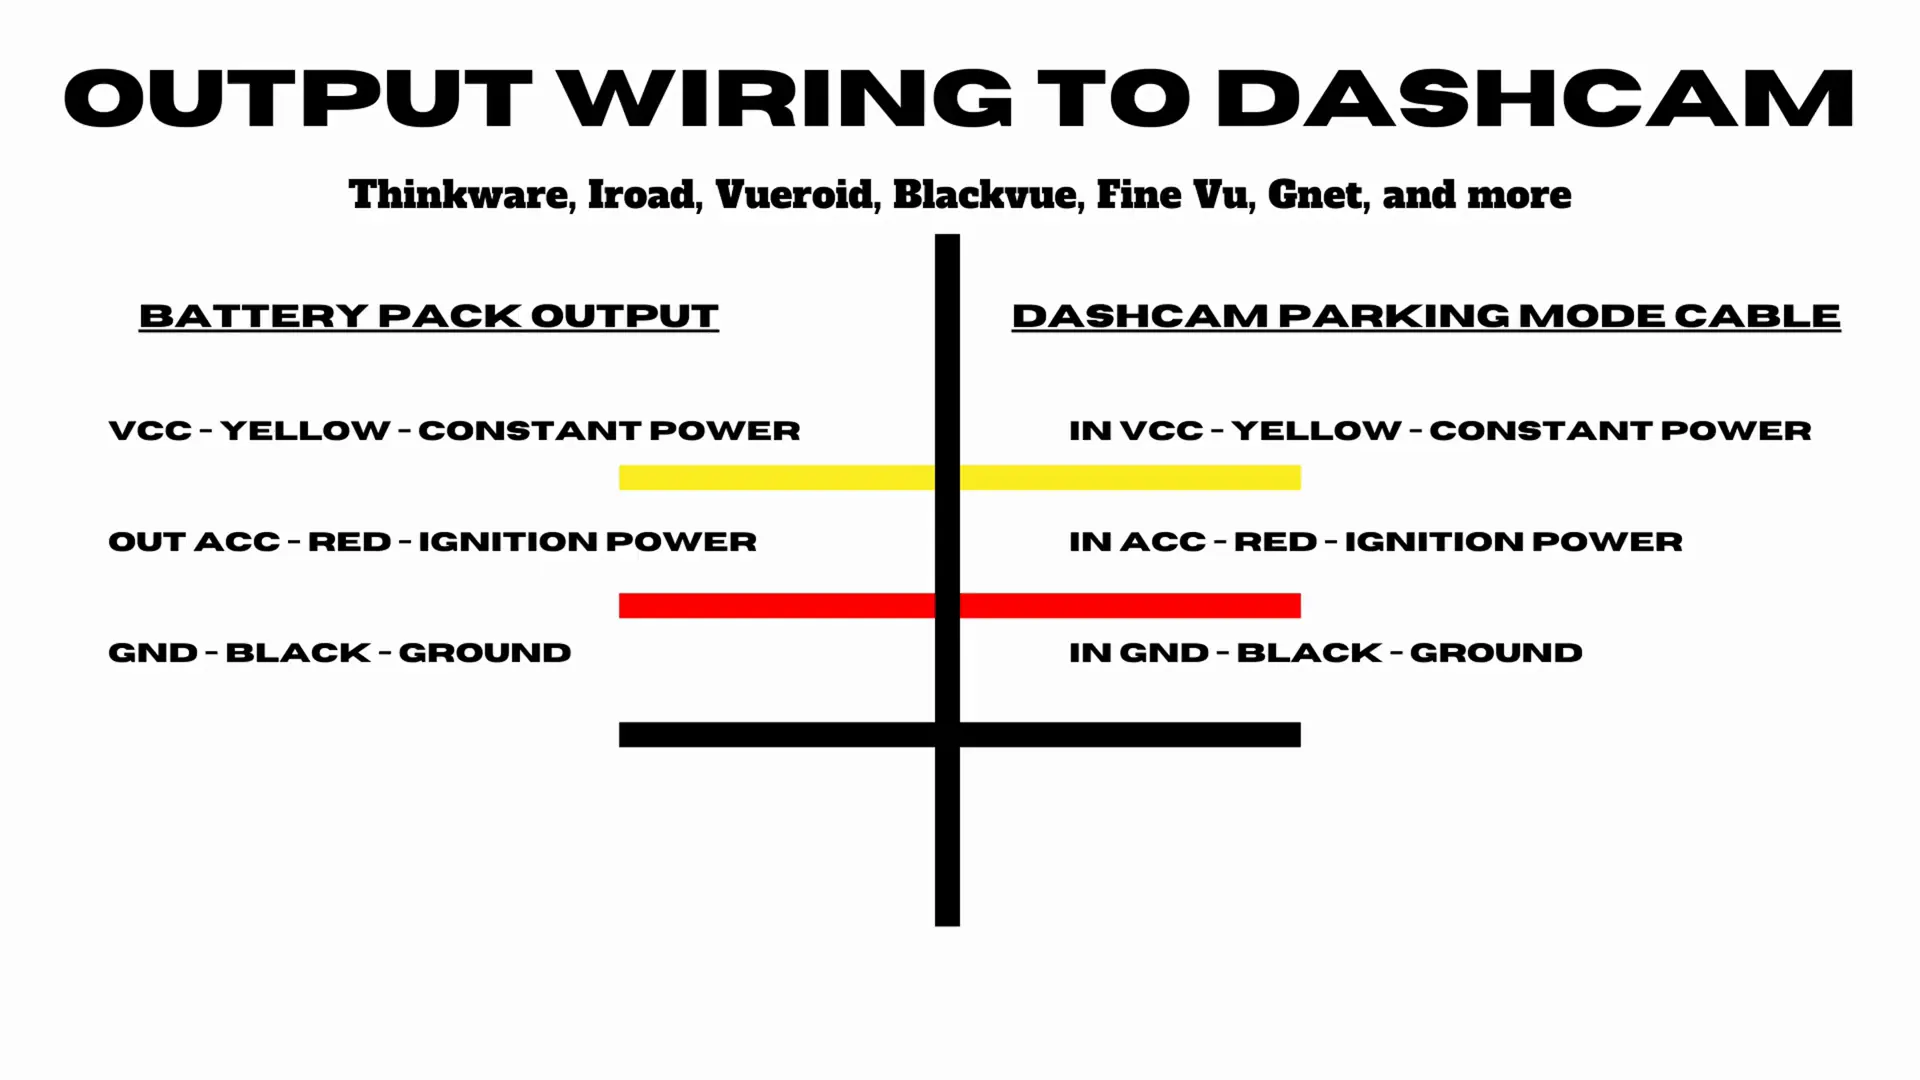
For many dash cameras, including Korean brands like Thinkware and Viofo:
- Black goes to Black (Ground)
- Red goes to Red (Ignition)
- Yellow goes to Yellow (Constant Power)
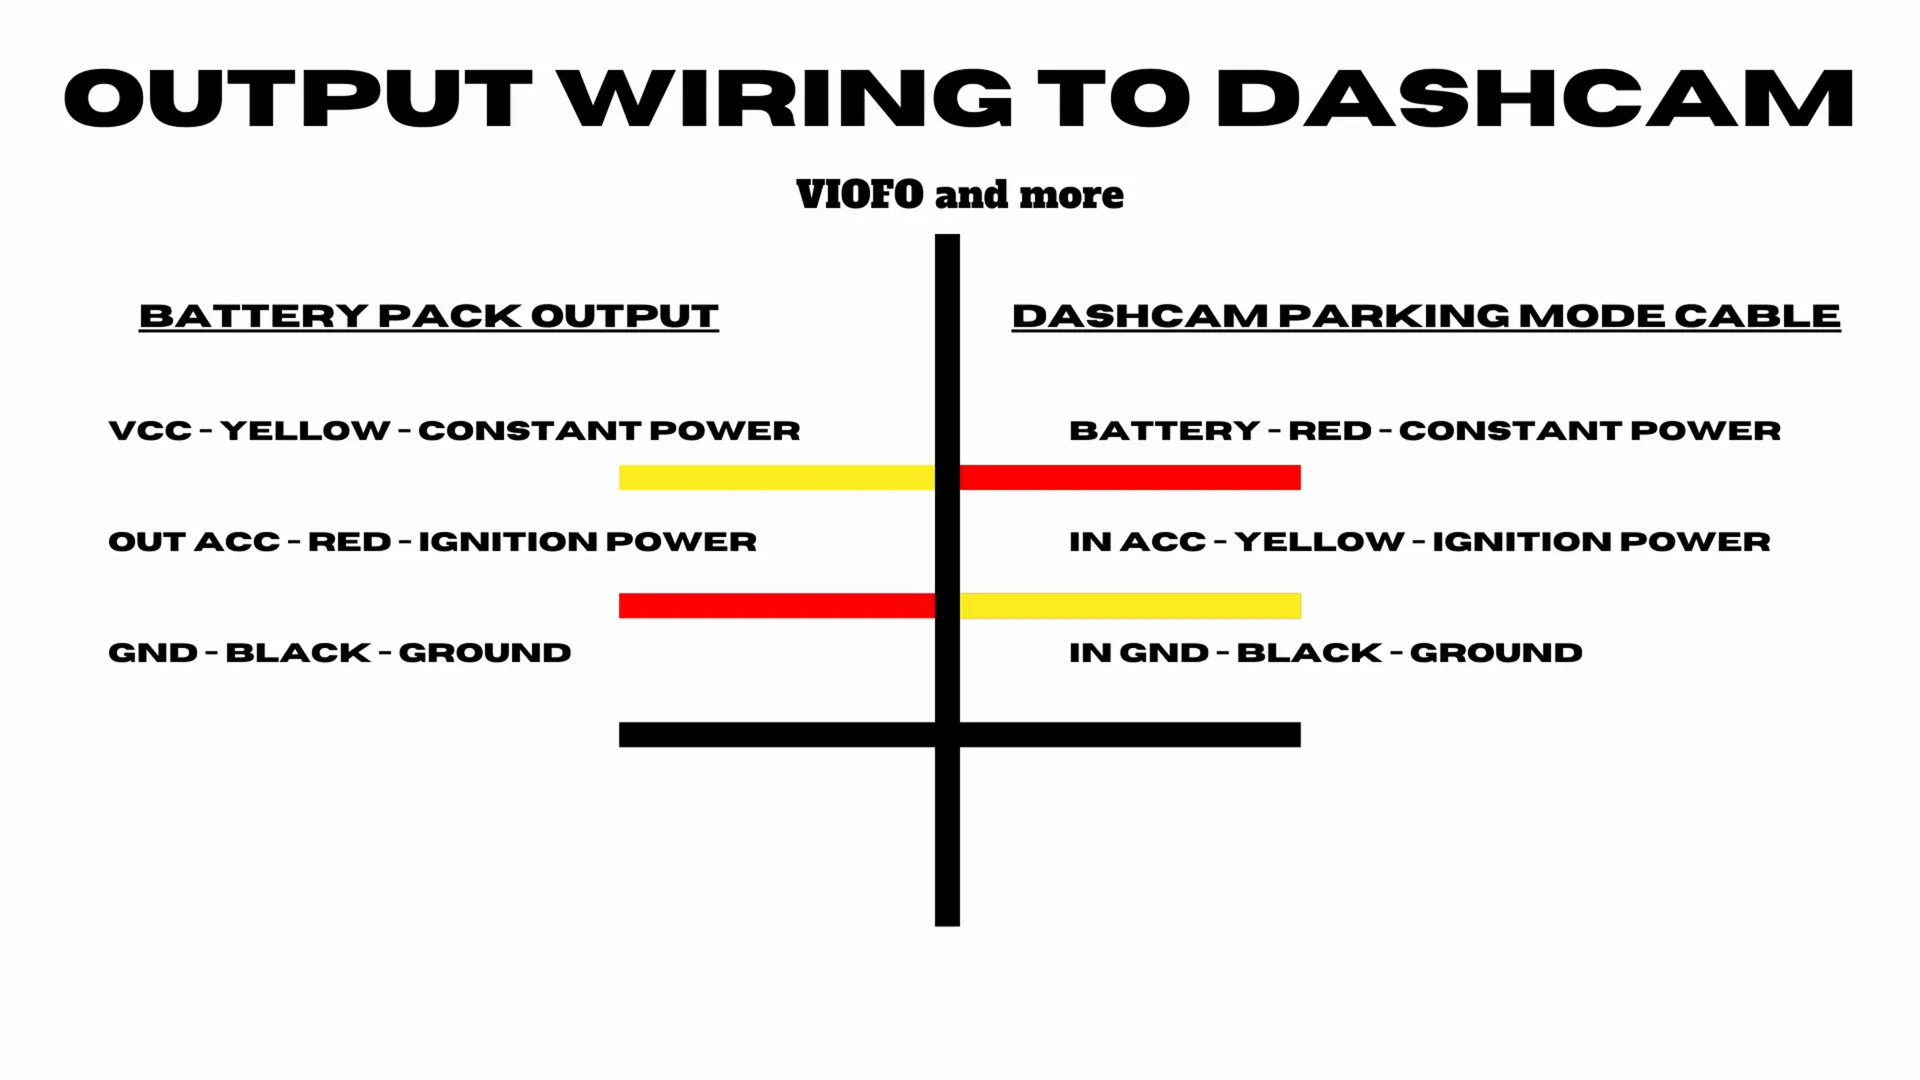
However, for Viofo models, you’ll need to connect the red wire to the yellow input instead. This is a common mistake, so be sure to double-check your connections!
Common Mistakes to Avoid
When connecting your IROAD Powerpack Pro 12, it’s easy to make some common mistakes. Here’s what to watch out for:
- Connecting red to red on Viofo cameras instead of red to yellow.
- Forgetting to ground the device properly.
- Not using the correct fuse ratings for the connections.
Always read your dash camera’s manual for specific wiring instructions. If you’re unsure, feel free to reach out to our support team for assistance.
Professional Installation Services
If you’re not comfortable with the installation process, we offer professional dash camera installation services in Greater Vancouver and Greater Toronto areas. Our team can ensure that everything is wired correctly for optimal performance.
Check out our Dash Cam Installation Service to learn more.
Conclusion
Understanding how to connect the IROAD Powerpack Pro 12 to your dash camera is essential for ensuring your device functions properly. By following this guide, you can confidently wire your battery pack and enjoy the benefits of having a reliable dash cam.
If you have any questions or need further assistance, feel free to contact us or leave a comment below. Don’t forget to like and subscribe to our channel for more helpful tips!

